


Wood fillers are essential for repairing and restoring wooden furniture and surfaces. While there are many commercial wood fillers available in the market, making your own trowelable wood filler can be a cost-effective and convenient option. Trowelable wood filler is a thick paste-like substance that can be easily applied with a trowel or putty knife.
Materials Needed:
- Wood dust or sawdust
- Wood glue
- Measuring cup
- Mixing bowl
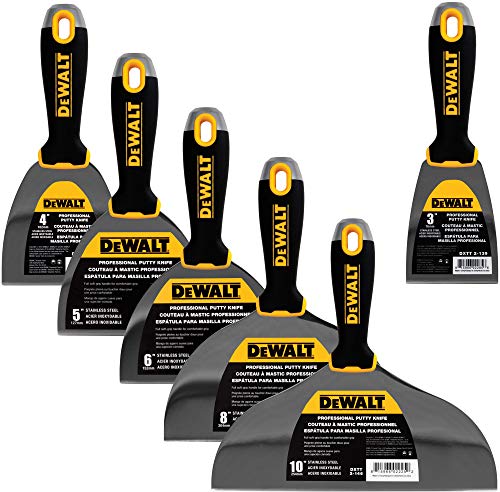
- Putty knife or trowel
Step 1: Collect Wood Dust or Sawdust
Start by collecting a sufficient amount of wood dust or sawdust from the type of wood that matches the piece you want to repair. You can achieve this by sanding or sawing a small piece of the same type of wood. Ensure that the wood dust or sawdust is fine and without any large particles.
Step 2: Mix the Wood Dust with Wood Glue
In a mixing bowl, combine the collected wood dust or sawdust with an equal amount of wood glue. Use a measuring cup for accurate measurements. Stir the mixture thoroughly until it forms a thick and consistent paste. Adjust the amount of wood glue as needed to achieve the desired consistency.
Step 3: Apply the Trowelable Wood Filler
Using a putty knife or trowel, apply the trowelable wood filler to the damaged or uneven area. Press the filler firmly into the wood surface, ensuring that it fills all the cracks and gaps. Smooth out the surface with the putty knife or trowel to create an even finish.
Step 4: Let it Dry and Sand
Allow the trowelable wood filler to dry completely according to the manufacturer’s instructions. Once dry, use sandpaper to smooth out the surface and remove any excess filler. Sand in a circular motion until the repaired area blends seamlessly with the surrounding wood.
Note: It’s important to test the trowelable wood filler on a small, inconspicuous area before applying it to the larger damaged area. This will ensure that the color and consistency match the original wood.
By following these simple steps, you can create your own trowelable wood filler and effectively repair damaged wooden surfaces. This DIY solution not only saves money but also allows for customization as you can adjust the color and consistency of the filler to match the wood you are working with. So, roll up your sleeves, gather your materials, and get ready to restore your wooden furniture to its former glory!
What is Trowelable Wood Filler?
Trowelable wood filler is a type of wood filler that is designed to be spread and applied using a trowel. It is a thick paste-like substance that can be used to fill large holes, cracks, and imperfections in wood surfaces. This type of wood filler is typically made from a combination of wood fibers, binders, and solvents, and it is specifically formulated to be easy to apply and manipulate with a trowel.
Trowelable wood filler is commonly used in woodworking projects where a significant amount of wood repair and restoration is required. It has a number of advantages over other types of wood fillers, such as its ability to adhere to the wood surface and provide a strong and durable repair. It is also easy to sand and paint over, making it a popular choice for both professional woodworkers and DIY enthusiasts who are looking to restore or repair damaged wood surfaces.
One key advantage of trowelable wood filler is its ability to be applied in thick layers, allowing for larger holes or depressions to be filled in a single application. This can save time and effort compared to using multiple layers of a thinner wood filler. Additionally, trowelable wood filler is often available in a range of colors to match different wood tones, making it easier to achieve a seamless repair.
It is important to note that trowelable wood filler is not meant to be used as a wood adhesive or structural repair material. It is primarily designed for cosmetic purposes and should not be relied upon to provide structural support or reinforcement to damaged wood.
Benefits of Trowelable Wood Filler
Trowelable wood filler is a versatile product that offers numerous benefits for woodworking projects. Whether you are a professional woodworker or a DIY enthusiast, using trowelable wood filler can greatly enhance the quality and durability of your work. Here are some of the key benefits of using this type of wood filler:
- Durable Repair: Trowelable wood filler is designed to provide a long-lasting repair solution for damaged wood. It fills in cracks, holes, and other imperfections, creating a smooth and solid surface that can withstand daily use and harsh conditions.
- Easy Application: Unlike other types of wood filler, trowelable wood filler is easy to apply. It has a thick, paste-like consistency that can be easily spread and shaped with a putty knife or trowel. This makes it ideal for filling large areas or repairing extensive damage.
- Excellent Adhesion: Trowelable wood filler has exceptional adhesion properties, allowing it to bond effectively with the wood surface. Once applied, it adheres firmly, preventing any future cracking or crumbling.
- Sanding and Finishing: Trowelable wood filler can be sanded and finished just like wood, allowing you to achieve a seamless and professional-looking repair. You can easily sand it down to a smooth surface and apply paint, stain, or varnish to match the surrounding wood.
- Versatile Use: Trowelable wood filler is suitable for various woodworking projects, including furniture repairs, cabinetry, flooring, and trim work. It can be used on both interior and exterior applications, making it a versatile choice for all types of woodwork.
- Cost-effective: Using trowelable wood filler can save you money in the long run. By repairing and filling in damaged wood instead of replacing it, you can avoid the cost of purchasing new materials and minimize the need for extensive repairs in the future.
Overall, trowelable wood filler is a valuable tool for any woodworker or DIY enthusiast. Its durability, ease of application, excellent adhesion, and versatility make it an essential product for achieving professional results in woodworking projects.
Choosing the Right Wood for Filler
When it comes to making trowelable wood filler, choosing the right type of wood is crucial. Not all types of wood are suitable for creating a durable and long-lasting filler. Here are some factors to consider when selecting the wood:
Type of Wood
The type of wood you choose will depend on the specific application and the type of wood you are filling. It is important to select a wood species that closely matches the color and grain of the surrounding wood. This will help the filler blend in seamlessly and make the repair less noticeable.
Density and Hardness
The density and hardness of the wood will influence the strength and durability of the filler. It is advisable to choose a wood species that is similar in density and hardness to the wood being repaired. This will ensure that the filler is a good match in terms of strength and durability.
Availability and Cost
Consider the availability and cost of the wood species you are considering for filler. Some exotic or rare wood species may be expensive or difficult to source. It is important to choose a wood species that is readily available and cost-effective for the specific repair job.
Overall, selecting the right wood for filler is essential for achieving a seamless and long-lasting repair. Take into account the type of wood, its density and hardness, as well as the availability and cost when making your decision. With the right wood and proper application techniques, you can create a trowelable wood filler that will beautifully restore your woodwork.
Step-by-Step Guide to Making Trowelable Wood Filler
Making your own trowelable wood filler is a cost-effective and easy way to repair and fill in gaps or holes in wooden surfaces. With just a few basic ingredients and some simple steps, you can create a durable and easy-to-use filler that blends seamlessly with your woodwork. Follow this step-by-step guide to make your own trowelable wood filler.
Step 1: Gather the materials
Before you start making your wood filler, gather all the necessary materials. You will need:
- – Sawdust from the same type of wood you are repairing
- – Wood glue
- – A mixing container
- – A mixing tool (such as a putty knife)
- – Sandpaper
Step 2: Collect sawdust
Collect an ample amount of sawdust from the same type of wood that you are repairing. You can use a saw or sandpaper to create sawdust. Make sure the sawdust is fine and does not contain any large particles.
Step 3: Mix wood glue and sawdust
In the mixing container, combine the collected sawdust with wood glue. The ratio should be approximately one part glue to two parts sawdust. Use the mixing tool to thoroughly mix the two ingredients until you achieve a thick and consistent paste. Adjust the ratio of glue and sawdust as needed to achieve the desired consistency.
Step 4: Apply the filler
Using a putty knife or similar tool, apply the trowelable wood filler to the damaged area. Press the filler firmly into the gap or hole to ensure a strong bond. Smooth out the surface of the filler with the putty knife, making it level with the surrounding wood. If the filler starts to dry before you have finished applying it, dampen the putty knife slightly to prevent sticking.
Step 5: Let it dry
Allow the wood filler to dry completely before proceeding. The drying time will depend on the type of wood glue used, so refer to the manufacturer’s instructions for guidance. Once the filler is dry, sand it down with sandpaper to achieve a smooth and even finish.
Step 6: Finish the repair
After sanding, you can proceed to finish the repair with paint, stain, or varnish, depending on your desired outcome. Apply the appropriate finish to match the surrounding woodwork and let it dry according to the product instructions.
Congratulations! You have successfully made your own trowelable wood filler and repaired the damaged wooden surface. This cost-effective and simple method offers a convenient way to fix imperfections in your woodwork and restore its appearance and functionality.
Tips for Applying Trowelable Wood Filler
When it comes to using trowelable wood filler, there are a few key tips to keep in mind to ensure a successful application and optimal results.
1. Clean and prepare the surface: Before applying the wood filler, it is important to clean the surface thoroughly and remove any dust, dirt, or debris. Use a clean cloth or brush to wipe away any loose particles. Additionally, sand the area lightly to create a smooth surface for the filler to adhere to.
2. Mix the filler properly: Follow the manufacturer’s instructions for mixing the trowelable wood filler. Typically, this involves combining the filler with a hardener or activator. Use a clean mixing tool, such as a putty knife, and ensure that the filler is mixed thoroughly and evenly.
3. Apply the filler in thin layers: It is best to apply the filler in thin layers rather than in one thick coat. This allows for better control and ensures that the filler dries evenly and cures properly. Use a trowel or putty knife to spread the filler evenly across the surface, filling in any cracks, holes, or imperfections.
| 4. Smooth and level the filler: | 5. Allow proper drying and curing time: |
|---|---|
| After applying the filler, use a trowel, putty knife, or sandpaper to smooth and level the surface. This will help create a seamless finish that blends in with the surrounding wood. Take your time and work carefully to achieve the desired result. | Be sure to allow the trowelable wood filler sufficient drying and curing time. This can vary depending on the product used and the environmental conditions. Refer to the manufacturer’s instructions for specific guidelines. Avoid rushing the drying process as this can result in an uneven finish. |
6. Sand the cured filler: Once the filler has fully dried and cured, use sandpaper to sand the surface. This will help smooth out any rough spots or uneven areas. Start with a coarser grit sandpaper and gradually work your way up to a finer grit for a polished and professional result.
7. Finish with a sealant or varnish: To protect the repaired area and ensure its longevity, consider applying a sealant or varnish over the trowelable wood filler. This will help prevent moisture penetration, further damage, and keep the repaired surface looking its best.
By following these tips for applying trowelable wood filler, you can achieve a seamless and durable finish that restores the appearance and functionality of your wood surfaces.
Curing and Finishing Trowelable Wood Filler
After applying trowelable wood filler to your wooden surface, it is important to properly cure and finish it to ensure a seamless and durable repair. Follow these steps to achieve the best results:
-
Curing Time: Allow the wood filler to dry and cure completely before moving on to the finishing step. The curing time will vary depending on the product you are using, so be sure to check the manufacturer’s instructions for the recommended drying time. Generally, it can take anywhere from a few hours to overnight for the wood filler to cure.
-
Sanding: Once the wood filler is fully cured, use sandpaper or a sanding block to smooth out any rough edges or uneven surfaces. Start with a coarse-grit sandpaper and gradually move to finer grits for a smoother finish.
-
Staining: If you want to match the color of the repaired area with the rest of the wood, you can apply a stain. Choose a stain that closely matches the wood tone and apply it using a brush or cloth. Allow the stain to penetrate the wood filler and wipe off any excess. Follow the stain manufacturer’s instructions for drying time.
-
Sealing: To protect the repaired area and ensure long-lasting results, apply a clear sealer or polyurethane over the wood filler. Use a brush or a foam applicator to evenly coat the surface. Allow the sealer to dry according to the manufacturer’s instructions before using or exposing the surface to moisture.
Following these steps will help you achieve a professional-looking finish and enhance the durability of your trowelable wood filler repair.