


When it comes to installing flooring, having the right tools is essential. One tool that is commonly used is a flooring trowel. This versatile tool is designed to help spread and level out flooring materials such as mortar, adhesive, or grout. Whether you’re a professional contractor or a DIY enthusiast, knowing how to use a flooring trowel correctly can make your flooring installation project much easier and more efficient.
Step 1: Choose the Right Trowel
Before you begin, it’s important to select the right trowel for the job. There are different types of flooring trowels available, each with its own purpose and design. For example, a notched trowel is commonly used for spreading adhesive, while a grout trowel is ideal for applying grout between tiles. Make sure to choose a trowel that is appropriate for the type of flooring material you are working with.
Step 2: Prepare the Surface
Next, you’ll need to prepare the surface where you will be applying the flooring material. This may involve cleaning the surface, removing any old flooring, or applying a primer. It’s essential to ensure that the surface is clean, dry, and free from any debris or contaminants that could affect the adhesion of the flooring material.
Step 3: Apply the Flooring Material
Once the surface is prepared, it’s time to apply the flooring material using the trowel. Start by scooping up a small amount of material onto the trowel with the flat edge. Then, hold the trowel at a slight angle and use the notched edge to spread the material evenly across the surface. Work in small sections, making sure to apply the material with enough pressure to ensure good adhesion.
Remember to follow the manufacturer’s instructions for mixing and applying the flooring material, as different products may have specific requirements.
Step 4: Level and Smooth the Material
After you have spread the flooring material, you’ll need to level and smooth it out using the trowel. Depending on the type of material you are working with, this may involve using the flat edge of the trowel to create a smooth surface or using the notched edge to create ridges for better adhesion. Take your time and work carefully to ensure that the material is evenly distributed and free from any lumps or bumps.
By following these steps and using your flooring trowel correctly, you can achieve professional-looking results when installing flooring. Remember to clean your trowel thoroughly after each use to prevent the material from hardening and affecting future projects. With practice, you’ll become more comfortable and efficient in using a flooring trowel, making your flooring installation projects go smoothly and effortlessly.
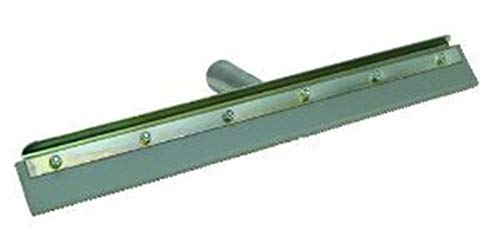
Choosing the right flooring trowel
When it comes to installing flooring, choosing the right trowel is essential. The trowel you use will determine how effectively you can spread the adhesive and ensure a proper bond between the flooring material and the subfloor. Here are some factors to consider when selecting a flooring trowel:
1. Flooring material: Different flooring materials require different types of trowels. For example, if you are installing vinyl or linoleum flooring, a V-notched trowel is recommended. On the other hand, if you are working with tiles, a square-notched trowel would be more appropriate.
2. Size of the trowel: The size of the trowel is determined by the size of the notches. Larger notches allow for more adhesive to be applied, which is necessary for thicker flooring materials or when working with uneven subfloors. Smaller notches are suitable for thinner materials or when working with a smooth subfloor.
3. Manufacturer’s recommendations: It’s always a good idea to consult the manufacturer’s recommendations for trowel selection. They often provide specific guidelines for the type and size of trowel to use with their flooring products.
4. Skill level: Consider your skill level and experience when choosing a trowel. If you are new to flooring installation, it’s recommended to use a trowel with larger notches as it allows for more forgiveness in spreading the adhesive.
5. Project size: The size of your project can also influence your trowel choice. For small projects, a handheld trowel can suffice. However, for larger projects, a trowel with a longer handle can help make the job easier and more efficient.
By considering these factors, you can choose the right flooring trowel for your specific needs, ensuring a successful installation and a durable flooring finish.
Types of flooring trowels
A flooring trowel is an essential tool when it comes to installing or repairing floors. It is used to spread mortar or adhesive evenly on the surface, ensuring a smooth and level finish. There are several types of flooring trowels available, each designed for specific tasks and materials. Let’s take a look at some of the common types:
1. Square-Notched Trowel
The square-notched trowel is a versatile tool commonly used for laying tile floors. It has a square-shaped blade with notches on all sides. The notches help create grooves in the mortar, allowing for better adhesion to the floor and preventing tile slippage. The size of the notches may vary depending on the size of the tiles being installed.
2. V-Notched Trowel
The V-notched trowel is similar to the square-notched trowel but has V-shaped notches instead. This type of trowel is commonly used for installing vinyl and linoleum flooring. The V-shaped notches provide better grip and adhesion for these types of materials.
It is important to choose the right size and shape of notches for your specific flooring project. This will help ensure proper adhesion and a professional-looking finish.
3. Rounded-Notched Trowel
The rounded-notched trowel is specifically designed for applying adhesive or mortar for carpet or other soft flooring materials. Its rounded notches create grooves that allow air to escape, preventing bubbles or wrinkles from forming under the carpet.
Remember to select a trowel size based on the size of the flooring material and the desired adhesive coverage. Using the wrong size trowel can result in improper adhesion and a less than satisfactory finish.
In conclusion, choosing the right type of flooring trowel is crucial for achieving a professional-looking and properly installed floor. Understanding the purpose and characteristics of each type will help you make the appropriate selection for your specific flooring project.
Preparing the surface
Before using a flooring trowel, it is important to properly prepare the surface. This step is crucial to ensure a smooth and even finish for your flooring project.
1. Clean the area: Start by thoroughly cleaning the surface where the flooring will be installed. Remove any dust, debris, or loose particles using a broom or vacuum cleaner.
2. Repair any damages: Inspect the surface for any cracks, holes, or uneven areas. Use a suitable filler or patching compound to repair these imperfections. Allow the filler to dry and sand it down to create a smooth surface.
3. Remove existing flooring: If there is old flooring in place, it needs to be removed before applying a new layer. Use appropriate tools such as a scraper or floor stripper to remove the existing flooring material completely.
4. Check for moisture: Moisture can adversely affect the adhesion of the flooring material. Use a moisture meter to check the moisture levels in the subfloor. If the moisture levels are high, take necessary steps such as installing a vapor barrier or using a moisture-resistant underlayment.
5. Level the subfloor: Use a leveling compound or self-leveling underlayment to ensure the subfloor is level and smooth. Follow the manufacturer’s instructions for application and drying time.
By thoroughly preparing the surface before using a flooring trowel, you can ensure a successful and long-lasting flooring installation.
Cleaning and leveling the floor
Before using a flooring trowel, it is essential to clean and level the floor properly. This ensures a smooth and even surface for the application of the flooring material.
1. Cleaning the floor
The first step is to remove any debris, dirt, or dust from the floor. Sweep the floor thoroughly using a broom or vacuum cleaner to ensure all loose particles are removed. Pay close attention to corners and hard-to-reach areas.
Next, damp mop the floor using a mild detergent or flooring cleaner. This will help remove any stains, spills, or sticky residue that may be present. Make sure to wring out the mop well to avoid excess water on the floor.
Allow the floor to dry completely before proceeding to the next step. This will prevent any moisture from interfering with the leveling process.
2. Leveling the floor
If there are any uneven spots or low areas on the floor, it is essential to level them before using a flooring trowel.
Use a self-leveling compound or floor patching compound to fill in the low areas and smooth out any imperfections. Follow the manufacturer’s instructions on the product for the best results.
Apply the compound using a trowel, spreading it evenly over the low spots. Use a leveling tool, such as a long straightedge or a level, to ensure the surface is flat and even. Allow the compound to dry according to the recommendations.
Once the floor is clean and level, it is ready for the application of the flooring material using a flooring trowel.
Applying the mortar
Before you begin applying the mortar, make sure your subfloor is clean, dry, and free from any debris. This will ensure a smooth and even application of the mortar.
Start by mixing the mortar according to the manufacturer’s instructions. Use a bucket and a mixing paddle to combine the mortar powder with water until you achieve a smooth, lump-free consistency.
Once your mortar is mixed, use a flooring trowel to scoop up a small amount of mortar from the bucket. Hold the trowel at a slight angle and use the notched edge to spread the mortar onto the subfloor.
For smaller areas, you can use a margin trowel to apply the mortar. This will give you better control and allow you to work in tight corners and edges.
Spread the mortar in a thin, even layer, making sure to cover the entire area of the subfloor. The notches in the trowel will help create ridges in the mortar, which will improve the adhesion of the flooring material.
Work your way across the subfloor, applying the mortar in small sections at a time. This will prevent the mortar from drying out before you have a chance to lay the flooring.
If you need to adjust the thickness of the mortar layer, you can use a trowel to smooth it out or add more mortar where needed. Just make sure to maintain an even thickness throughout the subfloor.
Once you have applied the mortar, allow it to cure according to the manufacturer’s instructions. This usually takes between 24 to 48 hours, depending on the type of mortar used.
Remember to clean your trowel and any other tools immediately after use to prevent the mortar from hardening and becoming difficult to remove.
Mixing and spreading the mortar
Before you can begin laying your flooring, you need to mix the mortar and spread it evenly on the surface. Follow these steps to ensure a smooth and sturdy finish:
Materials:
- Flooring Mortar
- Large bucket or mixing tray
- Mixing paddle or drill with a mixing attachment
- Water
- Measuring cup or scale
- Flooring trowel
Step 1: Prepare the mortar
Measure the appropriate amount of mortar according to the manufacturer’s instructions. In a large bucket or mixing tray, combine the mortar with the recommended amount of water. Use a mixing paddle or drill with a mixing attachment to blend the mixture thoroughly until it reaches a smooth and creamy consistency.
Step 2: Start spreading the mortar
Using the flooring trowel, scoop up a generous amount of the mixed mortar and begin spreading it onto the surface. Hold the trowel at a slight angle and apply firm pressure as you move the trowel back and forth. The goal is to create an even layer that is approximately 3/8-inch thick.
Step 3: Spread in small sections
Work in small sections to ensure that the mortar doesn’t dry out before you’re ready to lay the flooring. As you spread the mortar, periodically check the thickness and smoothness of the layer with the trowel. Adjust as needed to maintain an even surface.
Step 4: Comb the mortar
After spreading the mortar, use the notched edge of the flooring trowel to comb through the layer of mortar. This process helps create texture, which improves the adhesion of the flooring. Hold the trowel at a 45-degree angle and draw it towards you in one smooth motion.
Step 5: Clean up and wait
Once you have spread and combed the mortar, clean any excess from the trowel and mixing tools. Allow the freshly applied mortar to dry according to the manufacturer’s instructions. This typically takes several hours, but it can vary depending on the temperature and humidity of the room.
Note: It’s essential to work efficiently when mixing and spreading the mortar as it can dry quickly. Also, ensure that you mix only the amount of mortar you can use within the specified time frame to prevent wastage.
| Tip | Caution |
|---|---|
| Keep an eye on the working time of the mortar. If it starts to harden, discard it and mix a new batch. | Always wear protective gloves and goggles when working with mortar to avoid skin and eye irritation. |
| Clean tools immediately after use to prevent the mortar from hardening and becoming challenging to remove. | Ensure proper ventilation in the room to prevent the accumulation of fumes from the setting mortar. |


