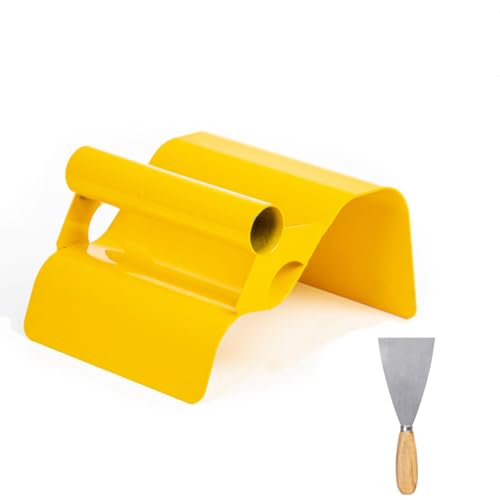
A gauging trowel is a handy tool that is commonly used by masons, plasterers, and tile setters. It is typically made of a flat, rectangular-shaped blade that is set into a handle, and it is designed for mixing and applying small amounts of mortar or plaster.
Before using a gauging trowel, it is important to familiarize yourself with its parts. The blade is the working part of the trowel and it is used to mix and spread the mortar or plaster. The handle is where you hold the trowel, and it should feel comfortable and secure in your hand. Some gauging trowels also have a hole in the handle, which can be used to hang the trowel up when not in use.
To use a gauging trowel, start by preparing the mortar or plaster according to the manufacturer’s instructions. Once the mixture is ready, scoop up a small amount of it with the trowel blade. Hold the trowel at a slight angle and use a firm, sweeping motion to spread the mixture onto the surface you are working on.
When working with a gauging trowel, it is important to keep the blade clean. Use a damp cloth or sponge to wipe away any excess mortar or plaster from the blade. This will help to ensure that your trowel stays in good condition and that the mixture is applied evenly.
The Basics of Using a Gauging Trowel
A gauging trowel is a versatile tool used by masons and DIY enthusiasts alike. It is typically made of tempered and ground steel, with a flat, rectangular blade and a comfortable handle. The gauging trowel is primarily used for small-scale projects and tasks that require precision and accuracy.
Preparing the Surface:
Before using a gauging trowel, it is important to ensure that the surface you will be working on is clean and free from debris. Use a broom or brush to remove any loose dirt or dust that may affect the quality of your work. By starting with a clean surface, you can achieve a smooth and even finish.
Applying the Material:
When using a gauging trowel, it is vital to apply the material evenly and at the proper thickness. Start by loading the trowel with the desired material, such as mortar or cement. Hold the trowel at a slight angle and firmly press it against the surface. Use smooth and even strokes to spread the material, making sure to maintain a consistent thickness throughout.
Smoothing the Surface:
After applying the material, use the gauging trowel to smooth the surface and remove any excess. Hold the trowel flat against the surface and use a light, sweeping motion to level the material. This will help create a flat and professional-looking finish. For a finer and more refined surface, consider using a trowel with a straight edge.
Cleaning and Maintenance:
Proper cleaning and maintenance of your gauging trowel will ensure its longevity and performance. After each use, remove any excess material from the blade and handle using a brush or cloth. Avoid using harsh chemicals or abrasive materials that may damage the trowel. If there is any rust or corrosion, gently remove it with a wire brush and apply a coat of oil to protect the blade.
In conclusion, the gauging trowel is a valuable tool for any mason or DIY enthusiast. By following these basic instructions, you can achieve professional-looking results and ensure the longevity of your trowel. Remember to take proper care of your trowel to keep it in good condition for future projects.
Detailed guide on how to properly use a gauging trowel
A gauging trowel is a versatile tool often used in masonry and tile work. Its flat rectangular shape and pointed tip make it ideal for spreading and leveling various materials, such as adhesive, mortar, and plaster. Here is a step-by-step guide on how to properly use a gauging trowel:
1. Prepare the surface
Before using a gauging trowel, make sure the surface you will be working on is clean, dry, and free from any dirt or debris. Remove any loose or uneven material to ensure a smooth finish.
2. Apply the material
Using a margin trowel or a similar tool, apply the material onto the surface in an even layer. Make sure the thickness and coverage are consistent throughout the area to achieve a professional look.
3. Spread and level
Once the material is applied, take the gauging trowel and start spreading it evenly across the surface. Hold the trowel at a slight angle and use smooth, sweeping motions to distribute the material. Apply light pressure to ensure an even and level finish.
4. Smooth out the surface
After spreading the material, use the flat side of the gauging trowel to smooth out the surface. Gently press the trowel against the material and move it in a back-and-forth motion to eliminate any ridges or bumps.
5. Clean the trowel
Once you have finished using the gauging trowel, clean it immediately to prevent the material from hardening and clogging the tool. Use a damp cloth or sponge to wipe off any excess material and rinse it with water.
Remember to always follow the manufacturer’s instructions and guidelines when working with a gauging trowel. With proper technique and practice, you can achieve a smooth and professional finish every time.
Step-by-Step Instructions for Gauging Trowel Application
Step 1: Prepare the Surface
Before using a gauging trowel, it is important to prepare the surface properly. Remove any loose debris or dirt and make sure the surface is clean and dry. This will ensure better adhesion and a smoother application.
Step 2: Mix the Mortar
Next, mix the mortar according to the manufacturer’s instructions. Use a clean container and a mixing paddle to achieve a smooth and consistent mixture. The mortar should have a thick, trowelable consistency.
Step 3: Apply the Mortar
Using the gauging trowel, scoop up a small amount of mortar from the container. Hold the trowel at a slight angle and press the mortar onto the surface. Use the flat side of the trowel to spread the mortar evenly, making sure to fill any gaps or depressions.
Step 4: Smooth the Surface
After applying the mortar, use the flat side of the gauging trowel to smooth the surface. Glide the trowel over the mortar with light pressure, creating a level and consistent finish.
Step 5: Clean the Trowel
After each use, it is important to clean the gauging trowel thoroughly. Use a damp cloth or sponge to remove any excess mortar from the trowel. Make sure to clean both the blade and handle to maintain the trowel’s performance and longevity.
Step 6: Allow the Mortar to Cure
Finally, allow the mortar to cure according to the manufacturer’s instructions. This usually takes several hours or even days, depending on the type of mortar used. Avoid any foot traffic or other disturbances until the mortar is fully cured.
Note: Always follow the specific instructions provided by the manufacturer for the gauging trowel and mortar being used.
Follow these easy steps to effectively use a gauging trowel
Using a gauging trowel is a simple process that can make your job easier and more efficient. Follow these steps to effectively use a gauging trowel:
Step 1: Choose the right trowel
There are different types and sizes of gauging trowels available, so it’s important to choose the right one for your specific needs. Consider the type of material you are working with and the size of the area you need to cover.
Step 2: Prepare the surface
Before using the gauging trowel, make sure the surface you’ll be working on is clean and free of debris. Remove any loose or damaged material and ensure the surface is smooth and even.
Step 3: Load the trowel
To load the gauging trowel, scoop a small amount of material onto the flat side of the blade. Hold the trowel at a slight angle and press the material onto the blade, using the rough side of the trowel to scrape off any excess.
Step 4: Apply the material
Hold the trowel at a slight angle and use a sweeping motion to apply the material onto the surface. Start from one corner and work your way across, using even pressure to ensure a consistent application. If needed, reload the trowel with more material and continue until the entire surface is covered.
Step 5: Smooth and level
After applying the material, use the flat side of the gauging trowel to smooth and level the surface. Hold the trowel at a slight angle and use long, even strokes to achieve a smooth and even finish. Scrape off any excess material as you go.
Following these simple steps will help you effectively use a gauging trowel and achieve professional results. Remember to clean and store the trowel properly after use to prolong its lifespan and ensure its effectiveness for future projects.
Tips and Tricks for Using a Gauging Trowel
Using a gauging trowel can make your work go more smoothly and efficiently. Here are some tips and tricks to help you get the most out of your gauging trowel:
Selecting the Right Trowel
Before you start using a gauging trowel, it’s important to choose the right one for your project. Trowels come in different sizes and shapes, so consider the type of work you’ll be doing. A wider trowel is ideal for spreading and smoothing larger amounts of material, while a narrower trowel is better for precision work in hard-to-reach areas.
Preparing the Surface
Before using your gauging trowel, make sure the surface is clean and free of debris. Remove any loose material and ensure that the surface is level and smooth. This will help ensure a professional finish and prevent any inconsistencies in your work.
Applying the Material
To apply the material using your gauging trowel, start by loading the trowel with an appropriate amount of material. Hold the trowel at a slight angle and apply even pressure as you spread the material onto the surface. Angle the trowel slightly to create a 45-degree angle between the trowel and the surface. This will help you achieve a smooth and even application.
When applying the material, work in small sections to ensure that the material remains workable. This will allow you to spread and smooth the material before it begins to set.
Smoothing and Finishing
After applying the material, use the flat edge of the gauging trowel to smooth and level the surface. Apply even pressure as you move the trowel across the surface, using long, sweeping motions. This will help remove any excess material and create a uniform finish.
If necessary, you can use a wet sponge or brush to further smooth the surface and remove any imperfections. Gently glide the wet sponge or brush across the surface, taking care not to disturb the material or create any marks.
Cleaning and Maintenance
After each use, clean your gauging trowel thoroughly to remove any remaining material. Warm, soapy water is usually sufficient for cleaning. Dry the trowel completely before storing it to prevent rust or damage.
Regularly inspect your trowel for any signs of wear or damage. Replace the trowel if the blade is bent, cracked, or worn down, as this can affect the quality of your work.
By following these tips and tricks, you can ensure that you get the best results when using a gauging trowel. Whether you’re working on a small DIY project or a larger professional job, proper technique and care will help you achieve a high-quality finish.
Expert advice to enhance your gauging trowel technique
Using a gauging trowel effectively requires skill and proper technique. Here are some expert tips to help you enhance your gauging trowel technique:
1. Hold the trowel correctly: Grip the handle firmly, with your thumb on top and your fingers wrapped around the sides. This will give you better control and balance while using the trowel.
2. Angle it right: Hold the gauging trowel at a slight angle, around 30-45 degrees, to the surface you are working on. This will help you apply the right amount of pressure and achieve a smooth and even finish.
3. Use the right pressure: Apply steady, even pressure with the trowel while smoothing the material. Avoid pressing too hard or too lightly, as this can result in an uneven application.
4. Master the flicking motion: To achieve a feathered edge or create a textured finish, practice the flicking motion. Lightly flick the trowel at the end of each stroke to create a seamless transition and avoid leaving visible lines or marks.
5. Keep your trowel clean: Clean your gauging trowel after each use to prevent material buildup and ensure optimal performance. Use a putty knife or wire brush to remove dried material and rinse with water.
6. Practice makes perfect: Regularly practice using the gauging trowel on different surfaces and materials to improve your technique. With time and experience, you will become more proficient in achieving the desired results.
Remember, using a gauging trowel is a skill that takes time to master. Take the time to learn and practice the techniques mentioned above, and you’ll soon become an expert in using this versatile tool.
Common Mistakes to Avoid When Using a Gauging Trowel
Using a gauging trowel can be a useful tool for many construction projects, but it is important to use it correctly to achieve the best results. Here are some common mistakes to avoid when using a gauging trowel:
1. Using the wrong angle
One of the most common mistakes people make when using a gauging trowel is holding it at the wrong angle. To get a smooth and even finish, it is important to hold the trowel at a slight angle, typically around 30 degrees. Holding it at the wrong angle can result in an uneven application of the mortar or plaster and create an unprofessional finish.
2. Applying too much pressure
Another mistake is applying too much pressure when using a gauging trowel. While it may seem like more pressure would result in a smoother finish, it can actually cause the mortar or plaster to be pushed too deep into the surface and create an uneven layer. It is important to apply gentle and even pressure to achieve the desired thickness and finish.
3. Not cleaning the trowel properly
After each use, it is crucial to clean the gauging trowel properly. Not doing so can result in the buildup of dried mortar or plaster, which can cause the trowel to become less effective and make it harder to achieve a smooth finish. To clean the trowel, simply scrape off any excess material and wash it with warm water and a mild detergent.
In conclusion, avoiding these common mistakes when using a gauging trowel can help ensure a professional and successful outcome for your construction projects. Remember to hold the trowel at the correct angle, apply gentle pressure, and properly clean the trowel after each use. By doing so, you will optimize the performance and longevity of your gauging trowel.