If you own an Insignia product, such as a television or a car stereo system, you may need to change the wedge bulb at some point. The wedge bulb is responsible for providing light to the display panel or buttons on your device. Over time, the bulb may burn out or become dim, making it difficult to see the information displayed on your Insignia device.
To change the wedge bulb on your Insignia product, you will need a few tools and a replacement bulb. First, you will need to determine the type and size of the wedge bulb needed for your specific Insignia model. This information can usually be found in the product’s user manual or by contacting the manufacturer.
Once you have the replacement bulb, you can begin the process of changing it. Start by turning off your Insignia device and unplugging it from the power source, if applicable. Use a small screwdriver or a pry tool to carefully remove the panel or cover that houses the wedge bulb. Be gentle to avoid damaging any other components.
Next, locate the old wedge bulb and carefully remove it from its socket. You may need to gently wiggle the bulb back and forth to loosen it. Once the old bulb is removed, insert the new wedge bulb into the socket, making sure it is securely in place. Replace the panel or cover and reassemble any other parts that were removed.
Finally, plug your Insignia device back into the power source and turn it on. Check the display panel or buttons to ensure that the new wedge bulb is working properly and providing adequate light. If you encounter any issues, double-check that the bulb is installed correctly and securely.
By following these steps, you can easily change the wedge bulb on your Insignia product and restore clear visibility to the display panel or buttons. Remember to always refer to the user manual or contact the manufacturer if you have any questions or concerns during the bulb replacement process.
Replacing wedge bulb on Insignia: step-by-step guide
Step 1: Gather the necessary tools and materials
Before starting the process of replacing the wedge bulb on your Insignia, make sure you have the following tools and materials:
- Replacement wedge bulb
- Screwdriver
- Pliers
- Protective gloves
Step 2: Turn off the power
Ensure that the power source connected to your Insignia is switched off before proceeding with the replacement.
Step 3: Locate the bulb compartment
Identify the compartment where the old wedge bulb is located. It is usually at the back of the device.
Step 4: Remove the bulb cover
Use a screwdriver to gently remove the bulb cover. Be careful not to apply too much force, as this may damage the cover or the surrounding components.
Step 5: Remove the old bulb
Carefully remove the old wedge bulb from its socket. If it feels stuck or hard to remove, you can use pliers to help you grip it and twist it out.
Step 6: Install the new bulb
Take the replacement wedge bulb and insert it into the empty socket. Make sure it fits securely and aligns with the surrounding components.
Step 7: Secure the bulb cover
Place the bulb cover back onto the compartment and use the screwdriver to tighten it in place. Ensure that it is firmly attached and doesn’t wobble.
Step 8: Turn on the power
Once the bulb cover is securely in place, you can turn on the power source connected to your Insignia and test the new bulb.
Note: If you are unsure about any step in the process, consult the user manual or seek professional assistance.
Preparing for the replacement
Before attempting to change the wedge bulb on your Insignia, it’s important to make sure you have the correct replacement bulb on hand. Check the owner’s manual or the bulb’s packaging to find the specific type and wattage of the bulb you need.
Next, gather the necessary tools for the replacement. You may need a screwdriver or pliers to remove any necessary screws or connectors. It’s also a good idea to have a clean cloth or towel to handle the bulb, as oils from your skin can damage the bulb and reduce its lifespan.
Make sure the power to the Insignia is turned off before attempting any bulb replacement. If necessary, unplug the Insignia from the power source or turn off the circuit breaker that supplies power to the device.
If the Insignia has been in use recently, give it some time to cool down. Handling hot bulbs can be dangerous and may cause burns. Wait until the device is completely cool before proceeding with the replacement.
Finally, find a suitable workspace with enough lighting to see what you’re doing. It’s important to have a clear view of the area where the bulb is located to avoid damaging any other components during the replacement process.
Removing the old wedge bulb
To replace the wedge bulb on your Insignia device, follow these steps:
- Make sure the device is turned off and unplugged from the power source.
- Locate the area where the old wedge bulb is located. This is usually a small opening or compartment.
- Using a flat-head screwdriver or a similar tool, gently pry open the compartment or remove any screws that are holding it in place.
- Once the compartment is open, you will see the old wedge bulb. Carefully grip the bulb and gently pull it out of the socket.
- If the bulb is stuck, apply a small amount of pressure and wiggle it until it comes loose.
- Dispose of the old bulb properly.
Remember to always handle bulbs with care to avoid breakage and injury.
Choosing the right replacement bulb
When it comes to replacing a wedge bulb on your Insignia device, it’s important to choose the right replacement bulb to ensure proper functionality and performance. Here are a few things to consider when selecting a replacement bulb:
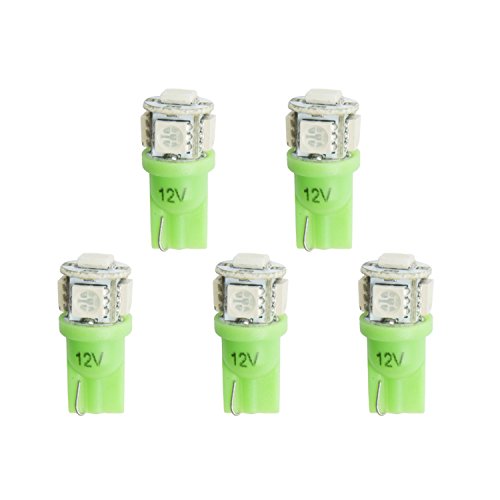
| Bulb type: | First, determine the type of bulb you need to replace. Insignia devices typically use a wedge bulb, also known as a T5 bulb. Make sure to check your device’s user manual or specifications to confirm the correct bulb type. |
| Bulb wattage: | Next, check the wattage requirements for the replacement bulb. Different devices may have different wattage requirements, so it’s important to use a bulb that matches the recommended wattage to avoid potential damage to the device. |
| Bulb voltage: | Another important factor to consider is the bulb voltage. Insignia devices typically operate on either 12V or 24V systems, so make sure to choose a replacement bulb with the correct voltage to ensure proper compatibility and functionality. |
| Bulb color: | Lastly, consider the desired color temperature or appearance of the replacement bulb. Different bulbs may emit different colors or shades of light, so choose a bulb that matches your preferences or the original bulb’s color temperature for a consistent look. |
By considering these factors and choosing the right replacement bulb for your Insignia device, you can ensure that your device continues to perform optimally and provide the desired lighting experience.
Installing the new wedge bulb
Once you have removed the old wedge bulb from your Insignia device, it’s time to install the new one. Follow these steps to replace the bulb:
Step 1: Prepare the new wedge bulb
Before installing the new wedge bulb, make sure it is compatible with your Insignia device and that it has the correct wattage. Additionally, check for any packaging or protective covers that need to be removed before installation.
Step 2: Insert the new wedge bulb
Locate the socket where the old wedge bulb was removed. Position the new bulb so that the tabs on the sides align with the slots in the socket. Gently push the bulb into the socket until it is securely in place. Be careful not to force it or damage the bulb.
Note: Some wedge bulbs may require a slight twist or turn to lock them into place. Refer to the instructions specific to your Insignia device if needed.
Step 3: Test the new bulb
Once the new bulb is installed, turn on your Insignia device to test its functionality. If the bulb does not light up, double-check that it is properly inserted and consult the troubleshooting guide for further assistance.
Always ensure that your Insignia device is powered off and unplugged before performing any bulb replacement.
With the new wedge bulb correctly installed and working, you can now enjoy the improved lighting in your Insignia device.
Testing the new bulb
After you have successfully replaced the wedge bulb in your Insignia device, it is important to test the new bulb to ensure that it is working properly. Follow these steps to test the bulb:
1. Power on the device: Plug in your Insignia device and turn it on using the power button or remote control.
2. Verify bulb placement: Make sure that the new wedge bulb is properly inserted into the socket. Check for any loose connections or misalignment.
3. Check for proper illumination: Look for the bulb to illuminate once the device is powered on. The new bulb should emit a bright, steady light without any flickering or dimness.
4. Test different settings: Adjust the device settings to test different levels of brightness or color temperature. Ensure that the bulb responds correctly to these changes and maintains consistent performance.
5. Monitor bulb performance: Keep an eye on the bulb over the next few days to ensure that it continues to function properly. If you notice any issues such as flickering, decreased brightness, or abnormal behavior, it may be necessary to check the bulb’s placement again or consider replacing it.
Note: Always exercise caution when working with electrical devices and bulbs. If you are uncertain or uncomfortable performing these steps, it is recommended to consult a professional technician or contact Insignia support for assistance.