
Installing tiles on walls is a popular and stylish way to enhance the appearance of your home. One essential tool for achieving a professional tile installation is the wedge tile spacer. These small plastic wedges are used to create uniform gaps between tiles, ensuring a straight and symmetrical layout. However, once the tiles are set and the mortar has dried, it’s time to remove these spacers to complete the job.
Removing wedge tile spacers from a wall may seem like a daunting task, but with the right technique and tools, it can be done efficiently and without damaging your freshly installed tiles. In this guide, we will walk you through the step-by-step process of removing wedge tile spacers from the wall, helping you achieve a flawless finish for your tile project.
Step 1: Gather the necessary tools
Before you begin, make sure you have the following tools handy:
1. Safety goggles and gloves to protect your eyes and hands.
2. A pair of needle-nose pliers or tile spacer removal tool.
3. A scraper or putty knife to help pry out stubborn spacers.
Step 2: Start from the corner
Begin by locating a corner of the tiled wall. This will serve as your starting point for spacer removal. Insert the tip of the pliers or removal tool under the edge of the wedge spacer closest to the corner. Gently twist and lift the spacer to loosen it from the tile. Avoid using excessive force, as this could cause the tile to crack or chip.
Step 3: Work your way across the wall
Once you have successfully removed the first spacer, continue moving along the row of tiles, repeating the twisting and lifting motion to remove each wedge spacer. Take your time and be patient to prevent any damage to the tiles.
Step 4: Remove stubborn spacers
In some cases, a spacer may get stuck or be harder to remove. If this happens, use a scraper or putty knife to gently pry out the spacer. Insert the tool under the spacer’s edge and apply gentle pressure to lift it away from the tile’s surface. Take caution not to scratch the tile or damage the grout lines while doing so.
Step 5: Clean the tile surface
After removing all the wedge spacers, inspect the tile surface for any leftover adhesive or debris. Use a damp cloth or sponge to wipe away any residue, ensuring a clean and polished final appearance for your tiled wall.
By following these simple steps, you can successfully remove wedge tile spacers from your wall, completing your tile installation with a professional touch. Remember to work carefully, taking your time, to avoid any damage to the tiles or grout lines. With a little patience and the right tools, your tiled wall will look flawless and ready to impress!
Prepare for removing
Before attempting to remove wedge tile spacers from the wall, it is important to gather the necessary tools and materials to make the process easier and more efficient.
Gather the following materials:
- Tweezers or needle-nose pliers: These tools will help you grip and remove the spacers from the gaps easily.
- Bucket or container: Have a container nearby to collect the removed spacers.
- Clean cloth or sponge: You may need to clean the wall surface after removing the spacers, so having a cloth or sponge handy will be useful.
Once you have all the necessary materials, it’s time to prepare the workspace:
1. Clear the area
Clear any obstacles or items around the wall where you’ll be removing the spacers. This will provide you with more space to work and prevent accidental damage to nearby objects.
2. Protect the floor and surfaces
Place a drop cloth or protective material on the floor beneath the wall to catch any spacers that may fall while removing them. Additionally, consider using painter’s tape to protect adjacent surfaces from scratches or damage.
By preparing the necessary tools and materials and clearing the area, you’ll be ready to start the process of removing wedge tile spacers from the wall.
Gather necessary tools and materials
Before you begin removing wedge tile spacers from the wall, make sure you have the following tools and materials:
- Tiling sponge: You’ll need a tiling sponge to remove any excess grout from the tiles after removing the spacers. This will help give your tiled surface a clean and finished look.
- Paint scraper or putty knife: A paint scraper or putty knife can be used to gently pry the wedge tile spacers out from between the tiles. Be careful not to damage the tiles or grout.
- Bucket of water: Having a bucket of water nearby will allow you to dampen the sponge and clean it as needed while removing the spacers.
- Tweezers or pliers: Sometimes, the wedge spacers can be difficult to remove with just your hands. Having a pair of tweezers or pliers on hand can help you grip and pull them out more easily.
- Dust mask and safety goggles: When working with tiles and grout, it’s important to protect yourself. Wear a dust mask to avoid inhaling any dust particles, and safety goggles to protect your eyes from any debris that may scatter during the process.
Having these tools and materials ready before you start removing the wedge tile spacers will make the process go more smoothly and efficiently.
Protect the surrounding areas
As you remove wedge tile spacers from the wall, it is important to protect the surrounding areas to prevent any damage. Here are some steps to follow:
- Cover the floor with a drop cloth or plastic sheeting to catch any loose grout or tile adhesive that may fall.
- Place masking tape along the edges of adjacent tiles or fixtures to provide an extra barrier of protection.
- Use a soft cloth or sponge to wipe away any excess grout or adhesive that may have accumulated on nearby surfaces.
- Apply a gentle cleaning solution to remove any stains or residue from the tiles or surrounding areas.
- Ensure that there are no sharp or protruding edges on the tiles which may cause injury. If necessary, sand down any rough edges.
By taking these precautions, you can ensure that the surrounding areas remain undamaged and free from any debris during the process of removing wedge tile spacers.
Remove the wedges
Once the tile adhesive has set and your tiles are securely in place, it’s time to remove the wedge tile spacers. Removing them properly is important to ensure a clean and professional finish to your tiling project.
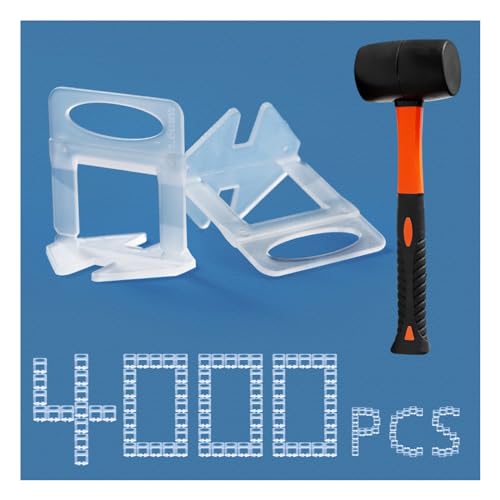
Gently tap the wedges
Using a small hammer or mallet, gently tap the wedges to loosen them from the tiles. Be careful not to hit the tiles too hard as you may damage them. The wedges should come out easily if the adhesive has set properly.
Remove the wedges
Once the wedges are loosened, carefully pull them out from between the tiles. Use a pair of pliers or your fingers to grip the wedge and gently pull it out. Make sure to remove all the wedges from the entire tiled area.
It’s important to remove the wedges before the adhesive fully hardens to prevent them from getting stuck or leaving marks on the tiles. If you encounter any resistance while removing the wedges, stop and allow the adhesive to set for a bit longer before trying again.
After removing the wedges, check the spaces between the tiles for any excess adhesive. Use a grout removing tool or a flat screwdriver to gently scrape off any adhesive residue, taking care not to scratch the tiles in the process.
With the wedges removed and any excess adhesive cleaned up, your tiled wall is now ready for grouting.
Start from the corners
When removing wedge tile spacers from a wall, it’s best to start from the corners to ensure a smooth and efficient process. Begin by locating the spacers in the corner of the tile installation. Look for gaps between the tiles and identify the spacers wedged in-between.
Once you’ve located the spacer, gently insert a flathead screwdriver or a pair of needle-nose pliers between the spacer and the tiles. Apply slight pressure and carefully pry the spacer out of the gap. Take your time to avoid damaging the tiles or the surrounding grout.
After removing the spacer from the corner, move on to the adjacent spacers along the same row or column. The spacers might be tightly wedged in, so use the same method of inserting a screwdriver or pliers to gently pry them out. Be cautious not to exert too much force, as this could cause the tiles to shift or crack.
Continue this process until all the corner spacers have been removed. Once the corners are cleared, you can then move on to removing the spacers in the center of the wall. Take care to maintain the proper alignment of the tiles as you work your way towards the center.
Remember to clean the gap between the tiles after removing each spacer to ensure a smooth and even finish. A toothbrush or a small brush can be used to sweep away any debris or excess grout.
By starting at the corners and working your way inward, you can remove wedge tile spacers efficiently and minimize any potential damage to the tiles or grout.
Use a pry tool for leverage
Once you have successfully loosened the tiles using the hammer and chisel method, it’s time to remove the wedge tile spacers. To do this, you will need a pry tool, such as a flathead screwdriver or a pry bar.
Start by positioning the pry tool at the edge of the tile spacer, between the tile and the wall. Apply gentle pressure and carefully pry the spacer away from the wall. Be sure to work slowly and steadily to avoid damaging the tiles or the wall surface.
If the spacer is resistant or difficult to remove, you can tap the pry tool lightly with a hammer to help loosen it. However, be cautious not to use excessive force, as this can cause the tool to slip and potentially damage the tiles.
Repeat this process for each wedge tile spacer, moving along the row until all spacers are removed. Remember to always work carefully and methodically to ensure a successful removal process.
Once all the wedge tile spacers have been removed, you can proceed with grouting the gaps between the tiles and completing your tiling project.
Be gentle to avoid damage
When removing wedge tile spacers from the wall, it’s important to be gentle to avoid causing any damage. The spacers can sometimes become stuck or lodged in the grout, so it’s important to proceed with caution.
Start by carefully wiggling the spacer back and forth to loosen it from the grout. Avoid applying too much force, as this could cause the tile to crack or chip. If the spacer does not easily come out, try using a pair of needle-nose pliers to grip it securely and gently pull it out.
It’s also important to be mindful of the surrounding tiles. As you remove the spacer, be careful not to accidentally scratch or damage the tile surface. Take your time and proceed with care to ensure a clean and successful removal.
By being gentle and taking the necessary precautions, you can remove wedge tile spacers from the wall without causing any damage or issues. Remember to work slowly and attentively, keeping the integrity of the tiles intact.
Clean the wall
Once you have removed the wedge tile spacers from the wall, it is important to clean the wall to ensure a smooth and professional finish.
Gather the necessary materials
Before you begin cleaning the wall, gather the necessary materials. You will need a bucket, warm water, mild detergent or tile cleaner, a sponge or soft cloth, and a towel.
Mix the cleaning solution
Fill the bucket with warm water and add a small amount of mild detergent or tile cleaner. Mix the solution until it forms a soapy mixture.
Note: It is important to use a mild detergent or tile cleaner to avoid damaging the wall surface.
Clean the wall
Dip the sponge or soft cloth into the cleaning solution and wring out any excess liquid. Gently scrub the wall in a circular motion, starting from the top and working your way down. Pay special attention to any areas that may have accumulated dirt or grime.
Tip: If you encounter stubborn stains or grime, you can use a soft-bristled brush to gently scrub the area. Be careful not to apply too much pressure, as this can damage the wall surface.
Rinse and dry the wall
Once you have cleaned the entire wall, rinse the sponge or cloth with clean water and wipe away any soapy residue. Then, use a towel to dry the wall thoroughly. This will help prevent water spots or streaks from forming on the surface.
By following these steps, you can effectively clean the wall after removing wedge tile spacers and ensure a clean and polished look for your tiled surface.


