


Sealant plays a crucial role in many DIY projects and home repairs. Whether you are sealing gaps, filling cracks, or waterproofing surfaces, having a caulking gun can make the application process much easier and efficient. However, before you can start using your caulking gun, you need to know how to load it with sealant. In this article, we will guide you through the step-by-step process of putting sealant in a caulking gun.
Step 1: Choose the right sealant. The first step is to choose the appropriate sealant for your specific project. There are different types of sealants available, such as silicone, acrylic, or polyurethane. Consider the surface you will be applying the sealant to and the desired outcome to select the best sealant for the job.
Step 2: Prepare the caulking gun. Before loading the sealant, make sure your caulking gun is clean and free from any debris or old sealant. Check that the plunger moves smoothly and that the gun is in good working condition. If needed, clean the caulking gun with a soft cloth and remove any obstructions.
Step 3: Open the caulking gun. Some caulking guns have a latch or trigger that allows you to open the gun. Find the mechanism and unlock the gun so that you have access to the barrel to insert the sealant tube.
Step 4: Insert the sealant tube. Take the sealant tube and cut off the tip at a 45-degree angle using a utility knife. The size of the cut will depend on the width of the sealant bead you desire. Insert the tube into the barrel of the caulking gun, ensuring that the nozzle is facing outward.
Step 5: Load the sealant into the gun. To load the sealant into the caulking gun, push the plunger rod all the way in until it reaches the bottom of the gun. This will create enough space for the sealant tube. Once the plunger rod is in position, lower the release lever or trigger, allowing the plunger to move freely.
Step 6: Test and adjust. Before you start applying the sealant, it is crucial to test the gun by squeezing the trigger gently. This will ensure that the sealant is flowing smoothly and that there are no obstructions. If necessary, adjust the plunger or cut the sealant tube again for a better flow.
Now that you know how to put sealant in a caulking gun, you can confidently tackle your next DIY project. Remember to always read the manufacturer’s instructions for the specific caulking gun you are using and follow proper safety precautions. With the right sealant and a properly loaded caulking gun, you can achieve professional-looking results and effectively seal various surfaces around your home.
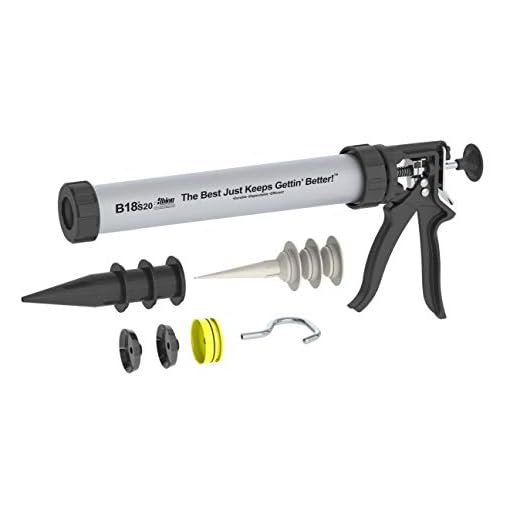
What You Need To Know About Using A Caulking Gun
Using a caulking gun may seem simple, but there are a few important things you need to know to ensure a successful seal. Here are some key points to keep in mind:
- Choose The Right Caulk: Before using a caulking gun, it’s crucial to choose the right type of caulk for your project. There are different caulk formulations available for various applications, such as silicone caulk for high-moisture areas or acrylic caulk for paintable surfaces.
- Prepare The Surface: Proper surface preparation is essential for a long-lasting seal. Clean the area where you will be applying the caulk, removing any old caulk, dirt, and debris. You may also need to use a primer or caulk remover, depending on the condition of the surface.
- Load The Caulking Gun: To load the caulking gun, pull back the rod on the gun and insert the caulk tube. Make sure the tube is centered in the gun and that the nozzle is facing outward. Push the rod forward until it securely holds the tube in place.
- Cut The Tip: Cut the tip of the caulk tube at a 45-degree angle, using a utility knife or caulk cutter. The size of the opening you cut will depend on the width of the joint you are sealing. Start with a smaller opening and cut more if needed.
- Apply The Caulk: Hold the caulking gun at a 45-degree angle to the surface and gently squeeze the trigger to dispense the caulk. Move the gun steadily along the joint, applying an even, continuous bead of caulk. Use a caulk smoothing tool or your finger to smooth the caulk and remove any excess.
- Clean Up: After applying the caulk, clean up any excess or smudges using a damp cloth or sponge. It’s important to clean up while the caulk is still wet, as dried caulk can be difficult to remove.
By following these steps and paying attention to the details, you can effectively use a caulking gun to create a tight and professional seal. Remember, practice makes perfect, so don’t be discouraged if your first attempts aren’t perfect. With a little practice, you’ll become a caulk gun pro in no time!
Preparation
Before you can start using a caulking gun to put sealant, you need to gather the necessary materials and prepare the area where you will be working.
Gather Materials
To begin, make sure you have all the materials you will need. This includes:
- A caulking gun
- A tube of sealant
- A utility knife
- A rag or towel
- Protective gloves
- Painter’s tape (optional)
Having these materials on hand will ensure you can work efficiently and without interruption.
Prepare the Area
Next, prepare the area where you will be applying the sealant. Here are a few steps you can take:
- Clean the surface: Use a mild detergent and water to clean the area where you will be applying the sealant. Remove any dirt, dust, or debris to ensure a clean and smooth surface.
- Remove old sealant: If there is old sealant present, use a utility knife to carefully remove it. Be cautious not to damage the surrounding surface.
- Apply painter’s tape: If desired, you can apply painter’s tape to protect adjacent surfaces from accidental sealant application.
By preparing the area beforehand, you can ensure that the sealant application process goes smoothly and results in a neat and professional-looking finish.
Applying the Sealant
Once you have prepared the caulk gun and chosen the appropriate sealant, it is time to start applying the sealant to the desired area. Follow these steps to ensure a successful application:
1. Prepare the surface
Before applying the sealant, make sure the surface is clean and dry. Remove any old caulk or debris using a scraper or a putty knife. Clean the area with a mild detergent and let it dry completely.
2. Load the caulk gun
Insert the tube of sealant into the caulk gun. Cut off the tip of the sealant tube at a 45-degree angle using a utility knife. Make sure to cut the tip small enough to fit the desired joint or gap.
3. Test the flow of the sealant
Before applying the sealant to the desired area, it is a good idea to test the flow. Squeeze the trigger gently to see if the sealant comes out smoothly. If the flow seems inconsistent, adjust the tension on the trigger.
4. Apply the sealant
Hold the caulk gun at a 45-degree angle to the surface. Position the nozzle of the caulk gun at the beginning of the joint or gap. Squeeze the trigger steadily to apply a consistent bead of sealant along the desired area. Use a smooth and continuous motion to ensure an even application.
5. Smooth the sealant
Once you have applied the sealant, you can use a caulk smoothing tool, a damp finger, or a damp cloth to smooth the surface. This will help create an even and neat finish.
Remember to work quickly, as some sealants may start to cure or dry relatively fast. Clean any excess sealant immediately using a cloth or sponge damp with mineral spirits.
With these steps, you should be able to effectively apply sealant using a caulk gun. Remember to read and follow the instructions provided by the sealant manufacturer for best results.
Clean Up and Maintenance
Properly cleaning and maintaining your caulking gun can help ensure its longevity and optimal performance. Here are some steps you can follow:
| Step | Description |
| 1 | After using the caulking gun, remove any excess sealant from the gun and the tip. |
| 2 | If the sealant has dried, gently scrape it off using a putty knife or a similar tool. |
| 3 | Use a moistened cloth or sponge to wipe the gun and remove any remaining residue or dirt. |
| 4 | Inspect the plunger rod and other moving parts for any signs of wear or damage. Replace any worn-out parts if necessary. |
| 5 | Apply a small amount of lubricant, specifically designed for caulking guns, to the moving parts to ensure smooth operation. Follow the manufacturer’s instructions for the appropriate type and amount of lubricant to use. |
| 6 | Store the caulking gun in a clean and dry place, away from extreme temperatures or direct sunlight. |
By regularly cleaning and maintaining your caulking gun, you can extend its lifespan and ensure it performs optimally every time you use it.


