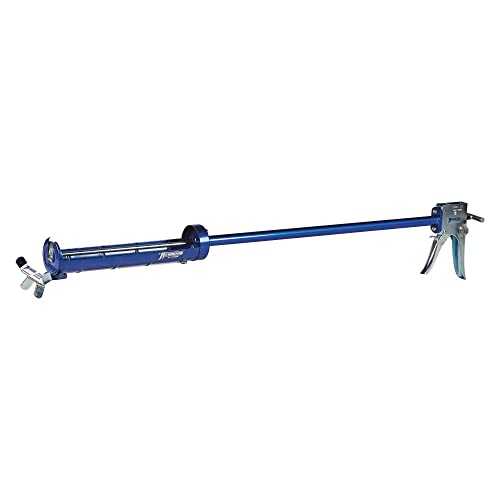
If you’ve ever used a caulk gun, you know how frustrating it can be when the bottle gets stuck. Whether you’re a professional contractor or a DIY enthusiast, dealing with this issue can be time-consuming and irritating. However, with the right techniques, you can easily remove the bottle from your caulk gun without causing any damage.
Step 1: Assess the situation
Before you try to remove the bottle, carefully assess the situation. Look for any visible obstructions or damage that may be causing the bottle to get stuck. If you notice any debris or dried caulk around the bottle, use a small brush or toothpick to clean it out. This will help ensure a smooth removal process.
Step 2: Apply lubricant
If the bottle is still stuck after cleaning, apply a small amount of lubricant to the area where the bottle connects to the caulk gun. You can use a silicone-based lubricant or even a little bit of vegetable oil. Let the lubricant sit for a few minutes to allow it to penetrate and loosen up any dried caulk.
Step 3: Use a heat gun
If the lubricant doesn’t do the trick, you can try using a heat gun to gently warm up the caulk and loosen its grip on the bottle. Be careful not to overheat the caulk, as this can cause it to release toxic fumes. Use the heat gun sparingly and keep moving it to avoid burning the caulk.
Step 4: Use pliers or a wrench
If all else fails, you may need to use pliers or a wrench to remove the bottle. Wrap a cloth or towel around the bottle to protect it from scratches, then use the pliers or wrench to grip the bottle securely. Gently twist and pull until the bottle comes free from the caulk gun.
Remember, it’s important to take your time and be gentle when trying to remove a stuck bottle from a caulk gun. Rushing or using excessive force can cause damage to the caulk gun or the bottle itself. By following these steps and using the right techniques, you can quickly and easily remove a stuck bottle and get back to your project.
Removing the Bottle from a Caulk Gun: A Step-by-Step Guide
Removing a bottle from a caulk gun can be a little tricky if you are not familiar with the process. However, with the right guidance, it can be a quick and easy task. Follow the steps below to remove the bottle from your caulk gun effortlessly:
Step 1: Release the Pressure
Before attempting to remove the bottle, it is crucial to release the pressure. To do this, simply press the release button or lever located on the caulk gun. This will prevent any messy caulk from squirting out when you remove the bottle.
Step 2: Remove the Retaining Clip
Next, locate the retaining clip that holds the bottle in place. This clip is usually found at the bottom of the caulk gun, near the nozzle. Use your fingers or a small tool to gently pry the clip open and release the bottle.
Step 3: Slide out the Bottle
Once the retaining clip is released, carefully slide out the bottle from the caulk gun. Be cautious not to spill any remaining caulk in the process. If the bottle seems stuck, you may need to wiggle it slightly to loosen it from the gun.
Step 4: Dispose of the Bottle
After successfully removing the bottle, it is important to properly dispose of it. Empty any leftover caulk into a sealable container and dispose of it according to your local waste regulations. Recycle the empty caulk bottle if possible.
By following these simple steps, you will be able to remove the bottle from your caulk gun without any hassle. Remember to always exercise caution and take your time to avoid any accidents or spills. With practice, this process will become second nature to you.
| Step | Description |
|---|---|
| Step 1 | Release the pressure by pressing the release button. |
| Step 2 | Remove the retaining clip that holds the bottle in place. |
| Step 3 | Slide out the bottle from the caulk gun. |
| Step 4 | Properly dispose of the bottle and any leftover caulk. |
Preparing the Caulk Gun for Bottle Removal
Before attempting to remove the bottle from the caulk gun, it is important to properly prepare the gun to ensure a successful removal process. Following these steps will help make the task easier and prevent any potential damage.
Tighten the Plunger Rod
Start by tightening the plunger rod at the back of the caulk gun. This will help create a tight seal between the rod and the caulk bottle, making it easier to pull out.
Release Pressure
Before removing the bottle, it is crucial to release any pressure that may have built up inside the caulk gun. To do this, simply press the trigger or release button on the handle of the gun. This will prevent any unexpected discharge of caulk during the removal process.
Note: It is always recommended to wear appropriate safety gear, such as gloves and goggles, when working with caulk guns to protect yourself from any potential harm.
By following these steps to properly prepare the caulk gun, you will be ready to safely remove the bottle without causing any damage to the gun or yourself.
Removing the Empty or Unwanted Bottle
Once you have finished using a bottle in your caulk gun, or if you simply want to switch to a different bottle, you will need to remove the empty or unwanted bottle. Here are the steps to safely remove the bottle:
Step 1: Release the Pressure
Before removing the bottle, it is important to release any pressure that may be built up. To do this, locate the pressure release valve on your caulk gun. Typically, it is located near the handle. Press or turn the valve to release the pressure. This will prevent any unexpected discharge of caulk when removing the bottle.
Step 2: Remove the Plunger
With the pressure released, you can now remove the plunger from the caulk gun. Locate the plunger handle and pull it back towards the rear of the gun. This will disengage the plunger from the bottle, allowing you to remove it.
Step 3: Unscrew the Bottle
With the plunger removed, you can now unscrew the bottle from the caulk gun. Hold the base of the bottle firmly and twist it counterclockwise to loosen it. Once loosened, you can simply lift the bottle off the caulk gun.
Note: Some caulk guns may have a locking mechanism to secure the bottle in place. If this is the case, you may need to release the lock before being able to unscrew the bottle.
Step 4: Dispose or Store
Once the bottle is removed, you can dispose of the empty bottle if it is no longer needed. However, if you plan on reusing the bottle or switching to a different bottle, make sure to store it properly to prevent any leakage or drying out of the caulk. Place a cap or seal over the bottle’s nozzle to keep it airtight.
By following these steps, you can safely and easily remove an empty or unwanted bottle from your caulk gun. Remember to always exercise caution and release any pressure before attempting to remove the bottle.
Cleaning the Caulk Gun after Bottle Removal
Once you have successfully removed the bottle from your caulk gun, it’s important to clean the gun properly to ensure its longevity and functionality. Follow these steps to clean your caulk gun effectively:
Gather your cleaning supplies
Before you begin, gather the necessary cleaning supplies. You will need a clean cloth or rag, warm water, mild soap or detergent, and a small brush or toothbrush.
Remove excess caulk
Start by removing any excess caulk from the gun. Use a clean cloth or rag to wipe away any leftover caulk. You can also use a small brush or toothbrush to scrub away any stubborn caulk residue.
Note: Take care not to scratch or damage the caulk gun while removing the excess caulk.
Clean with warm soapy water
Next, dampen the clean cloth or rag with warm water and add a small amount of mild soap or detergent. Gently wipe down the entire caulk gun, paying special attention to any areas where caulk may have accumulated.
Pro tip: If there are any difficult-to-reach areas, use the small brush or toothbrush to carefully clean them.
Rinse and dry
Once you have thoroughly cleaned the caulk gun, rinse it with clean warm water to remove any soap or detergent residue. Dry the gun completely with a clean, dry cloth or rag.
Note: Make sure the caulk gun is completely dry before storing it, as any moisture left behind can lead to rusting or other damage.
By following these simple steps, you can ensure your caulk gun remains in excellent condition after removing the bottle, ready for your next project.
Replacing the Bottle in the Caulk Gun
To replace the bottle in a caulk gun, follow these steps:
Step 1: Ensure that the caulk gun is fully discharged and there is no remaining caulk in the bottle. This is important to prevent any accidental spillage or damage.
Step 2: Loosen the plunger of the caulk gun by rotating it counterclockwise. This will release the pressure and allow you to remove the empty bottle.
Step 3: Carefully pull the empty bottle out of the caulk gun, making sure to grip it firmly to prevent it from falling or breaking.
Step 4: Dispose of the empty bottle appropriately, following your local regulations for hazardous waste disposal if necessary.
Step 5: Take a new bottle of caulk and ensure it is compatible with your caulk gun. Check the label or packaging for instructions on compatibility.
Step 6: Insert the new bottle into the caulk gun, aligning it with the plunger. Push it firmly into place until it sits securely.
Note: Some caulk guns may have different mechanisms for securing the bottle. Refer to the manufacturer’s instructions for specific guidance.
Step 7: Tighten the plunger by rotating it clockwise to create pressure and prepare the caulk gun for use.
Step 8: Test the caulk gun with the new bottle by squeezing the trigger gently to ensure the caulk is flowing smoothly.
By following these steps, you can easily replace the bottle in your caulk gun and continue with your caulking projects.