


Chiseling a rock in half may seem like a daunting task, but with the right tools and techniques, it can be accomplished successfully. Whether you are a sculptor looking to create a masterpiece or simply want to split a rock for landscaping purposes, this guide will provide you with step-by-step instructions on how to achieve your goal.
Step 1: Gather the necessary tools
Before you begin, make sure you have the proper tools. The most important tool you will need is a chisel. Look for a chisel with a sharp and durable blade that is specifically designed for splitting rocks. Additionally, you will need a hammer or mallet to strike the chisel and a safety mask and goggles to protect yourself from flying rock fragments.
Step 2: Choose the right rock
Not all rocks are suitable for chiseling. Choose a rock that is relatively flat and has a consistent texture throughout. Sandstone and limestone are often good choices for beginners, as they are softer and easier to chisel. Avoid rocks that are very hard or have irregular shapes, as they can be more difficult to work with.
Step 3: Mark the desired split line

Once you have selected the rock, use a marker or chalk to mark the line where you want to split it. This will serve as a guide as you chisel. Make sure the line is straight and runs the entire length of the rock.
Step 4: Start chiseling
Position the chisel on the split line, with the bevelled edge facing towards the rock. Hold the chisel firmly and strike it gently with the hammer or mallet. It is important to start with light taps to create a groove in the rock. Gradually increase the force of your strikes as the groove deepens.
Step 5: Finishing touches
Once the groove is deep enough, you can begin to chisel more forcefully. Continue chiseling along the split line, gradually moving the chisel along the rock. Be patient and take breaks when needed. Eventually, the rock will split apart along the desired line.
Remember to always wear protective gear and exercise caution when chiseling rocks. The process can be challenging and may require practice to master. However, with determination and the right tools, you can successfully chisel a rock in half and achieve your desired outcome.
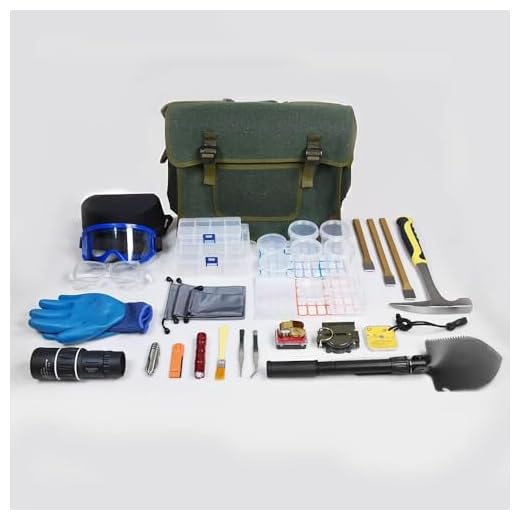
Essential Tools for Rock Chiseling
Chiseling rocks is a delicate process that requires the right tools to achieve the desired results. Whether you are a professional geologist or a hobbyist, having a set of essential tools will make your rock chiseling projects much easier and more successful.
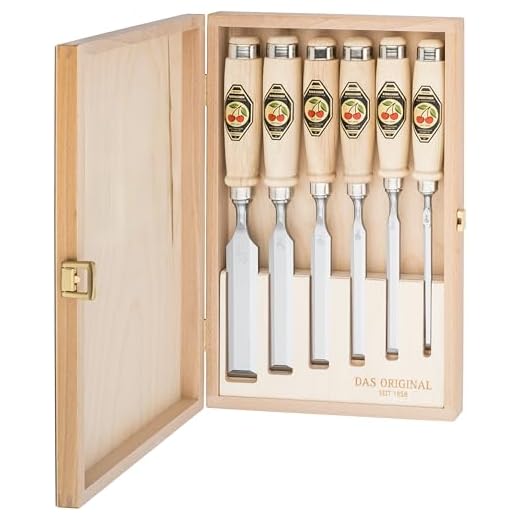
1. Chisels
The most crucial tool for rock chiseling is, of course, the chisel itself. There are various types of chisels available in the market specifically designed for different types of rocks and chiseling techniques. Flat chisels are great for general purposes, while pointed chisels are more suitable for intricate details. It is recommended to have a set of chisels with different sizes and shapes to accommodate various chiseling needs.
2. Safety Gear
Working with rocks can be dangerous, so it is essential to prioritize safety. Protective goggles will shield your eyes from rock chips and debris, ensuring no injuries occur. Additionally, heavy-duty gloves are crucial to protect your hands from cuts or abrasions while chiseling. Wearing sturdy boots with slip-resistant soles is also recommended to prevent unwanted accidents.
3. Hammer
Another essential tool for rock chiseling is a heavy hammer. The hammer should have a solid steel head and a non-slip grip for optimum control. It is used in conjunction with the chisel to deliver force and break down the rock. A hammer with a weight of around 1-3 pounds is generally suitable for most rock chiseling tasks.
4. Brush
A brush is a handy tool for rock chiseling projects. It helps in removing dust and debris from the rock’s surface, allowing better visibility and precision. A soft-bristled brush is recommended to avoid damaging the rock’s texture or structure.
5. Safety Goggles
Working with rocks can produce flying fragments and chips, which can be hazardous to the eyes. Safety goggles provide a protective barrier, shielding your eyes and ensuring a safe chiseling experience. It is important to choose goggles that fit properly and offer impact resistance.
6. Workbench or Table
A sturdy workbench or table is essential for stability and support during the chiseling process. It allows you to have a controlled working surface and reduces the risk of accidents. Ensure that the workbench or table is at a comfortable height and has a non-slip surface to prevent any movement during chiseling.
7. Dust Mask
When chiseling rocks, it is common for dust to be released into the air. Inhaling rock dust can be harmful to your respiratory system, so wearing a dust mask is highly recommended. Look for a mask that offers protection against fine particles and fits snugly on your face for maximum effectiveness.
| Tool | Function |
|---|---|
| Chisels | To break, shape, and sculpt rocks |
| Safety Gear | To protect eyes, hands, and feet |
| Hammer | To deliver force and break down rocks |
| Brush | To remove dust and debris from the rock’s surface |
| Safety Goggles | To protect eyes from flying fragments |
| Workbench or Table | Stability and support during chiseling |
| Dust Mask | To protect against inhaling harmful rock dust |
Find the Right Chisel
When it comes to chiseling a rock in half, having the right tools is crucial. The chisel you choose can make a big difference in the success of your project. Here are some tips to help you find the right chisel:
1. Consider the rock type: Different rocks have different hardness levels, so it’s important to choose a chisel that matches the hardness of the rock. For softer rocks, a flat chisel with a wider blade may be sufficient. However, for harder rocks, you may need a pointed or a narrower chisel to get the job done.
2. Look for a quality chisel: Investing in a high-quality chisel can make your work much easier and ensure better results. Look for a chisel made of durable materials that can withstand the pressure and force required for rock chiseling. A strong steel chisel with a comfortable handle is usually a good choice.
3. Consider the size: The size of the chisel blade will depend on the size of the rock you want to split. For smaller rocks, a narrower blade can provide more precision, while for larger rocks, a wider blade can help remove more material at once.
4. Check for sharpness: A sharp chisel is essential for effective rock chiseling. Make sure the chisel you choose has a sharp edge that is ready to cut through the rock. If necessary, you can sharpen the chisel before starting your project.
5. Test it out: Before committing to a particular chisel, it’s a good idea to test it out on a small piece of rock. This will give you a better idea of how well it works and if it’s suitable for your specific needs.
By taking the time to find the right chisel, you’ll increase your chances of successfully chiseling a rock in half. Remember to always wear protective gear, such as safety goggles and gloves, and take breaks when needed to avoid fatigue. Happy chiseling!
Invest in Safety Gear
When chiseling a rock, it is important to prioritize safety. Investing in proper safety gear can greatly reduce the risk of accidents and injuries. Here are some important safety items to consider:

1. Safety goggles
Protecting your eyes should be a top priority when chiseling rocks. Safety goggles provide a shield against flying debris and ensure that your eyes are safe from any potential harm.
2. Protective gloves
Wearing protective gloves will help prevent injuries to your hands while using a chisel. They provide a barrier between your skin and the sharp edges of the rock, reducing the risk of cuts and abrasions.
Additionally, investing in a good quality pair of gloves will provide better grip and control, allowing you to handle the chisel more effectively.
3. Dust mask
Chiseling rocks can create a lot of dust, which can be harmful to your respiratory system if inhaled. Wearing a dust mask or a respirator will help filter out dust particles and protect your lungs.
Remember:
Always prioritize safety and wear your safety gear when chiseling rocks. Accidents can happen even to the most experienced individuals, so it’s important to take precautions to minimize the risk of harm. Don’t compromise your safety and invest in proper safety gear.

Prepare the Rock Surface
Before you can start chiseling a rock in half, it is important to first prepare the surface of the rock. This step is crucial in ensuring a clean and accurate split.
1. Clean the Rock: Begin by thoroughly cleaning the rock. Remove any dirt, debris, or loose particles using a stiff brush or a cloth. This will help provide a smooth surface for chiseling.
2. Mark the Split Line: Use a pencil or a marker to carefully mark the line where you want to split the rock. Measure and mark the line on both ends of the rock to ensure accuracy.
3. Score the Split Line: With the help of a chisel or a rock hammer, gently score along the marked line. Avoid applying too much pressure as this may cause the rock to crack or break unevenly.
4. Create a Groove: Once the split line is scored, use the chisel or rock hammer to create a shallow groove along the line. This will provide a channel for the chisel to follow when splitting the rock.
5. Secure the Rock: To prevent the rock from moving while you chisel, it is important to securely fasten it in place. You can use clamps or wedges to hold the rock steady.
By following these steps to prepare the rock surface, you will be ready to begin chiseling and achieve a clean, straight split.
Mastering the Chiseling Technique
Chiseling a rock in half requires a combination of skill, precision, and patience. With the right tools and techniques, you can successfully achieve a clean and controlled split. Here, we will guide you through the process to help you master the chiseling technique.

Tools and Materials
Before you begin, gather the following tools and materials:
| Chisel | A chisel with a sharp and durable tip is essential for chiseling through the rock. |
| Hammer | Choose a hammer that is comfortable to grip and has enough weight to provide sufficient force. |
| Safety Goggles | Protect your eyes from flying debris by wearing safety goggles throughout the process. |
| Gloves | Wear gloves to protect your hands from potential injuries and to maintain a firm grip on the tools. |
Step-by-Step Procedure
Follow these steps to chisel a rock in half:
- Inspect the Rock: Carefully examine the rock to identify any existing fractures or weak spots that may affect the splitting process.
- Mark a Line: Use a pencil or chalk to mark the desired splitting line on the surface of the rock.
- Safety Measures: Put on your safety goggles and gloves before proceeding.
- Starting Point: Position the chisel on the marked line at a slight angle. Tap the chisel lightly with the hammer to create a small groove.
- Chiseling Technique: Hold the chisel at a 45-degree angle and strike it with the hammer. Move along the marked line, repeating the process to deepen the groove.
- Control and Accuracy: Maintain a steady and controlled hand while chiseling to ensure a straight and even split.
- Finishing Touches: Once the groove is deep enough, apply more force to the chisel until the rock splits in half.
Remember to take breaks as needed and work in a well-ventilated area. Mastering the chiseling technique requires practice and patience, so keep refining your skills with each attempt. Happy chiseling!


