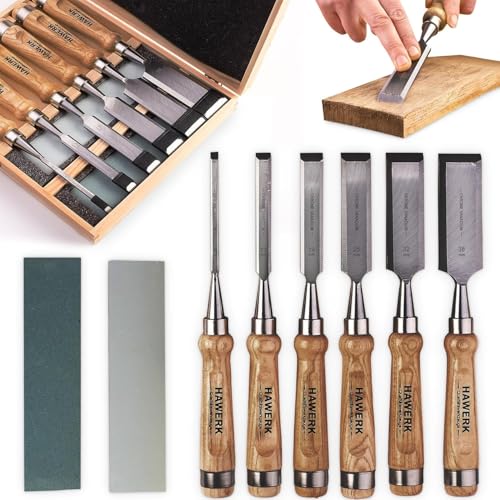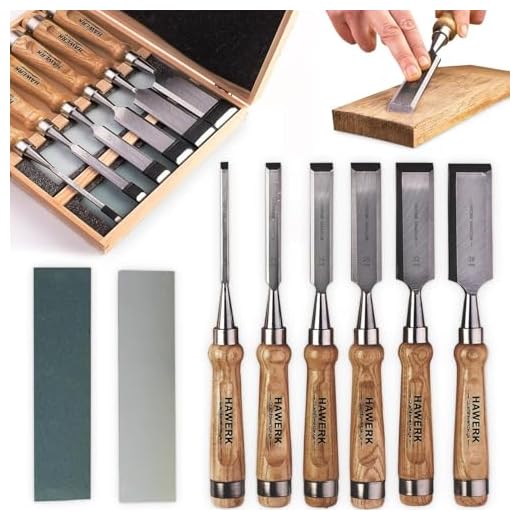


If you’re looking to install a new wall socket, you may find that you need to chisel a hole in your wall to accommodate it. Chiseling a wall socket can seem like a daunting task, but with the right tools and techniques, you can get the job done quickly and efficiently.
Before you begin, it’s important to gather all the necessary tools. You’ll need a chisel, a hammer, a pencil, a spirit level, and a dust mask to protect yourself from the debris. Additionally, make sure you have an understanding of the wall’s construction and the location of any electrical wires or pipes behind it.
Start by marking the area where you want to install the wall socket with a pencil. Use a spirit level to ensure that your markings are straight and aligned. This will help you achieve a professional-looking finish. Once you’re satisfied with the placement, put on your dust mask and prepare to chisel.
Hold the chisel firmly in one hand and use the hammer to gently tap it along the marked lines. Start with small, controlled taps and gradually increase the force until the chisel begins to penetrate the wall. Take your time and work slowly to avoid any unnecessary damage to the surrounding area.
As you continue to chisel, periodically check the depth of the hole with the wall socket. You want to make sure that the socket fits snugly into the hole, so adjust your chiseling as necessary. Once you’ve achieved the desired depth, clean up any loose debris and dust from the hole.
Chiseling a wall socket may require some patience and practice, but with the right tools and techniques, you can achieve a professional result. Remember to work slowly and steadily, and always prioritize safety by wearing a dust mask and being aware of any hidden hazards behind the wall. With time and practice, you’ll be able to confidently chisel a wall socket for any electrical installation project.
The Importance of Chiseling Wall Sockets Correctly
Chiseling wall sockets correctly is an essential step in the process of home improvement and renovation. Wall sockets, also known as electrical outlets, are an integral part of every home’s electrical system. They provide the necessary power for various appliances and devices, making them indispensable in our daily lives.
When it comes to chiseling wall sockets, precision and accuracy are paramount. A poorly chiseled wall socket can pose serious safety risks and result in a shoddy finish. It is crucial to follow the correct procedures and techniques to ensure a secure and professional installation.
One of the primary reasons why chiseling wall sockets correctly is vital is to prevent electrical hazards. A poorly chiseled socket can lead to loose connections, which can cause electrical arcing, overheating, and even electrical fires. By chiseling the socket correctly, you guarantee a tight and secure fit, minimizing the risk of electrical accidents.
In addition to safety concerns, chiseling wall sockets correctly also ensures a neat and aesthetically pleasing finish. A poorly chiseled socket can result in uneven edges and gaps, which can be an eyesore in an otherwise well-finished wall. By taking the time to chisel the socket carefully and precisely, you can achieve a seamless integration that enhances the overall appearance of the room.
Properly chiseling wall sockets also makes it easier to install and remove the electrical devices connected to them. A socket that is too shallow or uneven can make it challenging to plug in cords or insert the prongs of a plug. On the other hand, a socket that is too deep can make it difficult to remove the plug when necessary. By chiseling the socket correctly, you ensure that electrical devices can be easily and securely inserted and removed, improving convenience and functionality.
In conclusion, chiseling wall sockets correctly is crucial for both safety and aesthetic reasons. By following the correct procedures and techniques, you can eliminate the risk of electrical hazards, achieve a neat finish, and improve convenience. Whether you are a professional electrician or a DIY enthusiast, it is essential to pay attention to this crucial step in the installation process.
Section 1: Preparation
Before chiseling a wall socket, it is important to make the necessary preparations to ensure the task is carried out smoothly and safely. Follow these steps to properly prepare for chiseling a wall socket:
| 1. | Gather the necessary tools: | A chisel, preferably a sharp and sturdy one. |
| 2. | Ensure the power supply is turned off: | Before starting any electrical work, always turn off the power supply to the area where the socket is located. This will prevent any accidents or electrocution. |
| 3. | Remove any furniture or objects: | Clear the area around the wall socket of any furniture, decorations, or other objects that may obstruct your work. This will provide you with a clear and safe working space. |
| 4. | Protect the surrounding area: | Use plastic sheets or drop cloths to cover and protect the floor, nearby walls, and any adjacent surfaces from dust or debris that may be generated during the chiseling process. |
| 5. | Wear appropriate safety gear: | Put on safety goggles and gloves to protect your eyes and hands from any potential injury. It is also recommended to wear a dust mask to avoid inhaling any dust particles. |
By adequately preparing for the task, you can ensure a safer and more efficient chiseling process. Take the time to gather the right tools, turn off the power supply, clear the area, protect the surroundings, and wear the necessary safety gear. Once you have completed these preparations, you will be ready to proceed with chiseling the wall socket.
Gathering the necessary tools
Before you begin chiseling a wall socket, it is important to gather all the necessary tools to ensure a smooth and successful process. Here is a list of tools you will need:
- Chisel
- Hammer
- Protective eyewear
- Dust mask
- Tape measure
- Pencil or marker
- Level
- Electrical tester
Make sure that you have all these tools readily available before you start the chiseling process. Having the right tools will not only make the job easier but also ensure your safety.
Measuring and marking the wall socket
Before you start chiseling the wall socket, it’s important to measure and mark its exact location. This will ensure that your socket is installed in the correct position and at the appropriate height.
Here are the steps to follow:
- Measure the height: Use a tape measure to determine the height at which you want your wall socket. This will depend on your personal preference and the height of other electrical outlets in the room. Once you have decided on the height, make a small mark on the wall using a pencil.
- Measure the width: To determine the width of the wall socket, start by measuring the width of the faceplate. This will vary depending on the type of socket you are installing. Once you have the measurement, divide it in half to find the center point. Make a vertical mark on the wall at this center point.
- Find the depth: Next, you need to determine how deep the socket should be chiseled into the wall. This can be done by measuring the depth of the electrical box that will house the socket. Mark the depth on the side of the vertical mark you made in the previous step.
- Mark the outline: Finally, use a level to draw a horizontal line connecting the top and bottom marks you made. This will serve as a guide for the top edge of your chiseled area. Then, draw vertical lines connecting the top and bottom marks with the side marks you made. This will create the outline of the socket that you will chisel.
By measuring and marking the wall socket accurately, you’ll ensure that your installation is precise and professional-looking. Taking the time to do this step properly will help you avoid any mistakes or regrets later on.
Section 2: Chiseling
Chiseling is a crucial step in the process of installing a wall socket. It involves creating a recess in the wall where the socket will be inserted.
Before you start chiseling, it’s essential to turn off the power supply to avoid any electrical hazards. Locate the circuit breaker that controls the electricity in the room where you are working and switch it off.
Once the power is off, you can proceed with chiseling. Start by using a pencil and a spirit level to mark the outline of the socket on the wall. This will serve as a guide for your chiseling.
Next, carefully position the chisel along the marked outline, holding it at a slight angle towards the wall. Use a hammer to tap the chisel gently, creating a small groove. Continue chiseling along the marked outline, gradually increasing the depth of the groove.
Be patient and take your time to ensure that the groove is deep enough to accommodate the socket. Avoid applying excessive force, as this may lead to damaging the wall or causing cracks. If necessary, make multiple passes with the chisel, gradually deepening the groove.
Working with corners
When you reach the corners of the marked outline, it’s important to chisel carefully. Begin by creating a small groove near the corner, and then slowly work towards the corner from both directions. This helps prevent any unnecessary damage to the wall.
Once you have chiseled the entire outline, use the chisel to remove any excess plaster or debris from the groove. This will ensure a clean and precise fit for the wall socket.
Final checks
After chiseling, use a spirit level to check the depth and alignment of the groove. If necessary, make any adjustments before proceeding with the installation of the wall socket.
Remember to clean up any dust or debris from the chiseling process before installing the socket. This will ensure a smooth and secure fit for the socket in the wall.
With the chiseling complete, you are now ready to move on to the next step of installing the wall socket.
Using the chisel to create an initial groove
Once you have marked the area where you want to install the wall socket, it’s time to start chiseling. The first step is to use the chisel to create an initial groove in the wall. This groove will guide the chisel as you continue to chip away at the wall.
Start by positioning the chisel at one end of the marked area. Hold the chisel with both hands, one at the top of the handle and the other towards the bottom. Apply gentle pressure and tap the top of the chisel using a hammer. Make sure to keep the chisel perpendicular to the wall for better control.
Continue chiseling along the marked area, creating a shallow groove. Be patient and take your time. It’s important not to rush this step, as it will determine the accuracy of the socket recess.
|
|
|
As you progress, periodically check the depth of the groove with a ruler or depth gauge. Aim for a depth of around 5-10mm, depending on the thickness of the wall socket.
Once you have created the initial groove along the entire marked area, you can proceed to chisel out the remaining material and shape the recess for the wall socket. This initial groove will provide a boundary for your chisel, making the subsequent steps easier and more precise.


