


Chisels are versatile tools that can be used for a variety of woodworking tasks, including cutting slabs. Whether you are a professional woodworker or a DIY enthusiast, it is important to know how to properly cut slabs with chisels. This skill allows you to create custom-sized slabs for your woodworking projects and gives you the freedom to work with different materials and thicknesses.
Before you begin cutting slabs with chisels, it is important to gather the necessary tools and materials. You will need a sharp chisel, a mallet, a straightedge or ruler, and the slab material you wish to cut. Good lighting and a stable work surface are also essential for this task.
To start, lay the slab material on the work surface and use a straightedge or ruler to mark the desired cutting line. Make sure the line is straight and accurate to ensure clean cuts. This can be done by measuring and marking the line with a pencil or making a small incision to guide the chisel.
Next, hold the chisel at a slight angle with the beveled edge facing towards the waste side of the slab. Position the chisel along the marked cutting line and tap the end of the chisel with a mallet to create a small groove or notch in the material. This initial groove will act as a guide for the chisel as you continue cutting.
Now, starting from one end of the slab, position the chisel in the groove and use the mallet to gently tap the chisel, gradually increasing the force as you progress. Be patient and take your time to ensure that the cuts are straight and smooth.
Continue cutting along the marked line, periodically checking your progress and adjusting as needed. It is important to maintain a steady hand and apply even pressure while cutting. Take breaks if necessary to avoid fatigue and to ensure accuracy.
Once you have completed the cutting process, carefully examine the slabs for any uneven areas or rough edges. Use a chisel or sandpaper to smooth out any imperfections. Sanding the cut edges of the slab will also give it a polished and finished look.
Remember, cutting slabs with chisels requires practice and patience. Start with smaller, less valuable pieces of material until you feel comfortable and confident with the process. With time and experience, you will be able to cut slabs with precision and create beautiful custom pieces for your woodworking projects.
So, if you are looking to add a personal touch to your woodworking projects or need custom-sized slabs, consider using chisels to make the cuts. With the right tools, materials, and technique, you will be able to create professional-looking pieces that are tailored to your specific needs and preferences.

The Basics Of Cutting Slabs With Chisels
When it comes to cutting slabs with chisels, there are a few basic techniques that you need to know. Whether you are a beginner or an experienced stonecutter, these techniques will help you achieve clean and precise cuts.
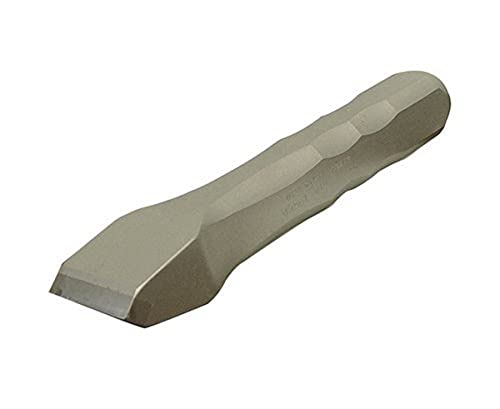
Firstly, it’s important to choose the right chisel for the job. A chisel with a sharp and sturdy blade is essential for cutting through tough slabs. Make sure to select a chisel that is appropriate for the type and thickness of the slab you are working with.
Before you begin cutting, it’s important to mark the desired cut line on the slab. Use a pencil or a piece of chalk to make a clear and visible line that you can follow. This will help you achieve accurate cuts and minimize mistakes.
Next, you will need to secure the slab in place. It’s best to use clamps or a workbench with a vice to hold the slab steady. This will prevent it from moving or shifting while you are cutting, ensuring that you have better control over the chisel.
When starting to cut, position the chisel along the marked cut line. Hold the chisel firmly with both hands, and use a mallet or a hammer to strike the top of the chisel. Apply controlled and consistent force to cut through the slab gradually.
It’s important to use a rhythmic motion while cutting. Strike the chisel with the mallet in a steady and controlled manner, moving along the marked cut line. Avoid applying excessive force or striking too hard, as this can cause the chisel to slip or damage the slab.
As you progress with the cut, you may need to change your position or angle to ensure smooth and even cutting. Adjust the angle and direction of the chisel based on the cut line and the shape of the slab. Take your time and work carefully to achieve the desired result.
| Key Points: |
|---|
| – Choose the right chisel for the job
– Mark the desired cut line on the slab – Secure the slab in place to prevent movement – Position the chisel along the marked cut line – Use a rhythmic motion and controlled force to cut gradually Trending Now
Versatile Portable Chainsaw Mill Kit Customizable sizes for various cutting needs
This chainsaw mill allows for adjustable cutting of logs between 14 to 36 inches, making it perfect for lumber production anywhere. Its unique design enhances portability and ease of use for woodworkers.
– Adjust the angle and direction of the chisel as needed – Take your time and work carefully |
By following these basic techniques, you can effectively cut slabs with chisels. Remember to always prioritize safety and wear protective gear, such as goggles and gloves. With practice and patience, you will be able to master the art of cutting slabs with chisels and create beautiful stone works.
Preparing The Slab For Cutting
Before you begin cutting slabs with chisels, it is important to properly prepare the slab to ensure clean and accurate cuts. Here are the steps you need to follow:
Step 1: Choose the Right Slab
Select a slab that is suitable for the project you have in mind. Consider the size, thickness, and quality of the slab. Make sure it is free from any defects or cracks that could affect the cutting process.
Step 2: Clean the Slab
Thoroughly clean the slab to remove any dirt, dust, or debris that may interfere with the cutting process. Use a brush or a damp cloth to wipe the surface clean. If there are any stubborn stains or marks, you can use a mild detergent or soap and water to clean them.
Step 3: Mark the Cut Line
Using a pencil or a marker, mark the cut line on the slab. This will serve as your guide while cutting. Measure and mark the desired dimensions of the slab carefully to ensure accurate cutting.
Step 4: Secure the Slab
Properly secure the slab in place before you start cutting. This will prevent any movement or slippage during the cutting process. You can use clamps or a vice to hold the slab firmly in place.
Step 5: Use a Guide
Using a guide can help you achieve straight and precise cuts. You can use a straight edge, a ruler, or a piece of wood as a guide. Place the guide along the marked cut line and hold it firmly in place.
Step 6: Start Cutting
With the slab secured and the guide in place, you can now begin cutting. Use a chisel with a sharp edge and start making controlled cuts along the marked cut line. Apply steady pressure and work slowly to ensure clean and accurate cuts.
Step 7: Finishing Touches
Once the desired cut has been made, inspect the slab for any rough edges or imperfections. Use sandpaper or a file to smooth out any rough areas and to achieve the desired finish.
Following these steps will help you properly prepare the slab for cutting and ensure that you achieve clean and accurate cuts with your chisels. Remember to work safely and wear appropriate protective gear throughout the cutting process.
Selecting The Right Chisel
When it comes to cutting slabs with chisels, selecting the right chisel is crucial for achieving accurate and clean cuts. Here are some key factors to consider when choosing the right chisel:
- Chisel Type: There are various types of chisels available, including firmer chisels, mortise chisels, and bevel edge chisels. Each type has its own specific purpose and features. Firmer chisels are ideal for general-purpose woodworking tasks, while mortise chisels are specifically designed for making square holes. Bevel edge chisels are versatile and commonly used for both woodworking and cutting slabs.
- Blade Material: The blade material of the chisel determines its durability and sharpness retention. High-carbon steel blades are commonly preferred for cutting slabs due to their excellent edge retention and ability to withstand heavy use. However, they may require more frequent sharpening compared to blades made from other materials.
- Blade Width: The width of the chisel blade should be selected based on the intended slab cutting task. For precision cuts and intricate details, a narrower blade width is recommended. On the other hand, wider blades are more suitable for removing larger chunks of material.
- Handle Design: The handle of the chisel plays a crucial role in providing comfort and control during use. Look for chisels with ergonomic handles that fit comfortably in your hand and provide a secure grip. Handles made from high-quality materials like hardwood or composite materials are preferred as they offer superior durability.
- Quality and Price: Investing in a high-quality chisel is essential for achieving accurate and clean cuts. Although they may be more expensive, high-quality chisels are built to last and offer better performance. It is recommended to choose a chisel from a reputable brand known for its craftsmanship and durability.
By considering the factors mentioned above, you can select the right chisel that suits your specific slab cutting needs. Remember to regularly maintain and sharpen your chisel to ensure optimal performance and longevity. Happy cutting!
Marking The Cut Line
Before cutting slabs with chisels, it is important to mark the cut line accurately. This will ensure that you achieve the desired shape and size for your slabs. Here are some steps to follow when marking the cut line:
| Step 1 | Measure and mark the desired dimensions on the slab using a straightedge and a pencil. Make sure to use a reliable measuring tool for precise measurements. |
| Step 2 | Double-check your measurements to ensure accuracy. Measure twice and cut once to avoid any mistakes. |
| Step 3 | Use a straightedge to draw a straight line connecting the marked points. This line will be your cut line. |
| Step 4 | Make sure the cut line is clearly visible on the slab. You can darken the line if needed, using a marker or a darker pencil. |
| Step 5 | Double-check the marking to ensure the cut line is straight and aligned with your desired dimensions. |
By following these steps, you will have a clearly marked cut line to guide you when cutting slabs with chisels. Remember, accuracy in marking the cut line is crucial for achieving the desired outcome.
Cutting The Slab With Precision
When it comes to cutting slabs with chisels, precision is key. Here are some important steps to follow for achieving accurate and clean cuts:
1. Marking the slab: Before you start cutting, it’s crucial to mark the slab with precise measurements and guidelines. Use a ruler or a square to ensure straight lines and accurate angles. This will help you maintain consistency throughout the cutting process.
2. Choosing the right chisel: Selecting the appropriate chisel for the task is essential. Different chisels have different blade widths and shapes, so choose one that suits the width and depth of the cut you need to make. A narrower chisel is more suitable for intricate cuts, while a wider chisel is better for removing larger portions of the slab.
3. Setting the chisel: Prepare the chisel by sharpening it properly. A sharp chisel will make your cuts more precise and reduce the risk of splintering or chipping the slab. Make sure the chisel is securely set in a wooden handle or mallet, which will provide better control and force during the cutting process.
4. Starting the cut: Begin the cut by positioning the chisel at the marked starting point. Gently tap the chisel with a mallet to create a shallow groove. This initial groove will serve as a guide for further cuts and prevent the chisel from slipping off the slab during the process.
5. Working along the marked lines: Continue cutting along the marked lines, using firm and controlled strikes with the mallet. Take your time to ensure each strike is accurate and doesn’t veer off the marked path. Work slowly and methodically, making small cuts at a time to avoid removing too much material at once.
6. Finishing touches: Once the initial cuts are complete, go back and make any necessary adjustments or refinements. Use smaller chisels or carving tools for detailed and intricate work. Smooth out any rough edges or uneven surfaces by carefully removing excess material. Double-check the measurements and ensure the slab meets your desired specifications.
7. Safety precautions: Always prioritize safety when cutting slabs with chisels. Wear eye protection to shield your eyes from flying debris. Keep your hands and fingers away from the cutting area to prevent accidents. Take regular breaks to prevent fatigue and maintain focus.
Following these steps will help you achieve precise and clean cuts when working with slabs and chisels. Remember to practice proper technique and take your time to ensure accuracy. With practice and patience, you’ll be able to master the art of cutting slabs with chisels.
Finishing Touches And Safety Measures
Once you have cut the slab with chisels, there are a few finishing touches you can add to enhance the look and durability of the cut. Here are some steps you can follow:
1. Smooth the edges: Use sandpaper to smooth out any rough edges on the slab. This will give it a more polished and professional look.
2. Seal the surface: Applying a sealant or finish to the cut slab will protect it from moisture, stains, and damage. Choose a sealant that is appropriate for the type of material you have cut.
3. Apply a wax coating: For an added layer of protection and shine, you can apply a wax coating to the cut slab. This will make it easier to clean and maintain in the long run.
4. Proper tool storage: When you are finished using your chisels, make sure to store them properly. Keep them in a sturdy toolbox or on a tool rack to prevent accidents and ensure they stay in good condition.
5. Wear safety gear: When working with chisels, it is essential to wear the appropriate safety gear. This includes safety glasses to protect your eyes from flying debris, gloves to protect your hands, and a dust mask to protect your lungs from airborne particles.
6. Work in a well-ventilated area: Cutting slabs with chisels can create a lot of dust and debris. Make sure to work in a well-ventilated area or use a dust extraction system to keep the air clean and prevent respiratory issues.
By following these finishing touches and safety measures, you can ensure that your cut slabs not only look great but also stand the test of time.


