Saddlers stitch, also known as saddle stitch, is a popular technique used in leatherworking to create strong and durable seams. This type of stitch is commonly used in the construction of saddles, bags, belts, and other leather goods. It involves using a stitch chisel, which is a specialized tool with multiple prongs or teeth, to create evenly spaced holes along the edges of the leather pieces. The thread is then passed through these holes, creating a double row of stitches that are stronger and more secure than a single row of stitches.
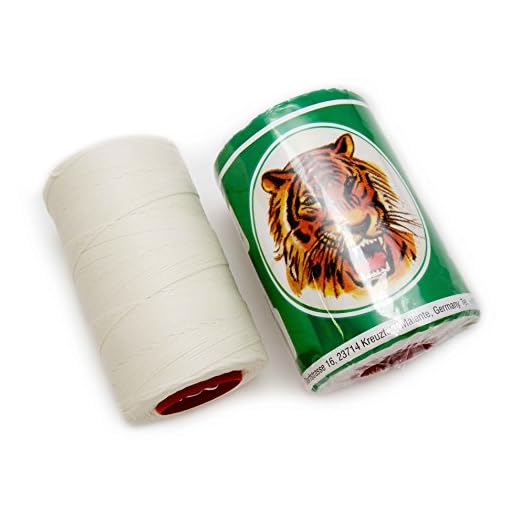
To do saddlers stitch with a stitch chisel, you will need a few basic tools and materials. These include a stitch chisel, a mallet or a hammer, waxed thread, and a needle. It’s important to choose the right size of stitch chisel and needle for your project to ensure that the stitches are evenly spaced and the thread fits through the holes easily.
Start by marking the spacing for your stitches along the edges of the leather pieces. You can use a ruler or a stitching groover to create evenly spaced lines. Then, place the stitch chisel on the marked line and tap it gently with a mallet or a hammer to create the holes. Make sure to keep the chisel perpendicular to the leather and apply enough pressure to create clean and even holes. Repeat this process along the entire length of the seam.

Once all the holes are made, thread your needle with waxed thread and start stitching. Begin by inserting the needle through the first hole from the front side of the leather, leaving a short tail of thread on the back side. Pull the needle through the hole until the tail is secured. Then, move to the corresponding hole on the opposite side and insert the needle from the back side of the leather. Pull the needle through, leaving a loop of thread on the front side.
To create the actual stitch, pass the needle through the loop of thread from the previous stitch and pull it tight. Continue this process of passing the needle through the loop of thread from the previous stitch, alternating sides, until you reach the end of the seam. Make sure to pull the thread tight after each stitch to create a tight and secure seam. Finally, tie off the thread on the back side of the leather and trim any excess.
With practice, you’ll be able to master the art of saddlers stitch with a stitch chisel and create professional-looking leather goods that are both functional and beautiful. Whether you’re a beginner or an experienced leatherworker, this technique will surely enhance the quality and durability of your projects.
How to Perform Saddlers Stitch Technique
The saddlers stitch technique is a traditional method of hand stitching leather goods, commonly used by saddlers and leatherworkers. This stitch provides a strong and decorative finish to leather products, such as bags, wallets, and belts. Here’s a step-by-step guide on how to perform the saddlers stitch technique:
Materials Needed:
- Leather piece(s)
- Stitch chisel
- Awl
- Waxed thread
- Needle
- Ruler
- Clips or clamps
- Hammer or mallet
Step 1: Prepare the Leather
Start by cutting and preparing the pieces of leather you want to stitch together. Make sure the edges are smooth and even, as this will ensure a tidy finish. You can use clips or clamps to hold the pieces together if needed.
Step 2: Mark the Stitching Line
Using a ruler or edge guide, mark the stitching line on your leather pieces. This will serve as a guide for your stitches and ensure that they are evenly spaced. Make small marks at intervals along the line.
Step 3: Create Stitching Holes
Next, use the stitch chisel to create evenly spaced stitching holes along the marked line. Place the chisel perpendicular to the leather and use a hammer or mallet to strike the chisel, creating a hole in the leather. Repeat this process for all the marked intervals.
Step 4: Thread the Needle
Thread a needle with waxed thread, making sure to leave a long tail at the end for tying later. The length of thread needed will depend on the size of your project. Double up the thread for added strength.
Step 5: Start Stitching
Insert the threaded needle through the first stitching hole from the back side of the leather, leaving the tail at the back. Pull the thread through, leaving a short tail at the front. This will secure the thread in place.
Step 6: Stitching Technique
For the saddlers stitch, the needle will go through two adjacent stitching holes at a time. Insert the needle from the front side of the leather through the second hole, then insert it from the back side through the first hole. Continue stitching in this manner along the entire length of the stitching line.
Step 7: Tying off the Thread
When you reach the end of the stitching line, tie off the thread by making a double knot at the back of the leather. Trim off any excess thread.
That’s it! You have successfully performed the saddlers stitch technique. Remember to practice and experiment with different thread colors and stitch spacing to achieve your desired results.
What You Need to Know About Saddlers Stitch With Stitch Chisel
Saddlers stitch, also known as saddle stitch, is a traditional hand stitching technique used in leatherwork. It is often used to join leather pieces together, such as for making bags, wallets, belts, and other leather accessories. The stitch chisel is an essential tool used to create the holes needed for the stitching.
Here are some key things you need to know about saddlers stitch with a stitch chisel:
1. Purpose: The purpose of saddlers stitch is to create a strong and durable stitch that can withstand the test of time. The stitch chisel ensures that the holes for the stitch are evenly spaced and aligned, resulting in a neat and professional finish.
2. Technique: To perform a saddlers stitch, you will need a stitch chisel with multiple prongs or teeth. The prongs create evenly spaced holes along the edge of the leather pieces to be stitched. The leather is then stitched using a waxed thread and two needles, with each needle passing through one hole at a time.
3. Advantages: Saddlers stitch with a stitch chisel offers several advantages. It creates a stronger stitch compared to machine stitching, as it penetrates the leather fully without leaving any weak spots. The chisel helps maintain consistent stitch spacing, resulting in a more professional and aesthetically pleasing finish.
4. Types of Stitch Chisels: Stitch chisels come in various sizes and configurations, depending on the desired stitch spacing and size. Common types include diamond chisels, prong chisels, and stitching irons.
5. Materials and Maintenance: Stitch chisels are typically made of high-quality steel or brass. It is important to keep them clean and dry after each use to prevent rusting. Regular sharpening and maintenance will ensure that the chisel remains sharp and efficient.
6. Learning and Practice: Saddlers stitch with a stitch chisel requires some practice to perfect. It is advisable to start with simple projects and gradually progress to more intricate ones. There are many online tutorials and resources available to help beginners learn and improve their saddlers stitching skills.
In conclusion, saddlers stitch with a stitch chisel is a valuable technique for anyone working with leather. By understanding the purpose, technique, advantages, types of stitch chisels, and proper maintenance, you can create high-quality and long-lasting leather projects.
Step-by-Step Guide to Saddlers Stitch Technique
Step 1: Prepare the Leather
Start by selecting a suitable piece of leather for your project. Make sure it is clean, smooth, and evenly tanned. If necessary, trim the edges to ensure they are straight and even.
Step 2: Mark the Stitching Line
Using a ruler or stitching groover, mark the desired stitching line on both sides of the leather. This will serve as a guide for the chisel and ensure even spacing between the stitches.
Step 3: Position the Chisel
Choose the appropriate size of stitch chisel for your project. Align the chisel with the marked stitching line and hold it firmly in place.
Step 4: Strike the Chisel
Using a mallet or hammer, strike the chisel firmly and evenly with enough force to create clean and even holes. Be careful not to strike too hard, as it can damage the leather or the chisel.
Step 5: Repeat the Process
Continue this process along the entire stitching line, making sure to align the chisel properly each time. Take your time and maintain a steady rhythm to ensure consistent results.
Step 6: Thread the Needle
Select a suitable thread for your project and cut a length long enough for the entire stitching line. Thread one end of the thread through a needle and tie a knot at the other end to prevent it from coming loose.
Step 7: Start Stitching
Begin stitching by inserting the needle through the first hole from the back side of the leather. Pull the thread all the way through until the knot catches on the back side of the leather.
Step 8: Create the Stitch
Insert the needle through the next hole on the same side of the leather, creating a loop of thread on the front side. Pull the thread tight, but not too tight, to create a secure stitch.
Step 9: Repeat the Stitch
Continue stitching by repeating step 8, moving from hole to hole along the stitching line. Make sure each stitch is pulled tight and evenly spaced to ensure a neat and professional finish.
Step 10: Tie off the Thread
Once you reach the end of the stitching line, tie off the thread by creating a knot on the back side of the leather. Trim any excess thread, and optionally apply a small amount of leather glue to secure the knot.
Remember to practice this technique on scrap pieces of leather before attempting it on your actual project. With time and practice, you will be able to master the saddlers stitch technique and create beautiful, durable stitching on your leather projects.
Tips for Achieving Great Results
When using a stitch chisel for saddlers stitch, there are some tips that can help you achieve great results:
- Choose the right leather: Use a high-quality leather that is suitable for saddle stitching. Look for leather that is durable and has a consistent thickness.
- Prepare the leather: Before starting the stitching process, make sure to prepare the leather properly. You can use leather conditioner or a slicker to soften the leather and make it more pliable.
- Mark the stitch line: Use a ruler and a leather marker to mark the stitch line on the leather. This will help you maintain a straight and even stitch line.
- Use the right thread: Use a waxed thread that is suitable for saddle stitching. The wax helps the thread glide through the leather smoothly and adds strength to the stitches.
- Keep the stitches consistent: When stitching, try to keep the stitches consistent in size and tension. This will give your finished project a professional look.
- Practice proper technique: Practice your stitching technique before starting on your actual project. This will help you get comfortable with the stitch chisel and ensure that you achieve clean and precise stitches.
- Take your time: Stitching with a stitch chisel requires patience and precision. Take your time and work slowly to ensure that each stitch is placed accurately.
By following these tips, you can achieve great results when using a stitch chisel for saddlers stitch. Remember to practice and be patient, and soon you’ll be creating beautiful stitched projects.
Common Mistakes to Avoid When Performing Saddlers Stitch
Performing a saddlers stitch requires precision and technique to achieve professional results. However, beginners often make some common mistakes that can affect the quality and durability of their stitching. Here are some mistakes to avoid when performing a saddlers stitch:
Inadequate Stitch Spacing
One common mistake is not leaving enough space between the stitches. Insufficient stitch spacing can cause the thread to pull too tightly, resulting in a weak and strained stitch. To avoid this, it is important to leave enough space between each stitch, allowing the thread to lie naturally without tension.
Lack of Consistency in Stitch Length
Another mistake beginners make is the lack of consistency in stitch length. Uneven stitch lengths can make the final product look unprofessional and messy. To achieve a clean and polished look, it is crucial to maintain a consistent stitch length throughout the entire stitching process.
Inconsistent Thread Tension
Inconsistent thread tension is also a common mistake that can impact the overall quality of the saddlers stitch. Uneven tension can cause the thread to be too loose or too tight, resulting in an unsightly stitch. It is important to maintain consistent tension throughout the entire stitching process for a strong and professional stitch.
Remember: Practice makes perfect! Don’t be discouraged if you make these mistakes when starting out. With time and practice, you will develop the skills necessary to avoid these common mistakes and achieve high-quality saddlers stitches.
Disclaimer: This article is intended for informational purposes only. Always follow safety guidelines and instructions provided by the manufacturer when using stitching tools.