Are you a blacksmith or aspiring metalworker looking to expand your collection of tools? One essential tool for any serious metalworker is a hot cut chisel. This versatile tool is used to cut and shape metal when it is hot and malleable. While you can buy a hot cut chisel from a store, making your own can be a rewarding and cost-effective alternative. In this article, we will walk you through the step-by-step process of making your own hot cut chisel, so you can start creating impressive metalwork projects.
The first step in making a hot cut chisel is gathering the necessary materials and tools. You will need a piece of high-carbon steel, such as an old file or a leaf spring from a car. This type of steel is strong and durable, making it ideal for constructing a chisel. Additionally, you will need a grinder or belt sander, a bench vise, a propane torch, and a forge or heat source capable of reaching temperatures over 2,000 degrees Fahrenheit.
Once you have gathered your materials and tools, you can begin the process of shaping the hot cut chisel. Start by heating the piece of steel in your forge or heat source until it becomes red-hot. Use your bench vise to secure the heated steel, making it easier to work with. Then, use your grinder or belt sander to shape the heated steel into the desired chisel shape. Be sure to wear proper safety gear, such as gloves and safety glasses, during this process to protect yourself from sparks and metal fragments.

After shaping the hot cut chisel, it is important to harden and temper the steel to make it strong and durable. To do this, heat the chisel again until it reaches critical temperature, which is around 1,400 degrees Fahrenheit for high-carbon steel. Then, quickly quench the chisel in a container of oil or water to cool it rapidly. Finally, temper the chisel by reheating it to a lower temperature, around 400-600 degrees Fahrenheit, and then allowing it to air-cool. This process will give the chisel the necessary hardness and toughness to withstand the intense heat and pressure of metalworking.
Once you have hardened and tempered the hot cut chisel, all that is left is to sharpen it. Use a sharpening stone or diamond file to create a sharp cutting edge on the chisel. Take your time and check the edge frequently to ensure it is even and symmetrical. After sharpening, make sure to oil or wax the chisel to prevent rust and maintain its performance.
By following these steps, you can create your own hot cut chisel and take your metalworking projects to the next level. Remember to always prioritize safety and wear the appropriate gear when working with hot metal and power tools. With a little time and effort, you will have a high-quality tool that will serve you well in your metalworking endeavors.
Choosing the Right Materials
When making a hot cut chisel, it is crucial to select the right materials to ensure durability and functionality. The materials you choose will determine the chisel’s ability to withstand heat, maintain a sharp edge, and withstand repeated use.
Steel
For the blade of the chisel, high-carbon tool steel is the ideal choice. This type of steel has a high hardness level and excellent wear resistance, making it perfect for cutting hot materials. Some commonly used tool steels for hot cut chisels include W1, W2, and O1. These steels have a high carbon content, which allows them to retain their sharpness for longer periods.
Handle Material
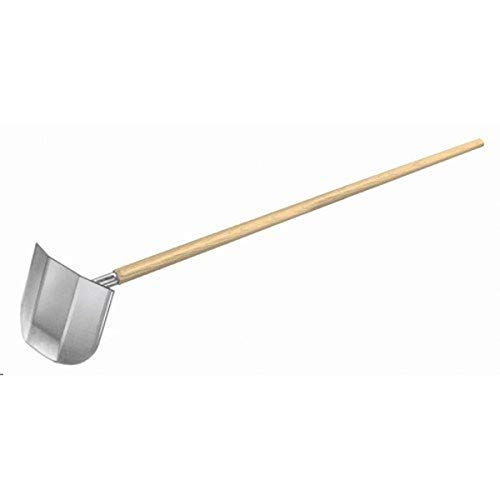
When it comes to the handle, it is important to choose a material that can withstand the heat generated during use. Wood is a popular choice for hot cut chisel handles due to its ability to resist heat. Hardwood varieties such as hickory or ash are excellent options as they are sturdy and have good heat resistance. Avoid using softwoods or materials that may melt or become damaged when exposed to high temperatures.
Another option for handle material is heat-resistant synthetic materials, such as fiberglass-reinforced nylon. These materials can tolerate high temperatures without deforming or becoming uncomfortable to hold.
| Blade Material | Handle Material |
|---|---|
| High-carbon tool steel (e.g., W1, W2, O1) | Wood (e.g., hickory, ash), or heat-resistant synthetic (e.g., fiberglass-reinforced nylon) |
By choosing the right materials, you can ensure that your hot cut chisel is durable, effective, and safe to use. Remember to consider the specific requirements of your project and select materials that meet those needs.
Shaping and Forging the Chisel
Once you have gathered all the necessary materials and tools, it’s time to start shaping and forging your hot cut chisel. Follow these steps to create a strong and effective tool:
1. Preparing the Stock
Begin by selecting a piece of high-carbon steel stock that is suitable for making chisels. The stock should be about 8 to 10 inches long and around 1 inch wide. It’s important to choose a high-quality steel that can withstand high temperatures and maintain its hardness.
2. Marking and Shaping the Blade
Use a marker or scribe to mark the outline of the blade on the steel stock. The blade should be slightly longer than the width of the stock, tapering down to a sharp edge. Once marked, carefully grind or file the excess steel away to shape the blade. Remember to maintain a consistent angle and keep the bevel straight.
3. Forging the Chisel
Heat the steel stock in a forge until it reaches a bright orange color. This indicates that the steel is hot enough for forging. Use a hammer and an anvil to carefully shape the heated steel into the desired form. Start by forging the blade, ensuring that it remains straight and symmetrical. Strike the steel with controlled blows, gradually forming the bevel and tapering the tang.
As you forge, periodically heat the steel to maintain the ideal forging temperature. Be cautious not to overheat the steel, as this can reduce its strength and hardness. Use a variety of hammer blows, including flat, cross peen, and rounding blows, to shape the chisel effectively.
4. Annealing and Hardening
Once the chisel has been forged to its desired shape, it’s time to anneal and harden it. Annealing involves heating the chisel and allowing it to cool slowly, which relieves internal stresses and makes the steel more workable. Harden the blade by heating it to a critical temperature, then quenching it in oil or water to rapidly cool it down. This process will make the chisel hard and durable.
It’s important to note that hardening can make the blade brittle, so it needs to be tempered. Temper the blade by heating it to a lower temperature to reduce its hardness slightly. This step will enhance the chisel’s toughness and prevent it from being too fragile.
5. Finishing and Sharpening
After the chisel has been properly hardened and tempered, it’s time to finish and sharpen it. Use a grinder or file to remove any remaining imperfections, such as scale or uneven edges. Take care to maintain the blade’s shape and symmetry during this process.
Finally, establish a sharp edge on the blade by grinding or honing it. Pay attention to maintaining the correct angle and honing evenly along the entire length of the blade. A well-sharpened chisel will provide clean and precise cuts when used.
With these steps, you can shape and forge a hot cut chisel that is ready for use in various metalwork projects. Remember to take your time, work with caution, and prioritize safety throughout the entire process.

Heat Treating and Tempering
Heat treating and tempering are essential steps in the process of making a hot cut chisel. These steps are crucial for achieving the desired hardness and toughness of the chisel, allowing it to withstand high temperatures and heavy use.
Heat Treating:
The first step in the heat treating process is heating the chisel to a critical temperature. This temperature is usually determined by the type of steel used for the chisel. Heat treating is typically done in a forge or using a torch.
Once the chisel reaches the critical temperature, it is then quenched in a liquid such as oil or water. This rapid cooling process helps to harden the steel. The chisel is then tempered to reduce the brittleness caused by the hardening process.
Tempering:
Tempering is the process of reheating the hardened chisel to a specific temperature and then allowing it to cool slowly. This controlled cooling process helps to relieve internal stresses and reduce the brittleness, making the chisel tougher and less prone to breakage.
Steps to Temper the Chisel:
- Clean the chisel to remove any dirt or scale.
- Place the chisel in an oven or heating source.
- Heat the chisel to the desired tempering temperature.
- Monitor the temperature using a thermometer or temperature indicator.
- Once the chisel has reached the desired temperature, remove it from the heat source.
- Allow the chisel to cool slowly in still air or by placing it on a heat-resistant surface.
By following these heat treating and tempering steps, you can ensure that your hot cut chisel is hardened and tempered to the appropriate level, making it a durable and effective tool for cutting and shaping hot metal.