


Sharpening chisels is an essential skill for anyone working with wood. A sharp chisel not only makes your work easier, but it also helps you achieve cleaner and more precise cuts. One way to ensure that your chisels are always sharp is by using a jig.
A jig is a tool or device that holds your chisel in place while you sharpen it. It provides the stability and angle control that you need to achieve consistent results. Making your own jig can be a cost-effective solution and allows you to customize it according to your needs.
To make a jig for sharpening chisels, you will need a few materials and basic woodworking skills. The main components of the jig are a base, a holder, and an adjustable guide. The base provides stability, the holder holds the chisel securely, and the guide controls the sharpening angle.
Start by cutting a piece of plywood for the base. Make sure it is large enough to accommodate your chisel and has enough room for the holder and guide. Next, attach the holder to the base using screws or glue. The holder should be wide enough to hold the chisel securely without allowing it to move during sharpening.
After attaching the holder, you will need to create an adjustable guide. This can be done by cutting a piece of hardwood or metal into a triangular shape. Drill a hole near the top of the guide and attach it to the base using a bolt and wingnut. This will allow you to adjust the angle of the guide to match the bevel of your chisel.
Once you have assembled the jig, place your chisel into the holder and adjust the guide to the desired angle. Secure the chisel in place and start sharpening using your preferred sharpening method. The jig will ensure that you maintain a consistent angle throughout the sharpening process.
By making your own jig for sharpening chisels, you can ensure that your chisels are always sharp and ready for use. It is a simple and cost-effective solution that will greatly improve the quality of your woodworking projects.
The Importance of Sharp Chisels
Sharpening your chisels is an essential skill for any woodworker. Whether you are a novice or a seasoned professional, having sharp chisels is crucial for achieving clean, precise cuts. Here are a few reasons why sharpening your chisels should be a top priority:
1. Enhanced Efficiency: A sharp chisel allows you to work more efficiently, reducing the amount of force and effort required to make cuts. With a dull chisel, you may end up exerting unnecessary pressure, leading to inaccurate cuts and wasted time.
2. Improved Accuracy: Sharp chisels provide better control, allowing you to accurately shape and carve wood. Dull chisels tend to wander off course, making it difficult to achieve the desired results. By keeping your chisels sharp, you can ensure clean and precise cuts every time.
3. Safer Woodworking: Dull chisels are more likely to slip and cause accidents. When a chisel loses its sharp edge, it becomes harder to control, increasing the risk of injury. By regularly sharpening your chisels, you can mitigate this risk and create a safer working environment.
4. Extended Chisel Lifespan: Properly sharpened chisels not only perform better but also last longer. When you sharpen your chisels, you remove any nicks and imperfections, effectively extending their lifespan. Regular maintenance and sharpening can save you money in the long run by preserving the quality of your chisels.
In conclusion, maintaining sharp chisels is essential for achieving quality woodworking results. By investing time and effort into sharpening your chisels, you can enhance your efficiency, accuracy, and safety, while also prolonging the lifespan of your tools.
Choosing the Right Materials
When it comes to making a jig for sharpening chisels, choosing the right materials is essential. The materials you select will determine the durability and effectiveness of your jig, so it’s important to choose wisely. Here are some factors to consider when selecting materials for your sharpening jig:
- Base Material: The base of your jig should be sturdy and stable. It’s recommended to use a hardwood such as oak or maple for the base, as these materials are known for their strength and resistance to wear and tear.
- Guide Material: The guide is the part of the jig that holds the chisel securely in place while sharpening. For this component, it’s best to use a durable material like brass or steel. These materials provide a smooth surface for the chisel to glide against, ensuring accurate and precise sharpening.
- Screw Material: The screws used to secure the chisel in the jig should be made of a corrosion-resistant material, such as stainless steel. This will prevent rusting and ensure that the screws remain securely in place throughout the sharpening process.
- Padding Material: To protect the chisel from scratches or damage, it’s advisable to add some padding to the jig. This can be done using materials like felt or rubber, which provide a soft and cushioned surface for the chisel to rest against.
By carefully choosing the right materials for your sharpening jig, you can create a tool that is not only effective in sharpening chisels but also durable and long-lasting. Invest time in selecting high-quality materials, and you will be rewarded with a jig that provides excellent results every time you sharpen your chisels.
High-Quality Wood for the Jig
When making a jig for sharpening chisels, it is important to choose high-quality wood that will provide stability and durability. The wood used for the jig should be hard enough to withstand the repeated pressure and friction that will be applied during the sharpening process.
One of the best types of wood to consider for making a jig is hardwood, such as maple, oak, or birch. These woods are known for their strength and durability, making them ideal for a tool that will be used regularly.
Additionally, the wood should be free from knots, cracks, and other imperfections that could weaken the jig or cause it to break. Look for a straight piece of wood that is at least 1 inch thick, as this will provide the necessary stability for the chisel sharpening process.
Another important factor to consider is the size of the wood. The jig should be wide enough to securely hold the chisel in place, while also allowing for easy movement and adjustment. A piece of wood that is at least 2 inches wide should provide ample space for most chisel sizes.
Finally, the wood should be smooth and free from rough edges or splinters. This will ensure a comfortable grip and prevent any damage to the chisel or your hands during use. Sand the wood thoroughly to achieve a smooth finish.
| Benefits of Using High-Quality Wood for the Jig: |
|---|
| 1. Stability and durability for long-lasting use |
| 2. Strength to withstand pressure and friction |
| 3. Securely holds the chisel in place |
| 4. Easy movement and adjustment |
| 5. Comfortable grip for a smooth sharpening process |
Measuring and Cutting
Before you can start building your jig, you’ll need to measure and cut the necessary pieces. Here’s a step-by-step guide on how to do it:
- Start by measuring the length and width of your chisel. This will determine the dimensions of the jig.
- Using a measuring tape or ruler, mark the measurements on a piece of wood. Make sure to include a little extra length to allow for any adjustments.
- Once you have the measurements marked, use a saw or a chisel to cut the wood into the desired shape. A rectangular shape with rounded edges works well for a chisel jig.
- If you want to add slots for different chisel sizes, measure the width of each chisel and mark the measurements on the wood, leaving enough space between the slots.
- Using a chisel or a router, carefully remove the wood between the marks to create the slots for the chisels.
- Sand the edges of the jig to smooth out any roughness and give it a polished finish.
Once you have the jig pieces measured and cut, you can proceed to the next step of assembling the jig and sharpening your chisels.
Accurate Measurements for the Jig
When creating a jig for sharpening chisels, precise measurements are crucial to ensure the best results. Here are some steps to follow in order to obtain accurate measurements:
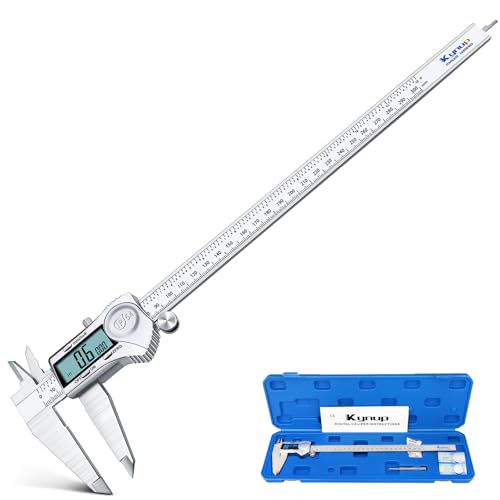
- Start by measuring the width of your chisel blade. Use a digital caliper or a ruler to measure from one side to the other. Write down this measurement as it will be used in the construction of the jig.
- Next, measure the length of the chisel blade. This measurement will help determine the appropriate length of the jig. Be sure to include the entire length of the blade, including the tang.
- Take note of the angle at which the chisel blade tapers. This will help determine the angle at which the jig needs to hold the chisel for sharpening.
- Consider the overall size of the chisel. This will determine the dimensions of the jig, ensuring it can securely hold the chisel in place during sharpening.
- It is essential to accurately measure and mark the location of the sharpening stone placement on the jig. This will help align the chisel correctly and maintain consistency in each sharpening session.
By taking precise measurements and considering the various factors involved, you can create a jig that will provide optimal sharpening results for your chisels. Remember to recheck your measurements before finalizing the construction of the jig to ensure accuracy.
Assembling the Jig
Before you can start sharpening your chisels, you’ll need to assemble the jig that will hold them securely in place. Here are the steps to follow:
Step 1: Gather all the necessary materials for the jig, including a piece of plywood, two wooden blocks, screws, and a clamp.
Step 2: Measure and mark the plywood to the desired size for your jig. It should be wide enough to accommodate your chisels and long enough to provide ample support.
Step 3: Attach the wooden blocks to the plywood using screws. These blocks will act as the guides for your chisels and help hold them in place during sharpening.
Step 4: Position the wooden blocks far enough apart to fit your chisels comfortably but close enough to keep them secure. Use a ruler or measuring tape to ensure accuracy.
Step 5: Secure the blocks to the plywood by tightening the screws. Make sure they are firmly attached to prevent any movement or wobbling while sharpening.
Step 6: Test the jig by placing one of your chisels between the wooden blocks. The chisel should fit snugly without any excessive movement.
Step 7: Once you’re satisfied with the jig’s stability and fit, attach a clamp to one end of the plywood. This will allow you to secure the jig to your workbench or table during use.
Step 8: Congratulations! You’ve successfully assembled the jig for sharpening your chisels. It’s now ready to be used for honing and maintaining the sharpness of your chisel blades.
Note: It’s important to regularly inspect the jig for any signs of wear or damage. Replace any worn-out components to ensure the safety and effectiveness of the sharpening process.
Securing the Chisel in the Jig
When it comes to sharpening chisels, having a secure grip on the tool is essential. Without proper stability, the chisel may slip or move during the sharpening process, leading to inconsistent results or even accidental injuries.
To ensure the chisel is securely held in place, the jig needs to have a reliable mechanism for clamping the chisel. There are various ways to achieve this, but one common approach is to use a tightening knob or screw.
The tightening knob or screw should be easy to operate and provide enough pressure to hold the chisel firmly. It’s important to strike a balance between a tight grip and a gentle one – too tight and you risk damaging the chisel, while too loose will result in unstable sharpening.
When placing the chisel in the jig, make sure the cutting edge is facing outwards and aligned with the sharpening stone or grinding wheel. The bevel or cutting angle should be positioned according to your preference and the specific needs of your project.
Once the chisel is correctly positioned, tighten the clamping mechanism gradually, checking to ensure the chisel is securely held in place. Give it a gentle tug to make sure it doesn’t move – a slight movement can affect the accuracy of the sharpening.
Some jigs may also have additional features to enhance stability, such as rubberized pads or adjustable brackets. These can provide extra support and prevent the chisel from slipping or shifting during the sharpening process.
By taking the time to properly secure the chisel in the jig, you’ll have a solid foundation for achieving precise and consistent sharpening results. This will not only improve the performance of your chisels but also enhance safety by minimizing the chances of accidents or injuries.