
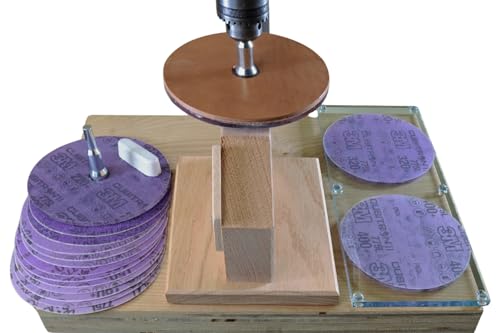


Keeping your chisels sharp is essential for any woodworking project. The Eclipse Chisel Sharpener is a popular tool that helps you achieve a razor-sharp edge on your chisels. To enhance the accuracy and precision of this tool, you can create a gauge that ensures consistent chisel positioning and optimal sharpening results. In this article, we will guide you through the process of making a gauge for the Eclipse Chisel Sharpener.
Step 1: Gather the Materials
To make the gauge, you will need the following materials:
- 1-2 pieces of hardwood, about 2 inches wide and 6 inches long
- Measuring tape or ruler
- Marker or pencil
- Saw (hand saw or table saw)
- Sandpaper (medium and fine grit)
Step 2: Measure and Mark
Using the measuring tape or ruler, mark the center of one of the hardwood pieces. This will be the reference point for aligning your chisels.
Step 3: Cut the Wood
Using a saw, cut the marked hardwood piece in half lengthwise. This will create two matching pieces that will form the gauge.
Step 4: Sand the Wood
Once you have cut the wood, sand the surfaces with medium grit sandpaper to remove any rough edges or splinters. Then, use fine grit sandpaper to achieve a smooth finish.
Step 5: Assemble the Gauge
Take the two matching pieces of wood and place them side by side, with the marked reference point facing up. Make sure they are aligned properly and then secure them together using clamps or glue.
Step 6: Test and Adjust
Now that you have assembled the gauge, test it by placing your chisel in the groove. The reference point should align with the center of the chisel. If necessary, make any adjustments to ensure proper alignment.
Step 7: Start Sharpening
With the gauge in place, insert your chisel into the Eclipse Chisel Sharpener and follow the manufacturer’s instructions for sharpening.
By creating this simple gauge, you can improve the accuracy and consistency of your chisel sharpening process with the Eclipse Chisel Sharpener. Enjoy your sharpened chisels and enhance the quality of your woodworking projects!
What is an Eclipse Chisel Sharpener and Why You Need a Gauge
The Eclipse Chisel Sharpener is a tool designed to help you maintain the sharpness of your chisels. Chisels, like any other cutting tool, need to be sharpened regularly to ensure their effectiveness and prevent damage. The Eclipse Chisel Sharpener makes this process quick and easy, allowing you to keep your chisels in optimal condition.
One important accessory for the Eclipse Chisel Sharpener is a gauge. A gauge is a measurement tool that allows you to set the correct angle for sharpening your chisels. The gauge ensures that you sharpen your chisels at the proper angle, which is crucial for achieving sharp and precise cuts.
By using a gauge with the Eclipse Chisel Sharpener, you can easily set the angle between the chisel and the sharpening stone. This ensures consistent and accurate sharpening results, saving you time and effort. The gauge also helps prevent over-sharpening or sharpening at the wrong angle, which can lead to reduced chisel performance and even damage.
Having a gauge for your Eclipse Chisel Sharpener is essential for maintaining the quality and longevity of your chisels. It allows you to achieve consistent and optimal sharpening results, ensuring that your chisels are always sharp and ready for use.
| Benefits of using a gauge with the Eclipse Chisel Sharpener: |
|---|
| – Ensures correct angle for sharpening |
| – Provides consistent and accurate sharpening results |
| – Saves time and effort |
| – Prevents over-sharpening or sharpening at the wrong angle |
| – Maintains chisel performance and prevents damage |
In conclusion, if you own an Eclipse Chisel Sharpener, it is highly recommended to also have a gauge. The gauge will help you achieve optimal sharpening results, ensuring that your chisels are always sharp and ready for any woodworking task.
Benefits of Using a Gauge for Eclipse Chisel Sharpener
The use of a gauge for an Eclipse chisel sharpener offers several benefits that can greatly improve the sharpening process and the overall performance of your chisels. Investing in a gauge for your chisel sharpener is a wise decision that can make a significant difference in the quality and effectiveness of your sharpening results.
1. Precision Sharpening
One of the key benefits of using a gauge is that it allows for precise sharpening. The gauge ensures that you maintain the correct angle and bevel when sharpening your chisels. This precision helps to ensure that your chisels are sharpened to an optimal level, resulting in cleaner and more accurate cuts in your woodworking projects.
2. Consistency
Using a gauge also helps to achieve consistent sharpening results. By setting and adjusting the gauge to the desired angle, you can ensure that each chisel is sharpened to the same specifications every time. This consistency is essential for maintaining uniform cutting edges across all your chisels, which leads to improved performance and a more polished finish in your woodworking projects.
Additionally, a gauge helps to prevent the risk of over-sharpening or under-sharpening your chisels. With the gauge in place, you have a reliable point of reference that ensures you are sharpening your chisels to the correct level of sharpness, avoiding any potential damage or inefficiency.
3. Time and Effort Saving
Using a gauge for your Eclipse chisel sharpener can also save you time and effort in the sharpening process. The gauge allows for quick and easy alignment of your chisel to the sharpening stone, eliminating the guesswork and potential mistakes associated with manual alignment. This streamlined process enables you to sharpen your chisels more efficiently, ultimately saving you precious time and exertion.
Overall, using a gauge for an Eclipse chisel sharpener provides numerous benefits that enhance the sharpening process and the performance of your chisels. From achieving precise and consistent results to saving time and effort, a gauge is a valuable tool that every woodworker should consider adding to their arsenal.
Accuracy
When it comes to sharpening your chisels, accuracy is key. The gauge is an essential tool in achieving the precise angle needed for a sharp edge. Without a proper gauge, it can be challenging to consistently achieve the desired sharpness.
With the Eclipse Chisel Sharpener, making a gauge is a straightforward process. This gauge will help you maintain the correct angle when sharpening your chisels, ensuring accuracy and consistency in your sharpening results.
To make the gauge, you will need a few basic tools and materials:
- A thin piece of metal or plastic
- A ruler or measuring tape
- A marker or a scribe
- A cutting tool (such as scissors or a utility knife)
- A drill or a small awl
Start by measuring the angle you want to achieve when sharpening your chisel. This angle will depend on your personal preference and the task at hand. Once you have determined the angle, mark it on the piece of metal or plastic using the ruler and marker or scribe.
Next, cut the metal or plastic to the desired shape and size. A rectangular shape with rounded corners works well for a gauge. Use the cutting tool to carefully trim the material to the correct dimensions.
Once the shape is ready, use the drill or small awl to create a hole near one of the corners of the gauge. This hole will allow you to attach the gauge to the Eclipse Chisel Sharpener.
After you have completed these steps, your gauge is ready to use. Simply align the angle marking on the gauge with the corresponding angle on the sharpener, and tighten the gauge in place using a screw or clamp.
Having an accurate gauge is essential for achieving consistent and precise results when sharpening your chisels. Taking the time to create a gauge for your Eclipse Chisel Sharpener will greatly improve your sharpening experience and the performance of your chisels.
Consistency
Consistency is key when it comes to sharpening your chisels, and having a gauge for your Eclipse chisel sharpener can help ensure that you achieve consistent results every time. When you have a gauge, you can set the sharpening angle precisely, allowing you to maintain the same angle across all your chisels.
Having consistent angles is important because it affects how your chisels perform. If the angles vary, you may end up with uneven cutting edges, which can lead to problems when you’re working on your projects. With a gauge, you can easily replicate the same angle each time you sharpen a chisel, resulting in a reliable cutting edge.
Consistency also plays a role in the longevity of your chisels. When the sharpening angle is consistent, you’re less likely to remove too much material, preserving the life of your tools. Additionally, consistent angles reduce the risk of creating weak points on the chisel’s edge, which can lead to chipping or breakage.
By using a gauge for your Eclipse chisel sharpener, you can maintain consistent results and ensure that your chisels are always ready for the job at hand. Whether you’re a professional woodworker or a DIY enthusiast, having a gauge can help elevate the quality of your work and make your chisel sharpening process more efficient.
Safety
Safety should always be a top priority when using any kind of tool, including the Eclipse Chisel Sharpener. Here are some important safety tips to keep in mind:
- Read the instruction manual: Before using the chisel sharpener, carefully read and understand the instructions provided by the manufacturer. This will help you use the tool correctly and safely.
- Wear protective gear: Always wear safety goggles to protect your eyes from flying debris. Additionally, consider wearing protective gloves to prevent any accidental cuts or injuries.
- Keep a clean workspace: Make sure your work area is clean and clutter-free. This will help prevent any accidents or injuries caused by tripping over tools or materials.
- Use the chisel sharpener on a stable surface: Ensure that the sharpener is placed on a sturdy and stable surface before use. This will help prevent any accidents or injuries caused by the sharpener moving or falling.
- Do not force the chisel: Let the chisel sharpener do the work for you. Do not apply excessive force or pressure when using the sharpener, as this can cause the tool to malfunction or lead to accidents.
- Keep fingers away from the grinding wheel: Never place your fingers near the grinding wheel while the chisel sharpener is in operation. This can result in serious injuries.
- Unplug when not in use: Always unplug the chisel sharpener when not in use or when performing any maintenance tasks. This will help prevent any accidental starts or injuries.
- Store properly: When you’re finished using the chisel sharpener, store it in a safe and secure location, out of reach of children. This will help prevent any accidental injuries or damage to the tool.
By following these safety guidelines, you can ensure that you use the Eclipse Chisel Sharpener safely and effectively. Remember, safety should always be your top priority when working with tools.
Step-by-Step Guide on Making a Gauge for Eclipse Chisel Sharpener
- Start by gathering the necessary materials for making the gauge. You will need a piece of hardwood, a ruler or tape measure, a pencil, a saw, sandpaper, and a drill with a drill bit.
- Measure and mark the desired length of the gauge on the hardwood. This will depend on the size of your chisels and personal preference.
- Use a saw to cut the hardwood to the measured length. Take your time to ensure a clean and straight cut.
- Once the hardwood is cut, use sandpaper to smoothen the edges and any rough surfaces. This will help prevent splinters and ensure a comfortable grip.
- Decide on the width of the gauge based on the width of your chisels. Mark the width on the side of the hardwood.
- Use a drill with a drill bit slightly larger than the marked width to create holes along the width of the gauge. These holes will serve as the slots for the chisels.
- Sand the holes to smoothen any rough edges or splinters.
- Insert the chisels into the slots to ensure a snug fit. If the slots are too wide or narrow, adjust the size of the holes accordingly using sandpaper or a file.
- Finally, use a ruler or tape measure to mark the appropriate depth for sharpening on the side of the gauge. This will serve as a reference point for consistent sharpening.
By following these step-by-step instructions, you can easily make a gauge for your Eclipse chisel sharpener. This gauge will help you achieve consistent sharpening results and maintain the optimal angle for your chisels.


