Chiseling rock is an art that requires precision, patience, and skill. Whether you are a professional sculptor or a DIY enthusiast, knowing how to chisel rock can open up a world of creative possibilities. In this article, we will guide you through the process of chiseling rock step by step, ensuring that you achieve the perfect results every time.
Step 1: Choose the right tools
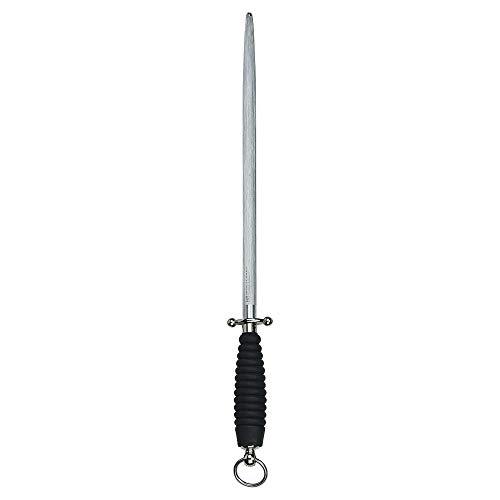
Before you begin chiseling rock, it is important to have the right tools at your disposal. A high-quality chisel with a sharp edge is essential for achieving clean and precise cuts. Additionally, a hammer or mallet will be needed to strike the chisel and create the desired shape. It is crucial to choose tools that are specifically designed for chiseling rock to ensure the best outcome.
Step 2: Mark your design
Once you have gathered the necessary tools, it is time to mark your design on the rock. Using a pencil or chalk, outline the desired shape or pattern that you wish to create. This will serve as a guide as you begin to chisel. Taking the time to plan your design in advance will help you stay focused and ensure that you achieve the desired result.

Step 3: Start chiseling
With your design marked on the rock, it’s time to start chiseling. Begin by positioning the chisel at the edge of the marked area and make sure it is perpendicular to the surface of the rock. Use the hammer or mallet to strike the chisel firmly but not too forcefully. Repeat this process, gradually moving the chisel along the outlined design. Take breaks if needed and always work in a well-ventilated area to avoid inhaling dust particles released during the chiseling process.
Step 4: Refine and finish
As you continue chiseling, you may notice that the surface of the rock is becoming rough. To achieve a smooth finish, consider using sandpaper or a file to refine the edges. Additionally, you can use a wire brush to remove any loose rock debris from the surface. Take your time and be attentive to details, as these finishing touches can make a significant difference in the final result.
In conclusion, chiseling rock requires careful planning, the right tools, and a steady hand. By following these steps and practicing regularly, you will be able to master the art of rock chiseling and create stunning pieces of art or functional objects.
Tips for Flawless Rock Chiseling
Chiseling rocks may seem like a daunting task, but with the right techniques and tools, you can achieve a flawless finish. Here are some tips to help you perfect your rock chiseling skills:
1. Choose the right chisel: It’s important to select a chisel that is appropriate for the type of rock you are working with. Different rocks have different hardness levels, so consider using a carbide-tipped chisel for harder rocks and a steel chisel for softer rocks.
2. Start with a rough shape: Before you begin chiseling, it’s recommended to outline the rough shape you want to achieve on the rock’s surface. This will guide your chiseling and help you maintain a consistent shape throughout the process.
3. Use proper hand placement: When using a chisel, it’s important to hold it with a firm grip. Place your dominant hand on the top of the chisel and your non-dominant hand near the bottom for better control and precision.
4. Focus on small areas at a time: Instead of trying to chisel the entire rock at once, focus on small sections at a time. This approach allows you to have better control over your chisel, resulting in more precise and detailed work.
5. Practice patience: Chiseling rocks requires patience and concentration. Take your time and work slowly to avoid making mistakes or damaging the rock. Remember, it’s better to take frequent breaks and maintain accuracy than rush through the process.
6. Make use of a mallet: A mallet is a valuable tool when it comes to rock chiseling. It provides the necessary force to break off pieces of the rock, making your job easier. However, make sure to use controlled and precise strikes to avoid overchiseling or damaging the rock.
7. Wear safety gear: Always prioritize your safety when chiseling rocks. Wear safety goggles to protect your eyes from flying debris and gloves to prevent any injuries to your hands. It’s also recommended to work in a well-ventilated area to avoid inhaling dust particles.
8. Refine and finish: Once you have chiseled the rock to the desired shape, it’s time to refine and finish the surface. Use finer-grit sandpapers or diamond files to smooth out any rough edges or imperfections. This will give your chiseled rock a polished and professional look.
Follow these tips and practice regularly to enhance your rock chiseling skills. With determination and patience, you’ll be able to create beautiful and flawless rock sculptures.
Essential Tools for Chiseling Rocks
Chiseling rocks requires the right tools to ensure precision and efficiency. Here are some essential tools that every rock chiseler should have:
- Chisel: A durable chisel with a pointed tip is essential for rock chiseling. It should have a comfortable grip and a sharp edge to easily chip away at the rock surface.
- Hammer: A hammer is necessary to strike the chisel and create the desired impact. Choose a hammer with a weight that you can handle comfortably and that matches the hardness of the rocks you are working with.
- Safety goggles: Protecting your eyes while chiseling rocks is crucial. Safety goggles will shield your eyes from flying debris and prevent any potential injuries.
- Gloves: Wearing gloves is important to protect your hands from blisters and injuries. Choose gloves that provide a good grip and are durable enough to withstand the pressure of chiseling.
- Dust mask: Chiseling rocks can create a lot of dust, which can be harmful to your respiratory system. Wearing a dust mask will help filter out the particles and keep your lungs protected.
- Brush: A brush is useful for removing excess debris and dust from the chiseled area. It helps you see the progress of your work and ensures a clean and tidy finish.
- Rock clamp: When chiseling large rocks, a rock clamp can come in handy. It provides a secure grip on the rock, allowing you to work on it more easily and safely.
These tools are the essentials for any rock chiseler. With the right tools in hand, you’ll be well-equipped to tackle your rock chiseling projects with precision and confidence.
Preparing the Rock Surface
Before you start chiseling the rock, it is crucial to properly prepare the rock surface. This will ensure that you achieve the best results and minimize the risk of any accidents or damage.
1. Clean the surface
Begin by thoroughly cleaning the rock surface. Remove any dirt, debris, or loose fragments using a brush or a soft cloth. This will allow you to have a clear view of the rock and make it easier to work on.
2. Inspect for cracks or fissures
Take the time to carefully inspect the rock for any cracks or fissures. These weak points can affect the stability of the rock and may lead to unexpected breakage during chiseling. Use a magnifying glass if needed, and mark any problematic areas.
3. Secure the rock
Depending on the size and weight of the rock, you may need to secure it in place before starting the chiseling process. Use clamps or vices to hold the rock firmly in position. This will provide stability and prevent any unnecessary movement during the work.
4. Protect yourself
Chiseling rocks can be a potentially dangerous activity, so it is vital to protect yourself. Wear protective eyewear, gloves, and a dust mask to shield yourself from flying debris and dust particles. Safety should always be your top priority.
By following these steps to prepare the rock surface, you will set yourself up for success in your chiseling project. Take the time to ensure that the rock is clean, free from cracks, securely held, and that you are properly protected. This will make the chiseling process smoother and safer, allowing you to achieve the desired outcome.
Proper Technique for Chiseling Rocks
Chiseling rocks may seem like a simple task, but to achieve the best results, it’s important to use the proper technique. Whether you’re a beginner or an experienced mason, following these steps will ensure that you can effectively chisel rocks without damaging them.
First, make sure you have the right tools for the job. A chisel with a carbide tip is ideal for chiseling rocks. It’s important to use a sharp chisel to ensure clean and precise cuts.
Before you begin, it’s crucial to wear protective gear, such as safety glasses and gloves, to protect yourself from potential flying rock fragments. Safety should always be your top priority when working with tools.
Start by positioning the chisel at the desired point on the rock. Use a hammer to strike the back of the chisel gently. The force should be controlled and applied in a gradual manner. It’s important to let the chisel do the work and not force it too hard, as this can damage the rock.
Continue chiseling in small increments, working your way along the desired shape or pattern. Be patient and take your time to ensure accuracy. Remember to keep the chisel perpendicular to the surface of the rock to achieve clean edges and angles.
If you need to remove larger chunks of rock, you can use a pitching tool or a hammer and chisel combination. These tools allow you to break off larger pieces of rock, but caution must be exercised to avoid injury or damage to the surrounding area.
Throughout the process, it’s essential to observe the rock closely, making adjustments as necessary. If you notice any cracks or fractures, it’s important to stop and reassess the situation. Continuing to chisel in these areas can lead to irreversible damage or breakage.
Once you have achieved the desired shape or size, use a rasp or sandpaper to smooth out any rough edges. This step is crucial for achieving a professional finish and preventing any accidental cuts or injuries.
Finally, clean up the work area and store your tools properly. Maintaining your chisels and other equipment will prolong their lifespan and ensure that they are in good condition for future use.
In conclusion, chiseling rocks requires precision and patience. By following the proper technique, using the right tools, and prioritizing safety, you can achieve excellent results and create beautiful rock sculptures or structures.
Finishing Touches and Maintenance
Once you have chiseled your rock to perfection, there are a few important finishing touches and maintenance steps you should consider to ensure its longevity and visual appeal.
Cleaning
Cleaning your chiseled rock regularly is essential to maintain its beauty and prevent the buildup of dirt and debris. Use a soft-bristle brush or a cloth to gently scrub the surface of the rock. Avoid using harsh chemicals or abrasive materials that could damage the rock’s finish.
Sealing
Applying a sealant to your chiseled rock can help protect it from water damage, staining, and fading. Choose a sealant specifically designed for the type of rock you have. Before applying the sealant, make sure the rock is clean and dry. Follow the manufacturer’s instructions for application and allow sufficient drying time.
It is recommended to reapply the sealant every few years or as needed to maintain optimal protection.
Remember to check the sealant regularly for any signs of wear or damage and reapply as necessary.
With proper cleaning, sealing, and maintenance, your chiseled rock will continue to showcase its exquisite craftsmanship and natural beauty for years to come.