


Sharpening a chisel is an essential skill for bookbinders. A sharp chisel allows for clean and precise cuts, helping to create professional-looking book covers and bindings. Whether you are a beginner or a seasoned bookbinder, learning how to sharpen your chisel is a valuable skill that will enhance your craftmanship. In this article, we will guide you through the step-by-step process of sharpening a chisel, providing you with the knowledge and techniques needed to achieve a razor-sharp edge.
Step 1: Preparing your workspace
Before you begin sharpening your chisel, it is important to set up a clean and organized workspace. Clear any clutter from your workbench and ensure that you have ample lighting. Gather the necessary tools, including a sharpening stone or honing guide, a flat work surface, and a spray bottle filled with water. Having a dedicated space for sharpening your chisels will not only improve your efficiency but also help you maintain focus on the task at hand.
Step 2: Inspecting your chisel

Once your workspace is ready, it is time to inspect your chisel. Look for any nicks, burrs, or damage to the blade. If you notice any issues, it is important to address them before proceeding with sharpening. You can use a file or a grinder to remove any larger nicks or imperfections. This step will ensure that you start with a clean and even edge.
Step 3: Honing the chisel
Now that your chisel is prepared, it is time to start honing the blade. Begin by placing the chisel in the honing guide to maintain a consistent angle. Wet the sharpening stone with water from the spray bottle to create a lubricating slurry. Move the chisel back and forth across the stone, applying light pressure. Start with a coarser grit and gradually work your way to a finer grit, ensuring that you cover the entire blade. This process will remove any burrs and create a sharp cutting edge.
Step 4: Testing the sharpness
Once you have finished honing your chisel, it is important to test the sharpness. Carefully run your thumb along the edge to check for any rough spots or imperfections. A sharp chisel should glide smoothly across your thumbnail without snagging. If you encounter any resistance, return to the sharpening stone and continue honing until the desired sharpness is achieved.
Step 5: Maintaining your chisel
After sharpening your chisel, it is crucial to maintain its sharpness for future use. Always clean the blade after each use, removing any residual debris or adhesive. Store your chisel in a dedicated case or rack to protect the cutting edge. Regularly inspect the blade for any signs of wear and re-sharpen as necessary. By properly maintaining your chisel, you can ensure its longevity and optimum performance.
Remember, sharpening a chisel is a skill that requires practice and patience. With time, you will develop a keen eye for detecting imperfections and honing your chisels to perfection. By mastering this essential technique, you will be well-equipped to create beautiful and professional bookbindings that stand the test of time.
Why Sharpen A Chisel for Bookbinding?
In the art of bookbinding, a sharp chisel is an essential tool that plays a crucial role in creating precise and neat cuts. Bookbinding involves various intricate techniques and requires attention to detail to achieve the desired results.
A sharp chisel allows bookbinders to make clean and accurate cuts in bookbinding materials such as paper, cardboard, fabric, and leather. By sharpening your chisel regularly, you ensure that it remains in optimal condition, enabling you to work efficiently and produce high-quality bookbinding projects.
Here are a few reasons why sharpening a chisel is important for bookbinding:
1. Precision:
Bookbinding requires precision, especially when performing tasks like trimming paper edges or cutting small slots for sewing. A sharp chisel allows you to have better control over your cuts, resulting in clean and precise edges that enhance the overall aesthetic appeal of the bound book.
2. Efficiency:
A dull chisel can make bookbinding tasks tedious and time-consuming. By keeping your chisel sharp, you can work efficiently and complete your projects faster. A sharp chisel slices through the materials effortlessly, saving you both time and effort.
3. Durability of Materials:
When using a dull chisel, it can often lead to tearing or crushing of the bookbinding materials, like paper or fabric. This can compromise the durability and longevity of the finished book. A sharp chisel, on the other hand, ensures clean cuts that minimize the risk of damage to the materials, resulting in a more durable and professionally crafted book.
To maintain the sharpness of your chisel, it is important to regularly inspect and hone its edge. You can accomplish this using sharpening stones or strops specific to chisel sharpening. By dedicating some time to sharpening your chisel, you can significantly improve your bookbinding skills and create beautiful masterpieces.
Therefore, sharpening a chisel is an essential and worthwhile skill for any bookbinder who seeks to produce high-quality and visually appealing books. With a sharp chisel, you can enhance your precision, efficiency, and the overall durability of your bookbinding projects.
Choosing the Right Chisel
When it comes to bookbinding, choosing the right chisel is essential. The chisel you select will greatly impact the quality of your work, so it’s important to consider a few key factors before making a decision.
First and foremost, you should consider the type of chisel that is most suitable for bookbinding. There are several types of chisels available, including bevel-edge chisels, mortise chisels, and paring chisels. Bevel-edge chisels are commonly used for general woodworking tasks, while mortise chisels are designed specifically for cutting mortises. Paring chisels, on the other hand, are ideal for delicate tasks such as trimming or shaving thin layers of material.
Next, you should consider the size of the chisel. Chisels come in a variety of sizes, with the width of the blade typically ranging from 1/8 inch to 3 inches. For bookbinding purposes, a chisel with a blade width between 1/4 inch and 1 inch is usually sufficient. It’s also important to consider the length of the chisel handle, as it can greatly impact the level of control you have when working with the chisel.
Another important factor to consider is the quality of the chisel. Investing in a high-quality chisel will not only ensure better results, but it will also last longer and require less maintenance. Look for chisels made from high-carbon steel, as they tend to hold their edge better and are less prone to chipping or breaking. Additionally, chisels with a well-designed handle that is comfortable to grip will help to reduce hand fatigue during prolonged use.
Lastly, you should consider your budget when choosing a chisel. Chisels can vary greatly in price, with higher-quality chisels often commanding a higher price tag. While it’s important to invest in a chisel that meets your needs, it’s also essential to consider your budget and choose a chisel that offers the best value for money.
In conclusion, choosing the right chisel for bookbinding requires careful consideration of factors such as the type of chisel, size, quality, and budget. Taking the time to select the appropriate chisel will not only result in better bookbinding work, but it will also enhance your overall experience as a bookbinder.
Gathering the Necessary Tools
To sharpen a chisel for bookbinding, you will need several tools to achieve the best result. Here is a list of essential tools you will need:
- Chisel – Make sure you have a quality chisel suitable for bookbinding. It should have a sharp edge and be in good condition.
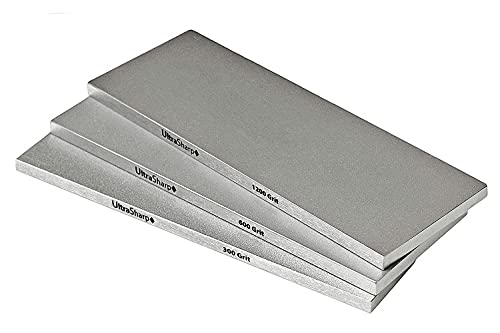
- Sharpening Stone – A sharpening stone is necessary to remove any burrs or dullness on the chisel. Choose a stone with a fine grit for better results.
- Honing Guide – Using a honing guide will help you maintain the correct angle while sharpening the chisel. It ensures precision and consistency.
- Water – If you are using a water stone, make sure you have enough water to keep it adequately lubricated while sharpening.
- Strop – A strop is a crucial tool for polishing the chisel after sharpening. It helps refine the edge and remove any remaining imperfections.
- Marker or Paint – You will need a marker or paint to mark the edge of the chisel. This will help you determine if you are sharpening evenly and removing material across the entire edge.
- Rags or Paper Towels – Keep some rags or paper towels handy to clean the chisel and wipe off any excess moisture or debris during the sharpening process.
Having these tools ready before you start sharpening your chisel will ensure a smooth and effective sharpening process. It is important to maintain the quality and condition of your tools to achieve the best results.
Preparing the Chisel for Sharpening
Before starting the sharpening process, it is important to prepare your chisel to ensure the best results. Here are the steps to follow:

1. Clean the chisel: Begin by wiping any dust or debris off the chisel using a clean cloth or paper towel. This will help you see the condition of the blade and handle.
2. Inspect the blade: Carefully examine the chisel blade for any signs of damage, such as chips, nicks, or rust. If you notice any of these issues, you may need to make extra efforts to repair or remove them before sharpening.
3. Remove the handle: If your chisel has a removable handle, remove it before sharpening. This will allow you to access the entire blade and make the sharpening process easier.
4. Secure the chisel: Find a stable work surface or bench vise to securely hold the chisel during sharpening. This will prevent any unexpected movement and ensure your safety.
5. Gather sharpening tools: You will need the appropriate sharpening stones or honing guides to sharpen your chisel. Make sure you have the right grits and tools for the type of chisel and sharpening method you plan to use.
6. Wear safety gear: To protect yourself from any sharp edges or flying debris, wear safety goggles and gloves during the sharpening process. Safety should always be a top priority.
By following these steps and properly preparing your chisel, you will be ready to move on to the sharpening process and achieve the desired sharpness for your chisel.
Sharpening the Chisel
Sharpening your chisel is a crucial step in maintaining its effectiveness. A sharp chisel will make your bookbinding tasks easier and produce cleaner cuts. Follow these steps to sharpen your chisel:
|
Step 1: Start by selecting the appropriate sharpening stone for your chisel. A fine-grit stone is recommended for most bookbinding projects. |
|
Step 2: Wet the sharpening stone with water or honing oil to create a lubricating surface. |
|
Step 3: Hold the chisel firmly with one hand and place the beveled edge of the chisel flat on the stone at a 25-degree angle. |
|
Step 4: Moving the chisel back and forth, apply even pressure and maintain the proper angle. Start from the heel of the bevel and work your way toward the tip. |
|
Step 5: Continue sharpening the chisel until you achieve a clean, sharp edge. Check your progress by running your finger lightly along the edge. |
|
Step 6: Once the chisel is sharpened, remove any burrs or rough edges by lightly honing the back of the chisel on the sharpening stone. |
|
Step 7: Finally, make sure to clean the chisel and remove any metal particles. You can use a soft cloth or brush for this purpose. |
Following these steps regularly will help you maintain a sharp chisel for all your bookbinding projects. Remember to exercise caution while working with sharp tools to ensure your safety.


