When it comes to woodworking, one of the most important tools in your arsenal is a sharp chisel. A dull chisel not only makes your work more difficult, but it can also be dangerous. Luckily, with the help of a Stanley guide, you can easily sharpen your chisel to a razor-sharp edge.
The Stanley guide is a simple yet effective tool that helps you maintain the correct angle while sharpening your chisel. It consists of a metal guide with an adjustable slot that allows you to set the desired angle, and a set of clamps that hold the chisel in place. With this guide, you can ensure that your chisel is always sharpened at the precise angle needed for optimal performance.
To start sharpening your chisel using a Stanley guide, first, make sure your chisel is securely clamped in the guide. Then, set the desired angle by adjusting the slot on the guide. It is recommended to start with a 25-degree angle for general woodworking tasks. Once you have set the angle, hold the guide firmly and start sliding the chisel back and forth across a sharpening stone or sandpaper, maintaining the same angle throughout the process.
As you sharpen your chisel, make sure to apply consistent pressure and alternate sides to ensure an even edge. Keep in mind that it is essential to frequently check the progress of your sharpening by inspecting the edge for sharpness. Once you achieve the desired sharpness, carefully remove the chisel from the guide, and your chisel is now ready to be used for precise woodworking tasks.
In conclusion, sharpening a chisel using a Stanley guide is a simple yet effective way to maintain the sharpness of your chisel. With the guide’s help, you can easily set the correct angle and ensure that your chisel is always sharpened to perfection. By following the steps outlined above, you can enhance your woodworking experience and achieve more precise and effortless cuts with a sharp chisel.
Overview of Chisel Sharpening
Chisel sharpening is an essential skill for any woodworker, as a sharp chisel ensures clean and precise cuts. Whether you are a beginner or an experienced craftsman, understanding the basics of chisel sharpening is crucial.
There are different methods for sharpening a chisel, but using a Stanley Guide can make the process easier and more consistent. The Stanley Guide is a popular tool that helps maintain the correct angle while sharpening, ensuring a sharp edge every time.
Before you start sharpening, it is important to inspect the condition of your chisel. Look for any nicks or dents on the edge that may need to be fixed before sharpening. This can be done by grinding the edge on a coarse grit sharpening stone or using a file to remove any imperfections.
Once the edge is free from nicks, it’s time to use the Stanley Guide. The Stanley Guide consists of a metal guide rod that holds the chisel at a precise angle. This helps maintain consistency and prevents the chisel from wandering during sharpening.
To use the Stanley Guide, simply slide the chisel into the guide and tighten the screw to secure it in place. Make sure the beveled edge of the chisel is facing up. This is the side that needs to be sharpened.
Using a fine grit sharpening stone, start sharpening the chisel by moving it back and forth across the stone. Make sure to maintain a consistent pressure and angle throughout the process. The Stanley Guide will help keep the angle correct and prevent any mistakes.
Continue sharpening until you have achieved a sharp edge on the chisel. You can test the sharpness by running your finger gently along the edge. Be careful not to cut yourself. If the edge feels smooth and glides effortlessly, then it is sharp.
After sharpening, it is important to remove any burrs or fine metal particles from the edge. This can be done by gently honing the chisel on a leather strop or a fine sharpening stone.
Remember, practicing chisel sharpening is the key to mastering the skill. With time and experience, you will be able to sharpen your chisels quickly and efficiently, ensuring clean and precise cuts in your woodworking projects.
The Importance of Using a Stanley Guide
When it comes to sharpening a chisel, using a Stanley guide is crucial. This simple tool can make a significant difference in the overall quality and effectiveness of your sharpening process. Here are some reasons why using a Stanley guide is important:
Consistency: One of the most significant advantages of using a Stanley guide is its ability to provide consistency in your sharpening process. The guide ensures that you maintain a consistent angle while sharpening, which is crucial for achieving a sharp and precise edge. Without a guide, it can be challenging to maintain a steady hand and maintain the same angle throughout the sharpening process. The Stanley guide eliminates this issue and helps you achieve consistent results every time.
Precision: A chisel with a sharp and precise edge is essential for achieving accurate and clean cuts. Using a Stanley guide allows you to maintain the precise angle required for optimal sharpening. By aligning the chisel with the guide, you can ensure that each sharpening stroke is precise and accurate, resulting in a sharp edge that performs at its best.
Efficiency: Sharpening a chisel can be a time-consuming process, especially if you don’t have the right tools or techniques. Using a Stanley guide can significantly improve the efficiency of your sharpening process. The guide simplifies and streamlines the sharpening process by providing a quick and easy way to set the correct sharpening angle. This saves you time and effort, allowing you to sharpen your chisels more efficiently.
Durability: Chisels are valuable tools that need proper maintenance to ensure their durability. When you sharpen a chisel without a guide, there is a higher risk of accidentally rounding or damaging the edge. The Stanley guide helps protect the chisel’s edge by providing a stable and controlled sharpening angle. By using a guide, you minimize the risk of unwanted damage and ensure the long-term durability of your chisels.
In conclusion, using a Stanley guide when sharpening a chisel is essential for achieving consistent, precise, and efficient results. The guide provides the necessary consistency, precision, and durability required to maintain sharp and reliable chisels for your woodworking projects.
Step 1: Gather the Necessary Tools
Before you begin sharpening your chisel using a Stanley guide, it’s important to make sure you have all the necessary tools to complete the task. Having the right tools on hand will help you achieve the best results and ensure a safe and efficient sharpening process.
Here are the tools you will need:
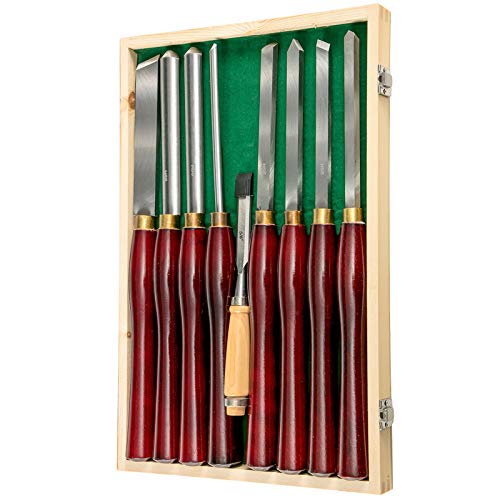
A chisel
To sharpen a chisel, you obviously need a chisel to work on. Make sure your chisel is clean and free from any debris or rust. It’s also important to check the chisel’s bevel angle and ensure it is in good condition.
A Stanley guide
The Stanley guide is a sharpening system that helps you maintain the correct angle while sharpening your chisel. It is an essential tool for achieving a sharp and precise edge. Make sure you have a Stanley guide that is suitable for your chisel size.
A sharpening stone
You will also need a sharpening stone to remove any nicks or imperfections from your chisel’s edge. There are different types of sharpening stones available, such as oil stones, water stones, and diamond stones. Choose a stone that best suits your needs and preferences.
Additionally, you may want to have some lubricating oil or water depending on the type of sharpening stone you are using.
Note: Remember to always wear safety goggles and work in a well-ventilated area when sharpening your chisel to protect yourself from any potential hazards.
Choosing the Right Chisel and Stanley Guide
When it comes to sharpening a chisel, using the right tools is essential for achieving a clean and precise edge. A chisel is a woodworking tool with a sharp cutting edge, and a Stanley guide is a popular choice for maintaining the correct angle while sharpening.
Here are some factors to consider when choosing the right chisel and Stanley guide:
Type of Chisel
There are various types of chisels available, such as bench chisels, bevel edge chisels, mortise chisels, and more. Each type is designed for specific tasks and has different characteristics. Consider the type of woodworking projects you usually work on and choose a chisel that suits your needs.
Size of Chisel
The size of the chisel refers to the width of the cutting edge. Chisels come in different sizes, ranging from narrow widths for fine detailing work to wider widths for removing larger amounts of material. Select a chisel size that is appropriate for the tasks you commonly encounter.
Quality of Chisel and Guide
Investing in high-quality tools is important for achieving consistent and long-lasting sharpening results. Look for chisels and Stanley guides made from durable materials that can withstand regular use. It is also advisable to read reviews and seek recommendations from experienced woodworkers to ensure you are purchasing reliable products.
Compatibility Between Chisel and Guide
When using a Stanley guide to sharpen a chisel, it is crucial to ensure compatibility between the two tools. Some chisels have a different bevel angle compared to the standard 25 degrees that the Stanley guide accommodates. Make sure your chisel is compatible with the guide or consider purchasing a guide that suits your chisel’s angle.
| Factor to Consider | Explanation |
|---|---|
| Type of Chisel | Consider the type of woodworking projects you usually work on and choose a chisel that suits your needs. |
| Size of Chisel | Select a chisel size that is appropriate for the tasks you commonly encounter. |
| Quality of Chisel and Guide | Invest in high-quality tools made from durable materials for consistent and long-lasting sharpening results. |
| Compatibility Between Chisel and Guide | Ensure compatibility between the chisel and the Stanley guide to achieve optimal sharpening results. |
Gathering Safety Equipment
Before starting the process of sharpening a chisel using a Stanley Guide, it is important to gather the necessary safety equipment to protect yourself from any potential accidents or injuries. These safety equipment items include:
- Safety goggles: Protect your eyes from any flying debris or particles that may be produced during the sharpening process.
- Dust mask: Prevent the inhalation of any dust or fine particles that may be generated when sharpening the chisel.
- Gloves: Provide additional protection for your hands and prevent any cuts or abrasions while handling the chisel.
- Hearing protection: Reduce the noise level and protect your ears from any loud sounds that may occur during the sharpening process.
Make sure to wear these safety equipment items throughout the entire sharpening process to prioritize your safety and minimize the risk of any accidents or injuries. Remember to follow the manufacturer’s instructions for each safety equipment item, and replace them if they become damaged or worn out.
Step 2: Prepare the Chisel
Before you begin sharpening your chisel, it’s important to make sure it’s properly prepared. Follow these steps to prepare the chisel for sharpening:
- Clean the chisel: Use a brush or rag to remove any dirt, dust, or debris from the chisel. This will ensure that there are no obstructions when you start sharpening.
- Inspect the chisel: Check the chisel for any signs of damage or wear. Look for cracks, chips, or uneven edges that may need to be addressed before sharpening.
- Check the bevel angle: Determine the bevel angle of your chisel. This is the angle at which the cutting edge is ground. Most chisels have a bevel angle of around 25 degrees, but it can vary depending on the type of chisel and the intended use.
- Secure the chisel in the guide: Place the chisel into the appropriate slot in the Stanley guide. Make sure the chisel sits snugly and securely in the guide to ensure accurate sharpening.
Once you have prepared your chisel, it will be ready for sharpening. Follow the next step to start sharpening the chisel using the Stanley guide.
Cleaning the Chisel
Before sharpening your chisel, it is essential to clean it properly. Cleaning the chisel helps remove any dirt, grime, or rust that may be present on the blade. This ensures a smoother and more effective sharpening process.
Tools and Materials
- Steel wool or a wire brush
- Mild soap or detergent
- Water
- Rag or towel
Steps to Clean the Chisel
- Start by using steel wool or a wire brush to remove any dirt or rust from the chisel blade. Gently scrub the blade in a back-and-forth motion until it looks clean.
- Prepare a solution of mild soap or detergent with water in a container. Dip the chisel blade into the solution and let it soak for a few minutes.
- After soaking, use a rag or towel to wipe away the dirt and soap residue from the blade.
- Rinse the chisel under running water to remove any remaining soap.
- Dry the chisel thoroughly with a towel to prevent any moisture from causing rust.
By following these steps, you can ensure that your chisel is clean and ready for sharpening. Cleaning the chisel regularly will also help maintain its longevity and performance.
Inspecting the Chisel for Damage
Before sharpening your chisel using a Stanley guide, it is important to inspect the chisel for any signs of damage. This will ensure that the sharpening process is effective and that you achieve the best results.
Here are some steps to follow when inspecting your chisel:
| Step 1: | Examine the blade of the chisel for any chips or cracks. These can affect the cutting performance and may need to be addressed before sharpening. |
| Step 2: | Inspect the handle for any signs of wear or damage. A loose or cracked handle can make it difficult to control the chisel during use, so it’s important to ensure it is in good condition. |
| Step 3: | Check the cutting edge for any nicks or dings. These imperfections can hinder the chisel’s ability to make clean cuts and should be addressed before sharpening. |
| Step 4: | Inspect the overall condition of the chisel. Look for any rust or corrosion, as this can affect the performance and longevity of the tool. |
If you notice any damage during the inspection, it is recommended to address it before proceeding with the sharpening process. Depending on the severity of the damage, this may involve repairing or replacing the chisel.
By thoroughly inspecting your chisel before sharpening, you can ensure that it is in optimal condition and ready for use. This will help you achieve the best results and prolong the lifespan of your chisel.