


Sharpening a chisel is an essential skill for any woodworker or craftsman. A sharp chisel not only improves the quality of your work but also makes it safer and more efficient. One of the most effective tools for sharpening a chisel is an oil stone. An oil stone, also known as a whetstone or sharpening stone, is made from natural or artificial abrasive material embedded in a hard base. It is designed to remove small amounts of material from the blade of a chisel, creating a sharp and durable edge.
To sharpen a chisel using an oil stone, you will need a few basic tools and materials. Firstly, you will need an oil stone appropriate for your needs. There are various types of oil stones available, with different levels of abrasiveness. For sharpening a chisel, a medium-grit oil stone is usually sufficient. Additionally, you will need some lubricant for the stone, such as honing oil or water. The lubricant helps to remove the metal particles and prevents the stone from clogging.
The first step in sharpening a chisel is to prepare the stone. If you are using an oil stone, apply a few drops of honing oil on the surface of the stone. This will create a lubricating layer that helps to remove the metal particles and prevents the stone from wearing out too quickly. If you are using a water stone, soak it in water for about 10-15 minutes before use.
Next, hold the chisel with the bevel against the stone, at an angle of about 25 degrees. Using moderate pressure, move the chisel back and forth across the stone in a smooth, sweeping motion. Make sure to maintain the same angle throughout the sharpening process. Repeat this motion several times, gradually moving from one end of the stone to the other. This will ensure an even and consistent sharpening of the chisel blade.
After a few passes on one side of the chisel, flip it over and repeat the process on the other side. This will ensure that both sides of the chisel are evenly sharpened. Continue sharpening the chisel, alternating between the two sides, until you achieve the desired sharpness. To test the sharpness, carefully run your finger along the edge of the chisel. If it feels smooth and cuts through paper effortlessly, your chisel is properly sharpened.
Once you have sharpened the chisel to your satisfaction, wipe off any excess oil or water from the blade. You can use a clean cloth or paper towel for this. Additionally, it is important to maintain the sharpness of your chisel by regularly honing it on an oil stone. This will help to keep the blade in optimal condition and prolong its lifespan. Taking the time to sharpen your chisels properly will greatly enhance your woodworking experience and enable you to create precise and professional-looking results.
What is a chisel and why is it important to sharpen it?
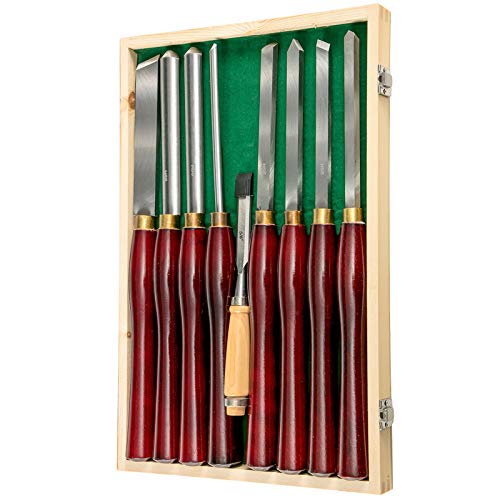
A chisel is a versatile hand tool with a sharp cutting edge attached to a handle. It is commonly used in woodworking, carving, and other crafts to shape, cut, and remove materials such as wood, metal, and stone. Chisels come in various shapes and sizes, each designed for specific tasks.
Sharpening your chisel is essential for maintaining its cutting performance and prolonging its lifespan. Over time, the cutting edge of a chisel can become dull and lose its effectiveness. Blunt chisels not only make your work slower and more arduous but also increase the risk of accidents due to slipping or digging into the material.
Importance of sharpening a chisel:
-
Improved cutting performance: Sharpening the chisel restores its keen cutting edge, making it easier and more efficient to work with. A sharp chisel helps you achieve precise cuts and clean finishes, enhancing the quality of your woodworking projects.
-
Increased control and accuracy: With a sharp chisel, you will have better control over the tool, allowing you to create intricate cuts and shapes. It reduces the chances of the chisel wandering off the intended cutting line and helps you maintain accuracy throughout your work.
-
Reduced physical effort: A sharp chisel requires less force to cut through materials, minimizing strain on your muscles and reducing fatigue. It allows you to work for longer periods without tiring, leading to increased productivity and improved overall woodworking experience.
-
Extended tool lifespan: Regularly sharpening your chisel helps to remove nicks, chips, and other imperfections, preventing further damage to the cutting edge. By maintaining the chisel’s sharpness, you can extend its lifespan and delay the need for replacing it.
-
Safety: A sharp chisel is safer to use than a dull one. Dull chisels are more likely to slip or bounce off the material, increasing the risk of injuries. Keeping your chisel sharp ensures better control, reducing the likelihood of accidents and making your work environment safer.
Sharpening your chisel using an oil stone is an effective technique that helps you maintain the chisel’s cutting edge and optimize its performance. By regularly sharpening your chisel, you can ensure that it remains a reliable and precise tool for your woodworking projects.
Choosing the right oil stone
When it comes to sharpening a chisel, using the right oil stone is essential for achieving the best results. There are different types of oil stones available, and choosing the right one can make a significant difference in the sharpening process.
Natural oil stones:
Natural oil stones, such as Arkansas stones or Japanese water stones, are known for their high-quality sharpening capabilities. These stones are available in various grits, ranging from coarse to fine, and they offer excellent sharpening power. However, natural oil stones can be quite expensive compared to other options.
Synthetic oil stones:
Synthetic oil stones, sometimes called artificial or man-made stones, are an affordable alternative to natural stones. These stones are made of abrasive particles bonded together, and they come in different grits as well. Synthetic oil stones are known for their consistent performance and durability.
Choosing the grit:
When selecting an oil stone, it’s crucial to consider the grit, which refers to the coarseness or fineness of the stone’s surface. Coarse grit stones, typically ranging from 120 to 400 grit, are suitable for initial sharpening or when re-establishing the chisel’s bevel. Medium grit stones, around 800 to 1000 grit, are ideal for sharpening the blade further. Finally, fine grit stones, usually 2000 grit or higher, are excellent for honing and polishing the chisel’s edge.
Considering your needs:
Choosing the right oil stone should also take into account your specific needs and preferences. If you are looking for speed and efficiency, a coarse grit stone may be the best option. However, if you prioritize achieving a razor-sharp edge, a combination of medium and fine grit stones might be more suitable. It’s essential to assess your sharpening goals and select the stone accordingly.
Remember, the key to effective chisel sharpening is using the right oil stone. Whether you opt for a natural or synthetic stone, and whichever grit you choose, ensure that it matches your requirements and enables you to achieve the desired sharpness for your chisel.
Understanding the different types of oil stones
When it comes to sharpening tools like chisels, oil stones are a popular choice for many woodworkers. These natural stones, also known as sharpening stones or whetstones, come in various types and grades to suit different sharpening needs.
Arkansas Stones: Arkansas stones are renowned for their fine grit and excellent sharpening abilities. They are quarried from the Ouachita Mountains in the United States, and are available in different grades, from soft to hard. Soft Arkansas stones are perfect for achieving a polished finish on tools, while hard Arkansas stones are ideal for initial sharpening and repairing damaged edges.
India Stones: India stones are made from aluminum oxide, which gives them a fast cutting rate and excellent durability. They are available in coarse, medium, and fine grit, making them suitable for both initial sharpening and honing. India stones are often used by woodworkers who need a versatile sharpening stone.
Japanese Water Stones: Japanese water stones, also known as whetstones, are known for their excellent quality and ability to achieve a very sharp edge. They come in different grits, ranging from coarse to extra fine, allowing woodworkers to choose the right stone for their specific sharpening needs. These stones require soaking in water before use, which helps to keep the surface lubricated and minimize the risk of overheating the tool.
Diamond Stones: Diamond stones are made from diamond abrasives bonded to a metal plate. They offer a fast cutting rate and are extremely durable. Diamond stones are available in various grits, making them suitable for both initial sharpening and honing. They are a popular choice among woodworkers because of their long-lasting performance.
Conclusion: Understanding the different types of oil stones can help woodworkers choose the right stone for their chisel sharpening needs. Whether it’s a soft Arkansas stone for achieving a polished finish or a Japanese water stone for achieving a razor-sharp edge, having the right stone can make a world of difference in the sharpening process.
Preparing the chisel
Before you begin sharpening the chisel, it’s important to properly prepare it for the process. This involves taking a few steps to ensure the chisel is clean and ready to be sharpened.
Step 1: Clean the chisel
Start by cleaning the chisel using a solvent or degreaser to remove any dirt, grease, or residue. This will help ensure a clean surface for sharpening.
Step 2: Inspect the chisel
Next, carefully inspect the chisel for any damage or wear. Check for any chips, cracks, or nicks that may affect the sharpening process. It’s important to repair or replace any damaged chisels before sharpening.
Step 3: Secure the chisel
Once the chisel is clean and in good condition, secure it in a chisel holder or vise grip. This will provide stability and prevent the chisel from moving or slipping during the sharpening process.
Step 4: Protect yourself
Before you start sharpening, it’s essential to protect yourself. Wear safety goggles and gloves to prevent any injuries from sharp metal or flying debris.
By properly preparing the chisel, you’ll ensure a more effective and efficient sharpening process, resulting in a chisel that is ready for precision work.
Cleaning and inspecting the chisel before sharpening
Before you begin sharpening your chisel, it is important to clean and inspect it. This will ensure that you have a clean and sharp cutting edge, and it will also help you identify any imperfections or damage that may need to be addressed.
Start by removing any dirt, grime, or rust that may have accumulated on the chisel. You can use a wire brush or a piece of fine steel wool to gently scrub the surface. Be sure to dry the chisel thoroughly afterward to prevent any further corrosion.
Once the chisel is clean, carefully inspect the cutting edge. Look for any nicks, chips, or other signs of wear. These can affect the performance of the chisel and should be addressed before sharpening. If you notice any damage, you may need to reshape or grind the cutting edge before proceeding.
Additionally, check the handle and ferrule of the chisel for any cracks or loose parts. These should be repaired or tightened to ensure the chisel is safe to use.
By taking the time to clean and inspect your chisel before sharpening, you will be able to achieve the best possible results and ensure the longevity of your tool.
Sharpening the chisel
Before you start sharpening your chisel, make sure you have a flat and stable surface to work on. You can use a bench or table with a non-slip mat or secure the oil stone to your workbench with a clamp.
To begin the sharpening process, hold the chisel with the bevel facing down and the back of the chisel flat on the oil stone. Start by applying a few drops of honing oil to the stone to lubricate the surface.
Using both hands, apply gentle pressure and move the chisel back and forth across the oil stone in a smooth, controlled motion. Make sure to maintain a consistent angle and keep the bevel flat against the stone.
Continue sharpening the chisel for several passes, periodically checking the progress. You should see a thin, even layer of metal being removed from the edge of the chisel.
Flattening the back of the chisel
After sharpening the bevel, you might also want to flatten the back of the chisel. This will ensure a clean and smooth cut. To flatten the back, place the chisel flat on the stone and repeat the same back and forth motion, applying even pressure.
Check the progress frequently and continue until the surface of the back is flat and even. This may take some time, especially if the chisel has a lot of wear or damage.
Finishing touches
Once both the bevel and back of the chisel are sharpened, remove any burrs or rough edges by lightly dragging the chisel across the stone, applying minimal pressure. This will help ensure a clean, sharp edge.
After sharpening, wipe off any excess oil from the chisel and stone with a cloth, and your chisel will be ready for use. Remember to store your sharpened chisel in a protective case or wrap it in a cloth to prevent damage.
Step-by-step guide to sharpening a chisel using an oil stone
Sharpening a chisel is an essential skill for any woodworker or DIY enthusiast. A sharp chisel improves the quality and accuracy of your work, making it easier to shape and cut through wood. In this step-by-step guide, we will walk you through the process of sharpening a chisel using an oil stone.
What You’ll Need
Before you start, make sure you have the following materials:
| 1. | A chisel |
| 2. | An oil stone (preferably one with two different grits) |
| 3. | Mineral oil or honing oil |
| 4. | A flat surface to work on |
Step 1: Prepare the Oil Stone
Start by placing the oil stone on a flat surface, making sure it is stable and won’t move while you’re sharpening. If your oil stone has two different grits, choose the coarser side to begin with.
Step 2: Apply Oil
Apply a few drops of mineral oil or honing oil to the surface of the stone. This will help lubricate the stone and make the sharpening process easier.
Step 3: Hold the Chisel
Take the chisel and hold it firmly with one hand. Make sure the bevel side of the chisel is facing up.
Step 4: Position the Chisel
Place the bevel side of the chisel flat against the oil stone, with the cutting edge touching the stone. Keep the chisel at a 20-degree angle to the stone. This angle will vary depending on the type of chisel you have, so make sure to check the manufacturer’s instructions.
Step 5: Start Sharpening
Using light pressure, move the chisel back and forth along the length of the stone. Make sure to maintain the 20-degree angle as you sharpen. Repeat this motion 10-15 times on one side of the chisel.
Step 6: Flip and Repeat
Flip the chisel over and repeat the sharpening process on the other side. This will ensure an even sharpening and help maintain the chisel’s balance.
Step 7: Test the Sharpness
Once you’ve sharpened both sides of the chisel, test the sharpness by gently running your thumb along the cutting edge. If it feels sharp and smooth, you’re good to go. If not, repeat the sharpening process until desired sharpness is achieved.
Step 8: Clean and Store
After sharpening, wipe the chisel clean with a cloth to remove any metal particles. Apply a light coat of oil to prevent rusting and store it in a safe place.
That’s it! By following these simple steps, you can sharpen a chisel using an oil stone and ensure that your woodworking projects are a cut above the rest.