


If you are passionate about wood carving, then having a sharp chisel is essential for achieving precise and intricate designs. A dull chisel can not only hinder your progress but also make your carving experience frustrating. However, with the right techniques and tools, you can easily sharpen your chisel and restore its cutting edge.
Before you start sharpening your chisel, it is important to gather the necessary materials. You will need a sharpening stone or sandpaper, honing guide, and a strop. Additionally, make sure you have a safety glove to protect your hand while sharpening.
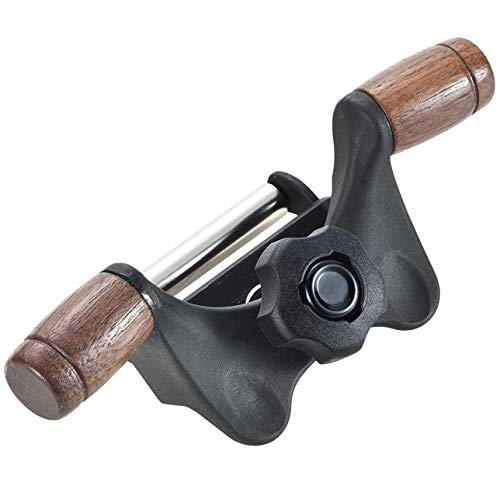
Once you have everything ready, the first step is to secure your chisel in a honing guide. The honing guide will ensure that you maintain a consistent angle while sharpening. Begin by placing the chisel in the honing guide and adjusting it to the desired angle, usually between 25 to 30 degrees. This angle will vary depending on the type of wood you are working with and your personal preference.
Next, apply a small amount of oil or water on your sharpening stone. Place the honing guide, with the chisel, on the stone and start moving it back and forth. Make sure to maintain a steady pressure and take even strokes along the entire length of the chisel. Repeat this process several times, periodically checking the sharpness of the chisel by testing it on a piece of scrap wood.
After you have achieved the desired sharpness, it is time to refine the cutting edge by using a strop. A strop is a piece of leather or fabric that is used to polish the chisel and remove any burrs or imperfections. Apply a honing compound or a small amount of polishing compound on the strop and run the chisel along it, stroking away from the cutting edge. This will help in creating a mirror-like finish and improve the overall performance of the chisel.
Remember, maintaining a sharp chisel is an ongoing process, and regular sharpening sessions will be required. By following these steps and dedicating some time to sharpening, you can keep your chisel in optimal condition for wood carving and enjoy a more rewarding carving experience.
What is Wood Carving
Wood carving is a traditional craft that involves shaping wood into various forms, designs, and sculptures using carving tools such as chisels and gouges. It is considered one of the oldest forms of artistic expression and has been practiced for centuries by cultures around the world.
Wood carving can be both functional and decorative, with artisans creating everything from wooden furniture and architectural elements to intricate figurines and intricate relief carvings. Different techniques are employed to achieve different results, and skillful woodcarvers can create intricate details and patterns with precision.
History of Wood Carving
The art of wood carving has a long and rich history. It dates back thousands of years to ancient civilizations such as Egypt and China, where wood carvings were used for religious rituals, burial ceremonies, and decorative purposes.
In Europe, wood carving became prominent during the Middle Ages, with intricate carvings adorning churches, cathedrals, and castles. Woodcarvers were highly regarded craftsmen, often working on elaborate altarpieces and wooden statues for religious institutions.
Tools and Techniques
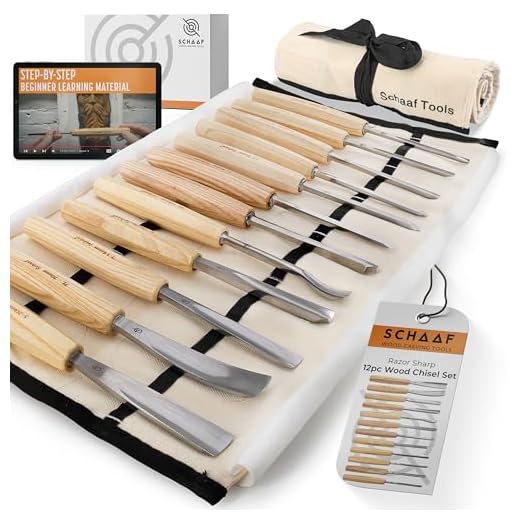
Wood carving requires a specific set of tools, each with its own purpose. These tools include chisels, gouges, knives, and mallets, among others. The selection of tools depends on the woodcarver’s style, preference, and the desired outcome of the carving.
There are various techniques used in wood carving, including relief carving, in which the design is raised from the surface of the wood, and intaglio carving, where the design is cut into the wood. Chip carving involves removing small chips of wood to create intricate patterns, while whittling involves shaping wood using a knife.
Modern woodcarvers also use power tools such as rotary tools and electric chisels to speed up the carving process and achieve more intricate details. However, traditional hand carving techniques are still highly valued and practiced by many woodcarvers.
Wood carving is not only a form of artistic expression but also a way to connect with nature and the natural beauty of wood. It requires patience, precision, and a deep understanding of the wood’s characteristics. Whether practiced as a hobby or profession, wood carving continues to captivate and inspire people with its timeless beauty and craftsmanship.
Why is a Sharp Chisel Important
A sharp chisel is crucial for wood carving for several reasons. Firstly, a sharp chisel allows for more precise and controlled cuts. It enables the woodcarver to create intricate details and achieve the desired shape with ease.
Additionally, a sharp chisel makes the carving process more efficient. A dull chisel requires more force to cut through the wood, resulting in a slower and more tedious carving experience. A sharp chisel, on the other hand, glides through the wood effortlessly, saving time and energy.
Furthermore, a sharp chisel minimizes the risk of accidents and injuries. When a chisel is dull, it tends to slip and cause unintended cuts. This can not only damage the workpiece but also put the woodcarver at risk. A sharp chisel provides better control and reduces the chances of slipping or losing control over the tool.
Lastly, a sharp chisel prolongs the lifespan of the tool. With regular sharpening, a chisel maintains its cutting edge and remains in good condition over time. This prevents the need for frequent replacement and saves money in the long run.
In conclusion, a sharp chisel is essential for wood carving due to its ability to enhance precision, efficiency, safety, and tool longevity. Woodcarvers should prioritize sharpening their chisels to achieve optimal results in their craft.
Step by Step Guide
Sharpening an AV chisel for wood carving is a crucial skill for every woodworker. Follow these steps to ensure you have a sharp and efficient chisel for your next carving project.
Step 1: Start by selecting the appropriate honing guide for your AV chisel. This guide will help you maintain the correct angle while sharpening.
Step 2: Secure the chisel in the honing guide according to the manufacturer’s instructions. Make sure it is firmly held in place
Step 3: Place the chisel on your sharpening stone or abrasive paper with the bevel facing down. Apply light pressure and move the chisel back and forth, keeping it flat against the stone.
Step 4: Continue sharpening the chisel, periodically checking the edge for sharpness. You can use a magnifying glass or your finger to feel for any burrs along the edge.
Step 5: Once the edge is sufficiently sharp, flip the chisel over and repeat the process on the other side. Remember to maintain the same angle throughout the sharpening process.
Step 6: After sharpening both sides of the chisel, remove any burrs or rough spots by gently rubbing the chisel against a fine-grit abrasive pad or leather strop.
Step 7: Clean the chisel and remove any metal shavings or debris. You can use a brush or cloth to wipe the chisel clean.
Step 8: Finally, apply a thin coat of oil or wax to protect the chisel’s edge from rust and corrosion.
Following these steps will ensure that your AV chisel is always sharp and ready for use in your wood carving projects. Remember to regularly maintain and sharpen your chisel to prolong its lifespan and maintain its effectiveness.
Gather the necessary tools
Before you start sharpening your AV chisel for wood carving, it’s important to gather all the necessary tools. Having everything prepared will make the process smoother and more efficient.
Here are the tools you’ll need:
- AV chisel
- Bench grinder
- Honing guide
- Sharpening stones (coarse, medium, fine grit)
- Leather strop
- Stropping compound
- Protective gloves
- Safety goggles
Make sure your AV chisel is clean and free from any dirt or debris before sharpening. Additionally, wear protective gloves and safety goggles to ensure your safety during the sharpening process.
Clean and Prepare the Chisel
Before sharpening your AV chisel for wood carving, it is important to clean and prepare it properly. This will help ensure that you achieve the best possible results when sharpening.
Cleaning the Chisel
Start by removing any dirt, dust, or debris from the chisel. Use a soft cloth or brush to gently wipe away any loose particles or build-up. Be careful not to apply too much pressure so as not to damage the chisel blade.
If the chisel is particularly dirty, you can use a mild soapy water solution to clean it. Dip the cloth or brush in the solution and gently scrub the blade, being sure to remove any grime or dirt. Rinse the chisel with clean water and pat it dry with a clean cloth. Make sure the chisel is completely dry before moving on to the next step.
Preparing the Chisel
Next, prepare the chisel by removing any rust or corrosion. This is especially important if the chisel has been stored for a long period of time or has been exposed to moisture. Use a rust remover or fine-grit sandpaper to gently remove any rust or corrosion from the blade. Be careful not to remove too much material and compromise the integrity of the chisel.
Once the chisel is clean and free from any rust, it is ready to be sharpened. Proceed to the next step in the sharpening process to ensure your chisel is properly honed and ready for wood carving.
Sharpen the Chisel
Sharpening your chisel is an essential step in wood carving. A sharp chisel allows for clean and precise cuts, making your carving process much more enjoyable and efficient. Here are the steps to sharpen your chisel:

Gather the necessary tools:
Before you begin sharpening, make sure you have the following tools:
- Sharpening stones
- Honing guide
- Water or honing oil
- Strop
Step 1: Prepare the sharpening stones:
Start by soaking your sharpening stones in water for about 10 minutes. This will ensure that the stones are adequately lubricated during the sharpening process.
Step 2: Secure the chisel in a honing guide:
Place the chisel in a honing guide to ensure a consistent angle while sharpening. Tighten the guide to hold the chisel securely in place.
Step 3: Start sharpening:
Begin by rubbing the chisel against the coarsest sharpening stone. Use light pressure and a circular motion to sharpen both sides of the chisel evenly. Repeat this process on the finer sharpening stones, gradually working your way to a finer grit.
Step 4: Check the sharpness:
Once you have sharpened the chisel on the finest stone, it’s time to check the sharpness. Hold a piece of paper and lightly drag the chisel across it. If the chisel cuts through the paper cleanly, it is sharp. If it tears or struggles to cut, continue sharpening on the finest stone.
Step 5: Strop the chisel:
After the sharpening process, use a leather strop to remove any burrs and polish the chisel’s edge. Apply some honing oil or water to the strop and stroke the chisel’s bevel gently across it.
By following these steps, you can ensure that your chisel is properly sharpened and ready for wood carving. Remember to regularly maintain and sharpen your chisel to maintain its cutting performance. Happy carving!


