


Sharpening chisels is an essential skill for any woodworker. Dull chisels can make your woodworking projects frustrating and difficult. Luckily, with the right tools and techniques, sharpening chisels can be a simple and satisfying task. In this article, we will guide you through the process of sharpening your chisels using the Estlea method.
The Estlea method is a tried and true method for sharpening chisels that produces excellent results. It involves using a series of sharpening stones with progressively finer grits to hone the edge of the chisel to a razor-sharp finish. This method is known for its simplicity and effectiveness, making it a popular choice among woodworkers of all skill levels.
Before you begin, gather all the necessary tools and materials. You will need a set of sharpening stones in various grits, ranging from coarse to fine. Additionally, you will need a honing guide, which is a device that helps you maintain a consistent angle while sharpening. Finally, make sure you have a honing compound, which is a paste-like substance that aids in the sharpening process.

The sharpening process consists of a series of steps. First, secure the chisel in the honing guide and set the angle according to your preference. Next, place the chisel on the coarsest sharpening stone and apply light pressure while sliding it back and forth. Repeat this motion several times on each side of the chisel until a burr, or thin metal edge, forms. Then, move on to the next finer grit stone and repeat the process. Continue this cycle until you reach your desired level of sharpness. Finally, apply the honing compound to a leather strop and polish the chisel by making a few passes on each side. Your chisel should now be ready for use!
In conclusion, sharpening chisels using the Estlea method is a straightforward process that can greatly improve your woodworking experience. By following these steps and practicing regularly, you will be able to keep your chisels sharp and ready for any woodworking project that comes your way. So, grab your sharpening stones and give your chisels the care they deserve!
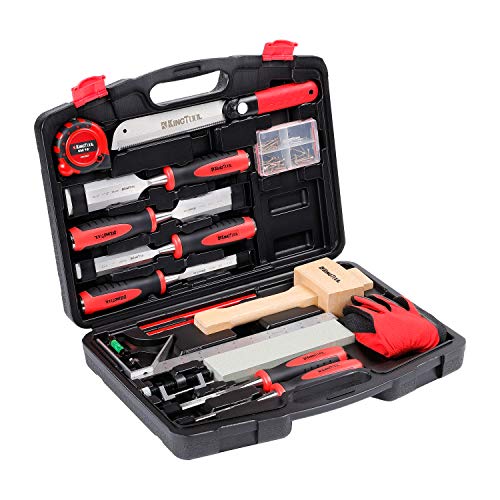
Essential Tools for Sharpening Chisels
When it comes to sharpening chisels, having the right tools is essential for achieving a sharp and precise edge. Here are some essential tools that every woodworker should have:
| Tool | Description |
|---|---|
| Sharpening Stones | Sharpening stones are the most common tools used for sharpening chisels. They come in various grits and are used to remove the dull edge and shape the chisel to a precise angle. |
| Honing Guide | A honing guide is used to hold the chisel at a consistent angle while sharpening. It ensures that the chisel is sharpened evenly and helps in achieving a sharp edge. |
| Strop | A strop is a tool used for polishing the edge of the chisel after sharpening. It helps in removing any burrs or rough edges and gives the chisel a smooth and refined finish. |
| Sharpening Jig | A sharpening jig is a device that holds the chisel securely and allows for precise and consistent sharpening. It helps in maintaining the correct angle and saves time during the sharpening process. |
| Angle Gauge | An angle gauge is used to measure the angle of the chisel while sharpening. It ensures that the correct angle is maintained and helps in achieving a sharp and accurate edge. |
| Bench Grinder | A bench grinder is an optional tool that can be used for initial shaping and removing large amounts of material from the chisel. It is useful for quick regrinding but should be used with caution to avoid overheating the blade. |
By having these essential tools in your workshop, you can easily and effectively sharpen your chisels, ensuring that they are always ready for precise woodworking tasks.
Preparing Your Chisels for Sharpening
Before you start sharpening your chisels, it’s important to properly prepare them. This will ensure that you achieve the best results and extend the lifespan of your tools. Here are a few steps to follow:
1. Clean the chisels: Begin by removing any dirt, debris, or rust from the chisels. You can use a wire brush or sandpaper to gently scrub the metal surfaces. Make sure to clean both the blade and the handle thoroughly.
2. Inspect for damage: Carefully examine each chisel for any signs of damage, such as chips, cracks, or bent edges. If you notice any issues, it’s best to address them before sharpening. Minor damages can often be repaired using a small file or honing guide.
3. Flatten the back of the blade: The flatness of the chisel’s back is crucial for achieving a sharp edge. Use a sharpening stone or sandpaper on a flat surface to flatten the back of the blade. Aim for a smooth and even surface, free from any irregularities.
4. Sharpen the bevel: The bevel is the angled edge of the chisel blade that you’ll be sharpening. Use a sharpening stone or honing guide to sharpen the bevel. Maintain a consistent angle and make sure to remove any burrs that may form during the sharpening process.
5. Hone the edge: After sharpening the bevel, use a honing guide and a finer grit sharpening stone to hone the edge of the chisel. This step helps polish the edge and remove any remaining burrs, resulting in a razor-sharp cutting edge.
6. Strop the chisel: To further refine the cutting edge, you can strop the chisel using a leather strop or a honing compound applied to a flat surface. This step helps remove any microscopic imperfections and ensures a smooth and sharp edge.
7. Reassemble and protect: Once you’ve finished sharpening, reassemble the chisels and protect the freshly sharpened blade with a blade guard or a cloth soaked in a rust-preventive oil. This will help prevent any damage or corrosion and keep your chisels in good condition until their next use.
By following these steps and properly preparing your chisels, you’ll be ready to sharpen them effectively and achieve excellent results in your woodworking projects.
Step-by-Step Guide to Sharpening Chisels
1. Prepare the chisel:
Before you begin sharpening, make sure your chisel is clean and free from any debris or rust. Use a wire brush to remove any rust and wipe it clean with a dry cloth.
2. Secure the chisel:
Place the chisel in a vise or hold it securely with a bench hook. This will ensure that the chisel remains stable and prevents any accidents or injuries during the sharpening process.
3. Flatten the back of the chisel:
Start by flattening the back of the chisel. Place a coarse grit sharpening stone on a stable surface and wet it with water or honing oil. Hold the chisel at a 25-degree angle and glide it back and forth on the stone, applying even pressure. Continue this motion until the back of the chisel is flat and free from any scratches or dents.
4. Sharpen the bevel edge:
Now it’s time to sharpen the bevel edge of the chisel. Switch to a finer grit sharpening stone and wet it with water or honing oil. Hold the chisel at the same 25-degree angle and glide it back and forth on the stone, starting from the heel to the tip. Apply even pressure and ensure that the entire bevel edge is in contact with the stone. Repeat this motion until a burr forms along the entire bevel edge.
5. Remove the burr:
To remove the burr, switch to a strop or a soft leather strip. Apply honing compound or abrasive paste to the strop and hold the chisel at the same angle as before. Stroke the chisel on the strop, moving it back and forth along the entire length of the bevel edge. This will help remove the burr and polish the edge for a sharp finish.
6. Test the sharpness:
Once you’ve completed the sharpening process, test the sharpness of the chisel by making a few test cuts on a piece of wood. If the chisel cuts cleanly and effortlessly, then it’s properly sharpened. If not, repeat the sharpening process until the desired sharpness is achieved.
7. Protect and store:
After sharpening, it’s important to protect the chisel’s edge. Use a chisel cover or sheath to prevent any accidental damage to the sharp edge. Store the chisel in a dry and clean place to avoid rusting and maintain its sharpness for a longer time.
By following this step-by-step guide, you can ensure that your chisels are always sharp and ready for any woodworking tasks.
Tips and Tricks for Achieving a Sharp Edge
Sharpening chisels is a skill that takes practice and attention to detail. Here are some tips and tricks to help you achieve a sharp edge on your chisels:
1. Use the Right Angle:
When sharpening your chisels, it is essential to use the correct angle. Most chisels have a bevel angle of 25 degrees, which means you should aim to match this angle when sharpening. Using a sharpening guide can help you maintain a consistent angle.
2. Start with Coarse Grit:
If your chisels are dull or have nicks, begin the sharpening process with a coarse grit stone. This will help remove any imperfections and reshape the edge. Gradually work your way up to finer grits to achieve a polished edge.
3. Maintain a Flat Surface:
One of the keys to sharpening chisels effectively is to maintain a flat surface on the back of the chisel. Use a honing guide to ensure that you are applying pressure evenly and keeping the chisel flat on the stone. This will help create a sharp and even edge.
4. Use Light Pressure:
When sharpening your chisels, it is important not to apply too much pressure. Using light, consistent pressure will allow for more control and prevent excessive wear on the stone. Remember, sharpening is a gradual process, so take your time and be patient.
5. Hone Regularly:
Maintaining a sharp edge on your chisels requires regular honing. After each use, spend a few minutes touching up the edge with a fine grit stone or honing guide. This will help ensure that your chisels are always ready for use and will prolong their lifespan.
6. Strop for a Polished Finish:
For a truly polished finish, consider using a strop. A strop allows you to refine the edge even further, reducing any burrs or imperfections. Apply some honing compound to the strop and make multiple passes with light pressure to achieve a razor-sharp edge.
7. Test the Edge:
Before putting your chisels back to work, always test the edge. Run your finger or a piece of paper along the edge to ensure it is sharp and free from any dull spots. A sharp chisel should effortlessly cut through paper or shave wood with ease.
By following these tips and tricks, you can achieve a sharp edge on your chisels and enjoy seamless cutting and shaping in your woodworking projects.
Maintaining Sharpness: Storing and Honing Chisels
After sharpening your chisels using the methods described in the previous sections, it is essential to store them properly to maintain their sharpness. Storing chisels correctly will protect the cutting edge from damage and ensure their longevity.
Storing Chisels
When not in use, chisels should be stored in a safe and organized manner. Here are some tips for storing chisels:
- Always clean the chisels after each use to remove any debris or dust.
- Store chisels in a dry and clean environment to prevent rusting.
- Consider using a chisel roll or a dedicated chisel storage system to keep the chisels protected and easily accessible.
- Avoid storing chisels in a way that allows them to come in contact with other tools or surfaces that can dull or damage the cutting edge.
Honing Chisels
Regularly honing your chisels will help maintain their sharpness and improve their cutting performance. Honing involves using a finer-grit sharpening stone or honing guide to refine the cutting edge. Here are some key considerations when honing chisels:
- Start by inspecting the chisel for any nicks or chips that may require reshaping or repairs.
- Choose an appropriate honing stone or guide based on the desired level of sharpness and the chisel’s bevel angle.
- Use consistent and smooth strokes while honing to ensure an even and polished cutting edge.
- After honing, remove any burrs or wire edges by gently stroking the chisel on a scrap piece of wood.
- Regularly check the sharpness of the chisel and repeat the honing process as necessary.
By properly storing your chisels and regularly honing them, you can ensure their sharpness and extend their lifespan. It is essential to incorporate these maintenance practices into your woodworking routine to achieve precise and efficient cutting results.
| Related Articles |
|---|
| How To Sharpen Chisels: The Basics |
| Choosing the Right Sharpening Stones |
| Common Mistakes to Avoid When Sharpening Chisels |