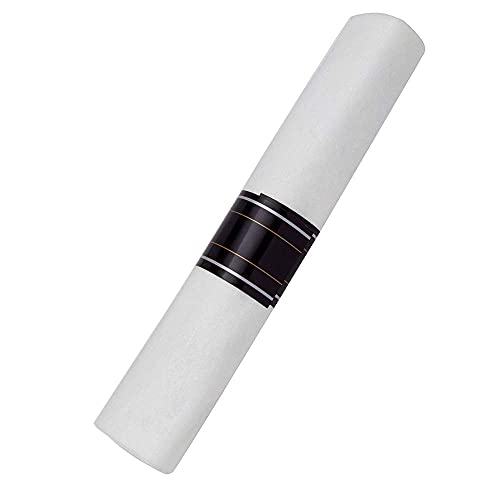


If you work with chisels, you know that keeping them sharp is essential for achieving precise and clean cuts. One of the best ways to sharpen chisels is by using an oilstone. An oilstone, also known as a sharpening stone or whetstone, is a natural or synthetic stone that is used to sharpen blades and tools.
Sharpening chisels on an oilstone requires a bit of practice and the right technique, but once you get the hang of it, you’ll be able to keep your chisels razor-sharp and ready for any project. In this article, we’ll guide you through the process of sharpening chisels on an oilstone, step by step.
First, you’ll need to gather the necessary tools and materials. You’ll need a chisel in need of sharpening, an oilstone (preferably a fine-grit stone), and honing oil. Honing oil is used to lubricate the stone and enhance the sharpening process. It helps to float away metal particles and ensures smooth sharpening.

Once you have everything ready, it’s time to start sharpening your chisels. Begin by applying a small amount of honing oil to your oilstone. You want to create a thin film of oil on the surface of the stone. Then, hold your chisel firmly with one hand and place the beveled edge of the chisel flat on the stone.
Sharpening Chisels: A Guide to Using an Oiling Stone
Sharpening chisels is an essential skill for any woodworker or craftsman. A sharp chisel not only allows for clean and precise cutting but also ensures your safety during use. One effective method for sharpening chisels is using an oiling stone.
An oiling stone is a type of sharpening stone that is specifically designed for use with oil as a lubricant. It consists of a fine-grained abrasive material that helps to remove burrs and restore the cutting edge of your chisel. Additionally, the use of oil helps to cool the chisel and prevent any damage to its temper.
Here is a step-by-step guide to using an oiling stone to sharpen your chisels:
-
Prepare the oiling stone: Before you start, ensure that your oiling stone is clean and free from any debris. If necessary, use a cleaning brush to remove any dirt or residue.
-
Choose the right oil: Select a suitable oil for lubricating the stone. Mineral oil or honing oil are commonly used. Apply a small amount of oil to the stone’s surface.
-
Hold the chisel correctly: Grasp the chisel firmly with your dominant hand, making sure to keep your fingers away from the cutting edge. Use your other hand to hold the chisel’s handle.
-
Position the chisel: Place the bevelled edge of the chisel flat against the oiling stone, making sure to maintain a consistent angle. The angle will depend on the type of chisel and its intended use.
-
Begin sharpening: Apply light pressure and move the chisel back and forth along the stone in a smooth, controlled motion. Ensure that the entire bevelled edge is making contact with the stone.
-
Check the progress: After a few passes, lift the chisel and examine the edge for any signs of improvement. Look for a clean and even edge without any visible burrs or nicks.
-
Repeat as necessary: If the chisel is not yet sharp, continue sharpening, focusing on any areas that require further attention. Remember to maintain a consistent angle and apply light pressure.
Trending Now Taytools Drill Press Sharpener AccessoryPerfect for chisels and plane bladesThis sharpener is specifically designed for effective sharpening of your woodworking chisels and plane blades, ensuring you achieve perfect carving edges with ease. -
Removing the burr: Once the chisel is sharp, gently run the back of the chisel over the oiling stone to remove any burrs that may have formed during sharpening.
-
Clean the chisel: Finally, wipe off any excess oil from the chisel using a clean cloth. You can also apply a small amount of oil to the chisel’s metal surfaces to prevent rusting.
With regular practice and proper maintenance, sharpening chisels on an oiling stone can become a straightforward and efficient process. Remember to take your time, be patient, and always prioritize safety when working with sharp tools.
Understanding the Importance of Sharp Chisels
A chisel is a basic woodworking tool that is essential for any carpenter or woodworker. Whether you are working on a small project or a large one, having sharp chisels is crucial for achieving precise and clean cuts. Here’s why sharpening your chisels is of utmost importance:
Enhanced Efficiency: Sharp chisels make your work easier and more efficient. With a sharp edge, you can effortlessly remove unwanted material and make clean and accurate cuts. Dull chisels, on the other hand, can slow you down and lead to frustration and mistakes.
Better Control: Sharp chisels provide better control over your cuts. They allow you to make precise and accurate movements, resulting in clean and smooth finishes. With a dull chisel, you are more likely to slip and damage your workpiece.
Reduced Effort: When your chisels are sharp, they require less force to cut through wood. This not only makes your work more enjoyable but also reduces the strain on your body, preventing fatigue and potential injuries.
Increased Tool Life: Regularly sharpening your chisels helps extend their lifespan. Dull chisels can chip or break more easily, requiring you to replace them more frequently. By keeping your chisels sharp, you can save money in the long run by avoiding unnecessary replacements.
Improved Safety: Sharp chisels are safer to use than dull ones. When you use a sharp chisel, it is less likely to slip or bounce off the workpiece, reducing the risk of accidents. Additionally, precise cuts made with sharp chisels result in a lower chance of splintering or tearing the wood, further enhancing safety.
Overall, keeping your chisels sharp is essential for achieving high-quality woodworking results. By understanding the importance of sharp chisels, you can prioritize regular sharpening and ensure that your chisels are always in optimal condition.
Step-by-Step Guide to Sharpening Chisels on an Oiling Stone
Sharpening chisels on an oiling stone is an essential skill for any woodworker. It ensures that your chisels remain sharp and ready for use, allowing you to achieve clean and precise cuts. In this step-by-step guide, we will walk you through the process of sharpening chisels on an oiling stone.
- Prepare the chisels: Start by gathering all the chisels that need sharpening. Check for any visible damage or nicks on the edges. If you notice any, use a bench grinder or a file to remove them before proceeding.
- Prepare the oiling stone: Place the oiling stone on a stable surface and make sure it is clean and free from debris. Apply a few drops of honing oil on the stone and spread it evenly across the surface. The oil will provide lubrication and protect the stone during the sharpening process.
- Set the angle: Determine the bevel angle of your chisel. Most chisels have a bevel angle between 25 to 30 degrees. Use a protractor or a honing guide to set the desired angle. This will ensure that you maintain a consistent angle across the entire edge of the chisel.
- Start sharpening: Holding the chisel firmly, place the beveled edge on the oiling stone at the set angle. Apply light and even pressure as you move the chisel back and forth on the stone. Start from the tip of the chisel and work your way back towards the handle. Repeat this motion for 10 to 15 strokes.
- Check for burr: After sharpening one side of the chisel, inspect the edge for a burr. A burr is a thin strip of metal that is pushed to the opposite side of the edge during sharpening. To check for a burr, run your finger along the backside of the chisel. If you feel a slight snag or roughness, the burr is present.
- Flip and repeat: Once you have sharpened one side and checked for a burr, flip the chisel over and repeat the sharpening process on the other side. Apply the same number of strokes and maintain the same angle.
- Remove the burr: To remove the burr, place the chisel flat on the oiling stone and gently drag it back and forth. This will help break off the burr and create a smooth and sharp edge.
- Test the sharpness: To ensure that your chisel is adequately sharpened, test its sharpness on a piece of scrap wood. Make a few test cuts and observe the results. If the chisel cuts cleanly and effortlessly, it is sharpened properly. If not, repeat the sharpening process until you achieve the desired sharpness.
By following this step-by-step guide, you can sharpen your chisels on an oiling stone with ease and precision. Regularly maintaining and sharpening your chisels will ensure that you have the right tools for every woodworking project.
Tips and Tricks for Maintaining Sharp Chisels
Keeping your chisels sharp is essential for achieving clean and precise cuts. Here are some tips and tricks to help you maintain sharp chisels:

- Regular Sharpening: Make it a habit to sharpen your chisels regularly. This will help prevent the edges from becoming dull and will reduce the amount of material you need to remove when sharpening.
- Use a Honing Guide: A honing guide can help you maintain a consistent angle when sharpening your chisels. This will ensure that you achieve a sharp and even edge.
- Start with Coarse Grit: If your chisel is very dull or damaged, start with a coarse grit stone or sandpaper to remove any chips or nicks. Gradually work your way up to finer grits for a polished edge.
- Keep the Chisel Flat: When sharpening your chisel, make sure to keep it flat against the stone or sandpaper. This will help maintain an even edge across the entire blade.
- Use Oil or Water: Depending on the type of sharpening stone you are using, you may need to use either oil or water as a lubricant. Follow the manufacturer’s instructions for best results.
- Check for Burr: After sharpening, check for a burr by running your finger lightly along the edge of the chisel. If you feel a slight hook, use a finer grit stone to remove it.
- Strop for a Polished Edge: For a truly sharp edge, consider using a leather strop. This will help remove any remaining burrs and give your chisel a polished finish.
- Store Properly: When not in use, make sure to store your chisels in a safe and dry place. Protect the edges by using blade guards or keeping them in a dedicated chisel rack.
By following these tips and tricks, you can ensure that your chisels stay sharp and ready for any woodworking task.