


If you’re a woodworker or have a passion for DIY projects, you know the importance of having sharp chisels. Blunt chisels can ruin your work and make your woodworking tasks frustrating. But don’t worry, you don’t need to be a professional to sharpen your chisels. In this step-by-step guide, we will show you how to sharpen chisels on YouTube.
Step 1: Gather the necessary tools
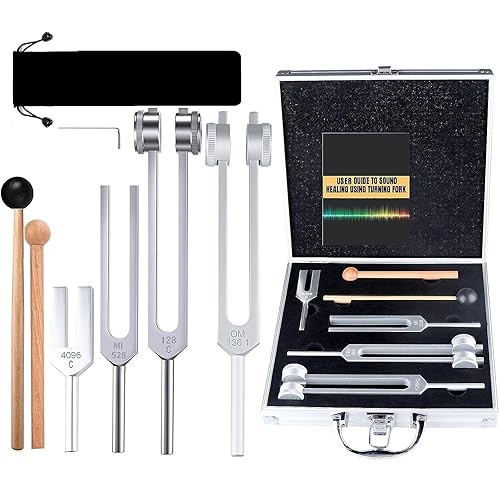
Before you start sharpening your chisels, you’ll need to gather a few tools. You will need a set of chisels, a sharpening stone or diamond plate, honing guide, lubricant, and a piece of leather or a strop. Having these tools ready will make the sharpening process much easier.
Step 2: Prepare the chisel
To start the sharpening process, you will need to prepare the chisel. Begin by removing any rust or debris from the chisel using a wire brush or sandpaper. Make sure the chisel is clean and free from any dirt or grime. If necessary, you can also use a honing guide to help you set the correct angle for sharpening.
Step 3: Sharpen the chisel

Now it’s time to sharpen the chisel. Start by applying a few drops of lubricant to the sharpening stone or diamond plate. Then place the chisel in the honing guide and position it on the stone or plate at the desired angle. Using even pressure, move the chisel back and forth across the stone or plate, making sure to cover the entire bevel. Repeat this process on both sides of the chisel until you achieve a sharp edge.
Step 4: Hone the chisel
Once you’ve sharpened the chisel, it’s important to hone the edge to make it even sharper. To do this, use a piece of leather or a strop. Apply a little honing compound to the leather or strop and rub the bevel side of the chisel against it in a circular motion. This will help remove any burrs and give your chisel a polished edge.
By following these steps and watching a detailed guide on YouTube, you can easily sharpen your chisels and improve your woodworking skills. Remember to take your time and be patient, as sharpening chisels is a skill that takes practice to master. With sharp chisels, you’ll be able to create clean and precise cuts in your woodworking projects.
Sharpen Chisels: Tips and Techniques
Chisels are indispensable tools for any woodworker or carpenter. However, like any other cutting tool, chisels become dull over time and require regular sharpening to maintain their functionality. Sharpening chisels may seem daunting at first, but with the right tips and techniques, you can achieve razor-sharp edges and make your chisels perform at their best. Here are some helpful suggestions to help you sharpen your chisels effectively:
1. Gather the necessary tools: Before you begin sharpening, make sure you have the right tools on hand. These usually include sharpening stones or sandpaper in various grits, a honing guide (optional but recommended), and a leather strop or honing compound.
2. Understand the bevel angle: Chisels usually have a bevel on one or both sides, which determines the cutting angle. It’s essential to understand the specific bevel angle for your chisels, as it will guide your sharpening technique.
3. Establish a flat back: Start by flattening the back of your chisel. This step ensures a solid foundation for sharpening the bevel. Use a coarse-grit stone or sandpaper, and gradually work your way up to finer grits until the back is flat and free from any scratches or nicks.
4. Sharpen the bevel: Once the back is flat, it’s time to sharpen the bevel. Place the chisel in a honing guide at the appropriate bevel angle and start with a coarse-grit stone or sandpaper. Maintain a consistent angle and apply even pressure as you move the chisel across the stone or sandpaper. Repeat this process with progressively finer grits until you achieve a sharp edge.
5. Hone the edge: After sharpening, it’s essential to hone the edge for a polished, razor-sharp finish. You can use a leather strop or apply honing compound to a flat surface. Move the chisel in a slicing motion, alternating sides, to remove any remaining burrs and refine the cutting edge.
6. Test and adjust: Finally, test the sharpness of your chisels by making a few practice cuts on a scrap piece of wood. If the chisel cuts cleanly and effortlessly, you’ve successfully sharpened it. If not, identify any dull spots or inconsistencies and make necessary adjustments.
Remember, practice makes perfect when it comes to sharpening chisels. With time and experience, you’ll develop your own techniques and preferences. Regular maintenance and sharpening will ensure that your chisels remain sharp and reliable for all your woodworking projects.
Why Do You Need to Sharpen Chisels?
Chisels are essential tools in woodworking, carpentry, and other crafts that involve cutting and shaping materials. Over time, chisels can become dull and lose their sharp edge, which can greatly affect their performance and efficiency. Sharpening chisels is a necessary skill for any craftsman or woodworking enthusiast. Here are a few reasons why you need to regularly sharpen your chisels:
1. Improved Cutting Efficiency
Sharp chisels make your work easier and more efficient. A sharp blade cuts through materials effortlessly, while a dull chisel requires additional force and effort. Sharpening your chisels ensures that you can work with precision and achieve clean, accurate cuts without exerting unnecessary pressure.
2. Safety
Dull chisels are more likely to slip or bounce off the workpiece, which can lead to accidents and injuries. When a chisel is not sharp, you may need to apply more pressure or use awkward angles to achieve the desired cut, increasing the risk of losing control. A sharp chisel allows for better control and reduces the chances of accidents, making your work safer.
3. Extended Tool Lifespan
Regularly sharpened chisels last longer than those left unsharpened. Dull chisels can quickly wear down and become damaged due to the need for excessive force and improper use. By sharpening your chisels, you not only maintain their performance and efficiency but also extend their lifespan, saving you money in the long run.
4. Versatility
Sharp chisels are versatile tools that can be used for various tasks and materials. Whether you are working with wood, metal, or other materials, a sharp chisel allows for precise cutting, shaping, and carving. With a sharp blade, you can easily tackle different projects and achieve professional-looking results.
Overall, sharpening your chisels is crucial for maintaining the quality of your work, ensuring safety, and maximizing the lifespan of your tools. By regularly sharpening your chisels, you can enjoy improved cutting efficiency, increased safety, and enhanced versatility in your woodworking and craft projects.
Choosing the Right Tools for Chisel Sharpening
When it comes to sharpening chisels, having the right tools can make a world of difference. The right tools not only make the task easier but also ensure that you achieve a sharp and precise edge on your chisels. Here are some key tools to consider for chisel sharpening:
| Tool | Description |
|---|---|
| Sharpening Stones | Sharpening stones are an essential tool for chisel sharpening. They come in various grits and can be used to remove nicks, reshape the bevel, and create a sharp edge. Water stones and oil stones are two common types of sharpening stones that you can choose from. |
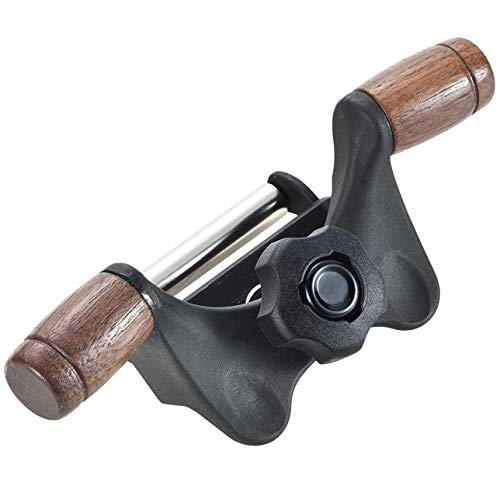
| Honing Guide | A honing guide is a tool that helps maintain a consistent angle while sharpening your chisels. It holds the chisel securely and ensures that you maintain the desired angle throughout the sharpening process. |
| Sharpening Jigs | Sharpening jigs are another useful tool for chisel sharpening, especially if you want to achieve a precise and repeatable edge. These jigs hold the chisel at a fixed angle, making it easier to consistently sharpen your chisels. |
| Honing Compound | Honing compound is applied to a leather strop or a honing wheel to further refine the edge of your chisel. It helps remove any burrs and brings the chisel to its final sharpness. |
| Flat Surface | A flat surface, such as a granite block or a honing plate, is crucial for ensuring that your chisel is flat and square during the sharpening process. It provides a stable base and allows you to achieve a precise edge. |
By investing in the right tools for chisel sharpening, you can ensure that your chisels are always sharp and ready for use. Remember to choose tools that suit your specific needs and preferences, and don’t forget to follow proper sharpening techniques for optimal results.
How to Sharpen Chisels: Step-by-Step Guide
Chisels are essential tools for woodworking and other tasks that require precise cutting. However, over time, the cutting edges of chisels can become dull and less effective. Sharpening your chisels is an important maintenance task that will not only improve their performance but also prolong their lifespan. In this step-by-step guide, we will walk you through the process of sharpening chisels to ensure they are always in top condition.
Step 1: Gather the necessary tools and materials
Before you begin sharpening your chisels, it is important to gather all the necessary tools and materials. You will need:

- A set of chisels
- A sharpening stone or diamond plate
- A honing guide
- A spray bottle with water
- A flat surface to work on
- A cloth or rag
Step 2: Prepare the sharpening stone
Start by preparing the sharpening stone. If you are using a natural stone, soak it in water for about 10 minutes before use. If you are using a diamond plate, spray it with water to ensure proper lubrication during sharpening.
Step 3: Set up the honing guide
Next, set up the honing guide. The honing guide will help you maintain a consistent angle while sharpening the chisel. Follow the manufacturer’s instructions to properly attach the chisel to the honing guide.
Step 4: Start sharpening
Now it’s time to start sharpening the chisel. Place the chisel in the honing guide and position it on the sharpening stone or diamond plate. Hold the honing guide firmly and apply light pressure as you slide the chisel back and forth on the stone. Make sure to maintain a consistent angle throughout the process.
Start with the coarse side of the sharpening stone or diamond plate to remove any nicks or dull edges. After a few passes, switch to the finer side to refine the edge and achieve a razor-sharp finish. Remember to keep the stone or plate wet by spraying water if necessary.
Step 5: Test the sharpness
Once you are satisfied with the sharpening, it’s time to test the sharpness. Carefully remove the chisel from the honing guide and run your finger gently along the cutting edge. If it feels smooth and you can see a slight reflection, your chisel is sharp and ready to use. If not, repeat the sharpening process until you achieve the desired sharpness.

Remember to take your time and be patient throughout the sharpening process. Practice regularly to improve your skills and maintain your chisels in optimal condition. With a sharp chisel, you will achieve clean and precise cuts, making your woodworking projects a breeze.
Common Mistakes to Avoid When Sharpening Chisels
Sharpening chisels is a crucial skill for any woodworker, but it can be easy to make mistakes if you’re not careful. Avoiding these common mistakes will help ensure that your chisels stay sharp and perform at their best. Here are some key mistakes to avoid:
1. Using the Wrong Angle
One of the most common mistakes when sharpening chisels is using the wrong angle. Each chisel has a specific angle that it should be sharpened at, typically between 20-30 degrees. Using the wrong angle can result in a chisel that is not effective or even damaged. Make sure to check the manufacturer’s recommendations or consult a sharpening guide for the correct angle.
2. Overheating the Blade
Overheating the blade while sharpening can cause the steel to lose its temper, resulting in a chisel that won’t hold its edge. It’s important to use a light touch and avoid letting the blade get too hot. Take breaks if needed and allow the chisel to cool down before continuing.
3. Neglecting the Backside
When sharpening a chisel, it’s essential to not forget about the backside of the blade. Neglecting to sharpen the backside can result in an uneven and unreliable edge. Take the time to ensure that both the bevel and backside are properly sharpened for optimal performance.
4. Rushing the Process
Sharpening chisels is a task that requires patience and attention to detail. Rushing the process can lead to mistakes and a poorly sharpened chisel. Take your time and follow the proper steps to ensure a sharp and effective cutting edge.
5. Not Honing the Edge
Honing the edge of a chisel is just as important as sharpening it. Not honing the edge can result in a rough and jagged surface that doesn’t provide clean cuts. Use a fine-grit honing stone or strop to refine the edge after sharpening, resulting in a chisel that is ready to use.

Avoiding these common mistakes when sharpening chisels will help you achieve a sharp and precise cutting tool. Remember to follow proper sharpening techniques and take the time needed to ensure a quality result. With practice and patience, you’ll be able to sharpen your chisels to perfection.
Sharpening Chisels with YouTube: Pros and Cons
YouTube has become an invaluable resource for learning new skills or honing existing ones, and sharpening chisels is no exception. By searching for “how to sharpen chisels” on YouTube, you can find numerous videos demonstrating the process step by step. But what are the pros and cons of relying on YouTube for sharpening chisels?
Pros
1. Visual Learning: Watching a video allows you to see the techniques being used in real-time. This can be especially helpful for beginners who may struggle to grasp the concept from written instructions alone. Seeing the process in action can make it easier to understand and replicate.
2. Accessibility: YouTube is available 24/7 and can be accessed from various devices, including smartphones, tablets, and computers. This means you can learn how to sharpen chisels at your own convenience, without the need to attend a physical class or workshop.
3. Demonstrations from Experts: YouTube hosts a wide range of videos created by seasoned professionals who have perfected their sharpening techniques over the years. By following their advice and tips, you can benefit from their expertise and improve your own chisel sharpening skills.
Cons
1. Quality Control: While YouTube has plenty of valuable content, it also contains videos from individuals with varying levels of expertise. It’s important to be cautious and verify the credibility of the sources you rely on. Look for videos created by reputable channels or individuals with a track record of sharing accurate and reliable information.
2. Lack of Personalized Instruction: YouTube videos are typically created for a broad audience, which means they may not address specific issues or provide personalized feedback. If you’re a beginner or struggling with a particular aspect of sharpening chisels, you may find it beneficial to seek guidance from a professional or attend a hands-on workshop.
3. Overload of Information: With the abundance of videos on YouTube, it’s easy to get overwhelmed by the different techniques and sharpening methods. It can be challenging to determine which approach suits your specific needs best. Take the time to research and compare different videos to find the method that resonates with you and aligns with the type of chisels you’re using.
In conclusion, while YouTube can be a valuable resource for learning how to sharpen chisels, it’s crucial to approach the platform with a discerning eye. Take advantage of the visual learning experience and expert advice available, but be aware of the potential drawbacks and consider seeking personalized instruction when necessary.