

Keeping your tools sharp is essential for any woodworking project, and chisels are no exception. A dull chisel can not only hinder your progress but also pose a safety risk. Fortunately, sharpening chisels with a whetstone is a straightforward process that can restore your chisels’ cutting edge and precision.
To begin the sharpening process, you will need a whetstone, also known as a sharpening stone. Whetstones come in various grits, with a coarse grit for initial sharpening and a finer grit for honing. If you are a beginner, it’s best to start with a medium-grit stone.
Before you start sharpening, secure your chisel by locking the blade into a honing guide. This guide will help you maintain a consistent angle as you sharpen the blade. It’s crucial to choose the correct angle for sharpening your chisel, which is typically around 25 degrees. You can use a protractor or an angle guide to ensure accuracy.
Once your chisel is secure and at the correct angle, wet your whetstone with water or honing oil, depending on the type of stone you are using. Start by working the chisel’s bevel against the stone in a circular motion. Apply moderate pressure and make sure to maintain a steady angle throughout the process. Repeat this motion several times on each side of the blade.
After sharpening both sides of the chisel, flip the honing guide to the flat side and repeat the circular motion on the flat side of the blade. This step helps remove any burrs or imperfections left from the initial sharpening process. Remember to apply water or honing oil to the stone as needed to keep it lubricated.
Lastly, use a honing compound on a leather strop or a piece of wood to give your chisel’s blade a final polish. This step will refine the cutting edge and make it razor-sharp. Hold the strop or wood flat on a stable surface, and with the bevel facing down, stroke the blade from the base to the tip, maintaining a consistent angle. Repeat this process several times until you achieve the desired sharpness.
Sharpening chisels with a whetstone is a skill that takes practice, but mastering it will greatly enhance your woodworking projects. By following these steps and maintaining your chisels regularly, you can ensure that they remain sharp and ready for any task.
Why Do You Need to Sharpen Chisels?
A chisel is a basic woodworking tool that consists of a handle and a sharp cutting edge. It is used for cutting, shaping, and removing materials such as wood, metal, or stone. Over time, the cutting edge of a chisel can become dull and lose its effectiveness. This is where the process of sharpening comes into play.
Sharpening chisels is essential for several key reasons:
1. Improved Performance
A sharp chisel allows for more precise and efficient work. It will effortlessly cut through materials, reducing the chances of slips or accidents. With a sharp chisel, you can achieve clean and accurate cuts, enhancing the overall quality of your woodworking projects.
2. Extended Lifespan
Regular sharpening helps to prolong the lifespan of your chisel. Dull chisels require more force to cut, which can lead to excessive pressure and strain on the tool. This can cause the cutting edge to chip, wear down, or even break, rendering the chisel unusable. By sharpening your chisels regularly, you can prevent these issues and ensure their longevity.
3. Cost Savings
Sharpening chisels yourself can save you money in the long run. Instead of constantly buying new chisels, you can maintain and restore the sharpness of your existing tools. With a whetstone, you have a cost-effective and efficient solution to keep your chisels in top shape.
Overall, sharpening chisels is necessary to maintain their performance, extend their lifespan, and save money. By investing time and effort into sharpening, you can ensure that your chisels are always sharp and ready for any woodworking task.
Choosing the Right Whetstone
When it comes to sharpening chisels, it’s important to choose the right whetstone for the job. There are a few factors to consider when making your selection:
1. Grit
Whetstones come in different grits, which refers to the coarseness of the stone’s surface. The grit you choose will depend on how dull or damaged your chisel is. Coarser grits, such as 1000 or 2000, are ideal for removing nicks and reshaping the edge of a chisel. Finer grits, like 4000 or 6000, are better suited for honing and polishing the chisel’s edge to a razor-sharp finish.
2. Size
Consider the size of the chisel you’ll be sharpening when selecting a whetstone. Smaller whetstones are more suitable for sharpening narrow chisels, while larger ones provide a wider surface area for sharpening wider chisels or multiple tools at once. Choose a size that accommodates the chisel you frequently work with.
3. Material
Whetstones can be made from different materials, each with their own advantages and disadvantages. Natural stones, like Arkansas or Japanese water stones, are known for their superior sharpening properties but may require more maintenance. Synthetic stones, such as aluminum oxide or silicon carbide, are more affordable and often easier to use. Consider your personal preferences and budget when choosing between natural and synthetic stones.
By taking into account the grit, size, and material of a whetstone, you can ensure that you’re choosing the right one to effectively sharpen your chisels and achieve the desired results.
Step-by-Step Guide to Sharpening Chisels with Whetstone
Sharpening chisels with a whetstone is a simple yet essential skill for any woodworking enthusiast. A sharp chisel not only improves the quality of your work but also ensures your safety. Follow these steps to properly sharpen your chisels using a whetstone:
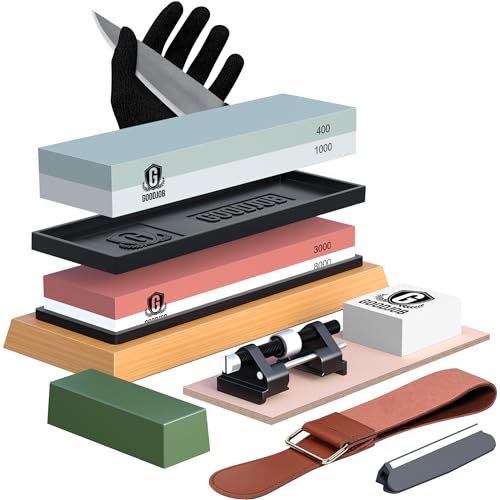
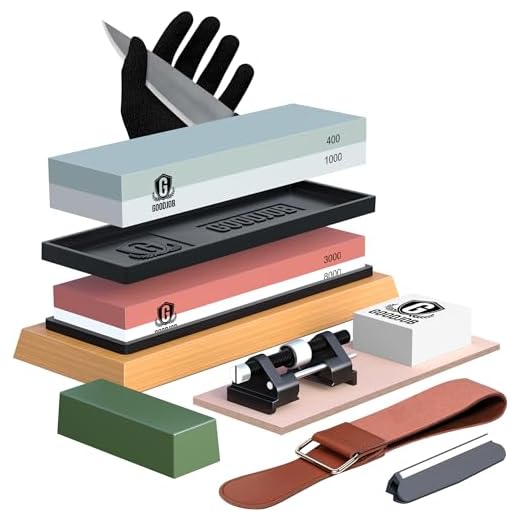
- Prepare Your Equipment: Gather the necessary tools, including a whetstone, a chisel, a honing guide, and a water container to soak the whetstone.
- Soak the Whetstone: Fill the water container and submerge the whetstone in water. Let it soak for about 10 minutes to ensure it is fully saturated.
- Set Up the Honing Guide: Attach the chisel to the honing guide, which will help maintain a consistent sharpening angle. Adjust the guide to the desired angle for your chisel (usually between 25 and 30 degrees).
- Start Sharpening: Hold the honing guide firmly and position the chisel against the whetstone at the desired angle. Using light pressure, move the chisel back and forth across the whetstone in a smooth motion.
- Alternate Sides: After several passes, flip the chisel and repeat the sharpening process on the other side. This ensures that both sides receive equal sharpening.
- Check for Burrs: After sharpening each side, examine the chisel for any burrs or rough edges. If present, lightly run the chisel flat on the whetstone to remove them.
- Test the Sharpness: Once you are satisfied with the sharpening, perform a test cut on a scrap piece of wood to ensure the chisel is sharp enough for your needs.
- Repeat if Necessary: If the test cut is not satisfactory, repeat the sharpening process, focusing on any areas that require further attention.
- Clean and Store: Rinse the whetstone, honing guide, and chisel with water to remove any metal shavings. Dry them thoroughly and store them in a dry, safe place until next use.
With practice, you will become more proficient in sharpening chisels with a whetstone. Regular maintenance and sharpening will extend the lifespan of your chisels and ensure that they always perform at their best.


