
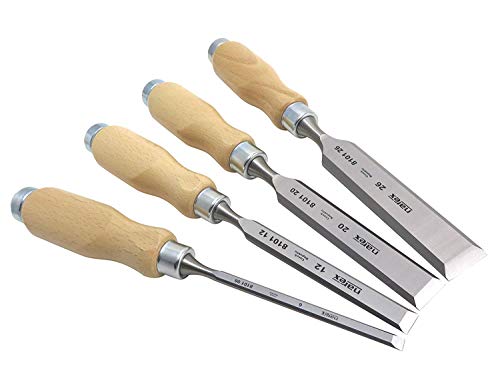


Tempering steel chisels is an essential skill for any woodworking enthusiast or professional. Properly tempered chisels are stronger and more durable, making them less likely to chip or break during use. In this article, we will guide you through the process of tempering steel chisels to ensure that you achieve the desired hardness and toughness for your chisels.
Step 1: Preparing the Chisels
Before tempering, it is important to properly prepare the chisels. Start by thoroughly cleaning the chisels to remove any dirt, grease, or rust. You can use a wire brush or sandpaper to remove any rust spots. Once the chisels are clean, make sure to dry them thoroughly to prevent water from interfering with the tempering process.
Step 2: Heating the Chisels
Next, you will need to heat the chisels to a specific temperature to achieve the desired hardness. This process is known as heat treating. Place the chisels in a forge or a gas or electric furnace and heat them to a temperature of around 800 to 900 degrees Celsius (1472 to 1652 degrees Fahrenheit). Use a thermometer to ensure accurate temperature control.
Step 3: Quenching the Chisels
After the chisels reach the desired temperature, it’s time to quench them. Quenching involves rapidly cooling the chisels to harden the steel. You can use different quenching mediums, such as oil, water, or brine, depending on the type of steel and the desired hardness. Carefully immerse the heated chisels into the quenching medium and ensure they are fully submerged for an even cooling process. Be cautious, as this step can cause a sharp release of steam and may require protective gear.
Step 4: Tempering the Chisels
Now that the chisels have been hardened, they need to be tempered to remove some of the brittleness and increase their toughness. This is achieved by reheating the chisels to a lower temperature and allowing them to cool slowly. Place the hardened chisels in an oven or a gas or electric furnace and heat them to around 200 to 300 degrees Celsius (392 to 572 degrees Fahrenheit) for about an hour. Let the chisels cool naturally in the oven or furnace after the specified time.
By following these steps, you can successfully temper your steel chisels and ensure their durability and longevity. Remember to always use caution and appropriate protective gear when working with high temperatures and potentially hazardous substances. Happy woodworking!
Preparation for Tempering Steel Chisels
Before tempering steel chisels, it is important to properly prepare the chisels to ensure the best results. This involves several steps that should be followed carefully to achieve the desired hardness and durability in the chisels.
1. Clean the Chisels
The first step in preparation is to clean the chisels thoroughly. This can be done by removing any dirt, rust, or debris from the chisels. It is important to have clean chisels to ensure that the heat treatment is effective.
2. Inspect the Chisels
After cleaning, inspect the chisels for any signs of damage or wear. Look for any cracks or chips in the cutting edge of the chisels. Any damaged chisels should be repaired or replaced before tempering.
3. Preheat the Chisels
Before tempering, it is necessary to preheat the chisels. This helps to ensure that the chisels heat evenly during the tempering process. Place the chisels in a preheating oven and gradually raise the temperature to around 300-400 degrees Celsius.
4. Prepare the Quenching Medium
The next step is to prepare the quenching medium. This can be done by filling a container with an appropriate quenching liquid, such as oil or water. The quenching medium should be at room temperature or slightly cool before use.
5. Harden and Temper the Chisels
Once the chisels have been preheated and the quenching medium is ready, it is time to harden and temper the chisels. Heat the chisels evenly until they reach the desired temperature, which varies depending on the type of steel being used. Then, quickly quench the chisels in the prepared quenching medium.
After quenching, the chisels should be tempered to reduce their brittleness and increase their toughness. This can be done by heating the chisels again to a specific temperature, typically around 200-250 degrees Celsius, and holding them at that temperature for a specific amount of time. This process is known as tempering.
It is important to follow these steps carefully during the preparation for tempering steel chisels. Proper preparation will ensure that the chisels achieve the desired hardness and durability, making them effective tools for various applications.
Cleaning Steel Chisels
Before tempering steel chisels, it’s important to thoroughly clean them to remove any dirt, rust, or other contaminants that may interfere with the tempering process. Cleaning your chisels will not only help ensure a successful tempering, but it will also extend their lifespan and improve their performance.
Here are some steps you can follow to properly clean your steel chisels:
- Inspect the chisels: Before cleaning, carefully inspect the chisels for any signs of damage or excessive wear. If you notice any cracks, chips, or other issues, it’s best to address them before proceeding.
- Remove the handles: If your chisels have wooden handles, remove them before cleaning. This will make it easier to clean the chisel blades and minimize the risk of damaging the handles.
- Remove dirt and debris: Use a stiff brush or a toothbrush to remove any loose dirt, dust, or debris from the chisels. Pay special attention to the area near the cutting edge and the sides of the blade.
- Remove rust: If there is any rust on the chisels, you can use a rust remover or a mixture of vinegar and water to dissolve it. Apply the rust remover or vinegar mixture to the affected areas and let it sit for a few minutes. Then, scrub the rusted areas with a scrub brush or steel wool until the rust is completely removed.
- Clean with soap and water: After removing the dirt and rust, wash the chisels with warm soapy water to remove any remaining contaminants. Use a mild dish soap or a specialized metal cleaner and scrub the chisels with a sponge or a soft cloth. Rinse them thoroughly with clean water and pat them dry with a towel.
- Dry and lubricate: Once the chisels are clean and dry, it’s important to protect them from moisture and prevent future rusting. Apply a thin coat of lubricating oil or a rust-preventive oil to the chisel blades and handles. This will help keep them in good condition and ready for use.
By following these cleaning steps, you’ll ensure that your steel chisels are in optimal condition and ready for the tempering process. Remember to clean your chisels regularly to maintain their performance and longevity.
Heating the Steel Chisels
Before tempering, it is important to heat the steel chisels to a specific temperature. This is a vital step in the tempering process as it allows the steel to reach its critical transformation temperature.
To heat the steel chisels, a heat source such as a forge or a torch can be used. It is crucial to ensure that the heat is evenly distributed across the chisel to avoid any hotspots or uneven heating.
One method of heating the chisels is by using a forge. The chisels should be placed in the forge and heated until they reach a uniform cherry red color. This color indicates that the steel has reached the desired temperature for tempering.
An alternative method is to use a torch. The chisel should be held with tongs and the torch flame should be directed towards the tip of the chisel. The chisel can be rotated slowly to ensure even heating. The steel should be heated until it reaches a cherry red color.
It is important to note that overheating the steel chisels can result in different outcomes, such as loss of hardness or even cracking. Therefore, it is crucial to monitor the temperature carefully and avoid overheating.
Once the steel chisels have reached the desired temperature, they are ready to undergo the tempering process to improve their hardness and durability.
Quenching the Steel Chisels
Quenching is a critical step in the process of tempering steel chisels. This step is essential for achieving the desired hardness and toughness in the chisel blades. Here is a step-by-step guide on how to properly quench your steel chisels:
- Prepare the quenching medium: Fill a container with oil or water to use as the quenching medium. The choice of quenching medium depends on the type of steel and the desired hardness of the chisel.
- Heat the chisel blade: Use a forge or a torch to heat the chisel blade until it reaches a bright red color. Make sure the entire blade is evenly heated.
- Quench the chisel in the medium: Carefully submerge the heated chisel blade into the quenching medium. Hold the blade vertically to ensure an even and consistent quenching process.
- Agitate the chisel: While the chisel is submerged in the quenching medium, gently move it back and forth or rotate it to promote an even and rapid quenching process.
- Monitor the temperature: Use a temperature indicator or watch the colors of the chisel blade to determine when it has cooled down sufficiently. Typically, you want the chisel blade to reach a dark straw color.
- Remove and clean the chisel: Once the chisel has cooled down, carefully remove it from the quenching medium. Clean off any residue or scale from the surface of the blade.
- Temper the chisel: After quenching, the chisel will be extremely hard but quite brittle. To improve its toughness, temper the chisel by gradually reheating it and then allowing it to cool slowly.
Remember to always follow safety precautions while quenching steel chisels, as the process involves high temperatures and flammable substances. Additionally, consult the manufacturer’s guidelines or seek expert advice to determine the appropriate quenching medium and specific quenching parameters for your steel chisels.
Tempering the Steel Chisels
Once the steel chisels have been hardened, it is important to temper them to the appropriate hardness. Tempering is a process that reduces the hardness and brittleness of the chisels, making them more durable and less likely to break during use.
To temper the steel chisels, follow these steps:
| Step 1: | Preheat an oven to the recommended tempering temperature, typically around 400-600 degrees Celsius. |
| Step 2: | Place the hardened chisels in the oven and let them heat up to the tempering temperature. Ensure that the chisels are spaced out and not touching each other. |
| Step 3: | Keep the chisels at the tempering temperature for the recommended amount of time, typically around 1-2 hours. |
| Step 4: | After the recommended tempering time has passed, remove the chisels from the oven using heat-resistant gloves or tongs. |
| Step 5: | Allow the chisels to cool gradually at room temperature. Avoid quenching them in water or oil, as this can alter their desired hardness. |
It is important to note that the specific tempering temperature and time may vary depending on the type of steel being used and the desired hardness. Consult the manufacturer’s guidelines or an expert in metalworking for the best results.
By following these steps, you can effectively temper your steel chisels and ensure they are strong and durable for various woodworking projects.
Final Steps for Tempering Steel Chisels
Tempering steel chisels is an important step in the process of making them stronger and more durable. After the chisels have been heated up and then quenched, it’s time to move on to the final steps of tempering them.
1. Clean the Chisels: Once the chisels have been quenched and cooled down, use a wire brush or sandpaper to clean off any residual oil or dirt. It’s important to have a clean surface before moving on to the next step.
2. Heat the Chisels Again: After cleaning, heat the chisels once again, this time to a lower temperature than during the initial heat treatment. This second heating process is called tempering. The precise temperature will depend on the type of steel used, but generally, a range of 350°F to 500°F (175°C to 260°C) is suitable.
3. Observe the Colors: As the chisels heat up, they will start to change color. This is a crucial part of the tempering process. Keep a close eye on the chisels and watch for the transformation of colors. The colors will progress from pale straw to dark straw, then to a light purple, followed by a dark blue, and finally to a light blue. Once the desired color is reached, immediately move on to the next step.
4. Quench the Chisels: To stop the tempering process and lock in the desired hardness, the chisels need to be quenched once again. Similar to the initial quenching step, use a quenching medium, such as oil or water, to rapidly cool down the chisels. Be cautious and ensure that the chisels are fully submerged to avoid any uneven cooling or warping.
5. Test the Hardness: Once the chisels have been quenched and cooled, it’s important to test their hardness. A simple way to do this is by gently tapping the chisels against a hard surface. If they produce a clear, high-pitched sound, it indicates that they are properly tempered and hardened. On the other hand, if the chisels produce a dull or muffled sound, they may need to be re-tempered.
6. Finish and Sharpen: Finally, after the tempering process is complete and the chisels have passed the hardness test, they can be finished and sharpened. Use a sharpening stone or sandpaper to remove any burrs or rough edges, and then hone the chisels to a sharp cutting edge. This will ensure that they are ready for use and perform optimally.
By following these final steps for tempering steel chisels, you can ensure that your chisels are strong, durable, and ready for any woodworking task. Remember to always exercise caution when working with heat and quenching fluids to ensure safety.


