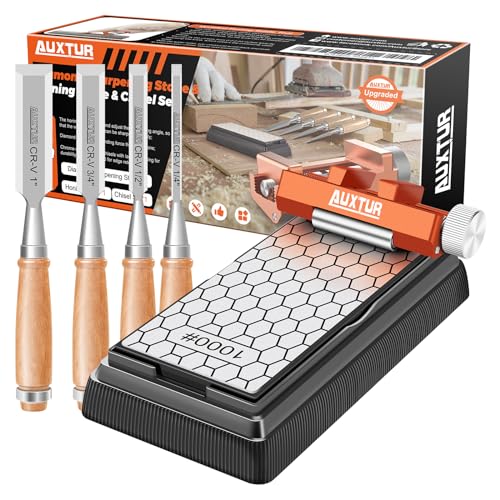
If you’re a woodworker or a carpenter, you know the importance of keeping your chisels sharp. A dull chisel can make your work slow and frustrating, and it can also be dangerous. One of the best tools for sharpening chisels is a diamond sharpening stone.
Diamond sharpening stones are known for their durability and effectiveness in sharpening various tools. They are made with a diamond-coated surface that allows for precise and efficient sharpening. Using a diamond sharpening stone can help you restore the cutting edge of your chisels and make them as good as new.
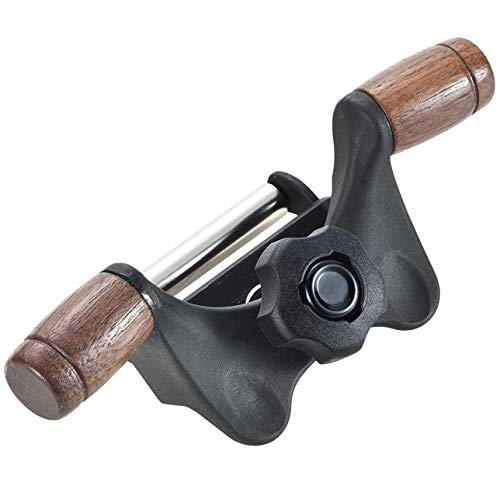
Before you start sharpening your chisels, it’s important to make sure you have the right tools and materials. In addition to a diamond sharpening stone, you’ll need a honing guide to hold the chisel at the correct angle, and some lubricating oil to keep the stone clean and prevent it from clogging. Once you have everything you need, you can start the sharpening process.
First, secure the diamond sharpening stone on a sturdy surface with non-slip material or a sharpening stone holder. This will prevent the stone from moving while you’re sharpening your chisels. Next, apply a few drops of lubricating oil on the surface of the stone. The oil will help reduce friction and keep the stone clean.

Selecting the Right Diamond Sharpening Stone
When it comes to sharpening chisels, using a diamond sharpening stone can be a game-changer. However, selecting the right stone for the job is crucial to achieve the best results. Here are some factors to consider when choosing a diamond sharpening stone:
Grit Size
One of the most important things to consider is the grit size of the stone. Diamond sharpening stones come in various grit sizes, and each grit size has its own purpose. Coarse grits, such as 200 or 300, are ideal for repairing damaged or extremely dull chisels. Medium grits, ranging from 400 to 800, are great for general sharpening tasks. Fine grits, such as 1000 or higher, are perfect for achieving a polished and razor-sharp edge.
Stone Size
The size of the diamond sharpening stone is another important factor to consider. Smaller stones, such as 6″ x 2″, are portable and easy to maneuver, making them great for sharpening chisels on the go or in tight spaces. Larger stones, like 8″ x 3″, provide a larger surface area, which can be beneficial when sharpening larger chisels or other tools.
Quality
The quality of the diamond sharpening stone is crucial for achieving consistent and effective sharpening results. Look for stones that are made with high-quality diamonds embedded in a durable, flat surface. It’s also worth considering stones that have a backing material to provide stability and prevent slippage during use.
Conclusion
Choosing the right diamond sharpening stone can greatly impact the efficiency and effectiveness of chisel sharpening. By considering the grit size, stone size, and quality of the stone, you can ensure that you have the right tool for the job. Invest in a high-quality diamond sharpening stone and take your chisel sharpening skills to the next level.
Preparing Your Chisel for Sharpening
Before you begin sharpening your chisel on a diamond sharpening stone, it’s important to properly prepare the chisel for optimal results. Follow these steps to ensure your chisel is clean and ready:
1. Inspect the Chisel: Carefully examine the chisel for any damage or signs of wear. Check for any chips, cracks, or unevenness on the blade. If you notice any issues, you may need to fix or replace the chisel before sharpening.
2. Clean the Chisel: Use a brush or cloth to remove any dirt, dust, or debris from the chisel. Make sure the blade is free from any particles that can interfere with the sharpening process.
3. Flatten the Back: The back of the chisel should be flat before sharpening. Place the chisel flat on the sharpening stone and move it back and forth in a figure-eight motion. This will help remove any imperfections and make the blade ready for sharpening. Check the back of the chisel for flatness and continue until it’s completely flat.
4. Establish the Bevel Angle: Determine the bevel angle you want to achieve on your chisel. Most chisels have a 25-degree bevel angle, but it can vary depending on your desired sharpness and cutting needs. Use a bevel gauge or protractor to measure and set the angle accurately.
5. Mark the Blade: To ensure consistency during the sharpening process, mark the edge of the chisel with a marker or pencil. This will help you keep track of where you’ve sharpened and avoid uneven sharpening.
6. Secure the Chisel: Use a bench vise or a sharpening jig to secure the chisel firmly in place. This will prevent any accidental movements or slips while sharpening, ensuring your safety and precise sharpening.
7. Start Sharpening: With all the preparations complete, you’re now ready to start sharpening your chisel on the diamond sharpening stone. Follow the proper sharpening technique, using consistent pressure and maintaining the desired bevel angle. Sharpen the chisel in a controlled manner until you achieve a sharp and polished edge.
By following these preparation steps, you’ll maximize the effectiveness of your diamond sharpening stone and achieve excellent results when sharpening your chisel.
Sharpening the Chisel
Properly sharpening your chisel is essential for achieving precise and clean cuts. Follow these steps to sharpen your chisel using a diamond sharpening stone:
Gather Your Tools
Before you begin sharpening, gather the necessary tools:
- Chisel
- Diamond sharpening stone (coarse and fine grit)
- Water or honing oil
Prepare the Stone
Place the diamond sharpening stone on a stable surface. If it is a two-sided stone with coarse and fine grit, start with the coarse side.
Wet the Stone
Wet the stone with water or apply a few drops of honing oil. This will lubricate the surface and prevent the steel from overheating.
Hold the Chisel
Hold the chisel securely, with the beveled edge facing up. Make sure your fingers are away from the cutting edge.
Angle the Chisel
Hold the chisel at an angle between 20 and 25 degrees. This angle allows for a sharp edge while maintaining strength.
Sharpen the Bevel
Starting at the heel of the chisel, glide it along the stone while maintaining the angle. Move the chisel in a sweeping motion from one end of the stone to the other.
Check for Burrs
After a few passes, check the bevel for a burr. Run your finger along the flat side of the chisel, and if you feel a rough edge, a burr has formed.
Switch Sides
Once you have sharpened one side of the bevel, flip the chisel and repeat the process on the other side. This will ensure even sharpening.
Switch to Fine Grit
Once you are satisfied with the sharpness of the chisel on the coarse grit side, switch to the fine grit side of the diamond sharpening stone. Repeat the sharpening process.
Hone the Back
After sharpening the beveled edge, you can hone the back of the chisel by placing it flat on the stone and lightly moving it back and forth. This will remove any burrs and refine the edge.
Remember to clean the sharpening stone after use and store it properly to ensure its longevity. Properly sharpened chisels will enhance your woodworking projects by providing crisp and precise cuts.
Finishing and Honing the Chisel
Once you have completed the initial sharpening of your chisel on the diamond sharpening stone, it is time to finish and hone the blade. This step is crucial to create a sharp and precise cutting edge.
To begin, you will need a honing guide to help you maintain a consistent angle while sharpening. This guide will ensure that the bevel is flat and the cutting edge is straight. Position your chisel in the honing guide, making sure it is secure and stable.
Next, apply a few drops of honing oil to the sharpening stone. This will lubricate the stone and prevent the chisel from overheating. Begin by holding the honing guide at the desired angle, usually between 20 and 30 degrees, and push the chisel across the stone in a sweeping motion.
| Pressure | Result |
|---|---|
| Ligth pressure | Polishing the cutting edge |
| Moderate pressure | Refining the edge |
| Firmer pressure | Removing minor nicks and burrs |
Continue to sharpen the chisel with firm, even strokes, paying attention to maintain the proper angle and consistent pressure. Check the blade frequently to monitor your progress. It is important to avoid overheating the blade or applying too much pressure, as this can damage the chisel.
Once the desired sharpness is achieved, you can move on to honing the chisel. Switch to a finer grit diamond stone or a leather strop. Apply a small amount of honing compound to the strop and move the chisel back and forth in a smooth, sweeping motion. This final step will remove any remaining burrs and make the cutting edge razor-sharp.
Remember to frequently clean the sharpening stones and remove any debris or metal particles that may accumulate. This will ensure optimal performance and longevity of your chisels.
With a properly sharpened and honed chisel, you will be able to achieve precise and clean cuts, making your woodworking tasks much more efficient and enjoyable.
Tips and Safety Precautions for Using a Diamond Sharpening Stone
Using a diamond sharpening stone can be an effective way to sharpen your chisels and achieve a keen cutting edge. However, it is important to follow some tips and safety precautions to ensure a successful and safe sharpening experience. Here are some guidelines to keep in mind:
1. Choose the Right Grit
Diamond sharpening stones come in different grit sizes, which determine the coarseness or fineness of the stone. For chisels, it is generally recommended to start with a coarser grit (around 300 to 600) to remove any nicks or imperfections and then progress to a finer grit (around 1000 to 1500) for a polished edge. Always check the manufacturer’s instructions for specific grit recommendations.
2. Keep the Stone Wet
It is important to keep the diamond sharpening stone wet during use to prevent heat buildup and to facilitate the sharpening process. Fill a container with water and place the stone in it to keep it continuously wet. You can also spray water directly onto the stone as you sharpen.
3. Maintain a Consistent Angle
When sharpening your chisel on the diamond stone, it is crucial to maintain a consistent angle throughout the process. This ensures an even sharpening and prolongs the life of your chisel. A good starting angle is typically around 25 to 30 degrees, but make sure to refer to your chisel manufacturer’s guidelines for the recommended angle.
4. Use Light Pressure
When sharpening, it is best to apply light and consistent pressure on the chisel against the diamond stone. Avoid using excessive force, as this can cause the chisel to gouge into the stone or produce uneven results. Let the diamond abrasives do the work and focus on maintaining the correct angle.
5. Clean and Dry the Chisel
After sharpening your chisel, make sure to clean off any metal shavings or debris that may have accumulated on the blade. Use a brush or cloth to remove any residue. Then, dry the chisel thoroughly to prevent rusting.
Safety Precautions:
| 1. | Always wear safety goggles or a face shield to protect your eyes from flying metal particles. |
| 2. | Secure your chisel properly in a vise or clamp to prevent any accidents or injuries. |
| 3. | Keep your fingers and hands away from the cutting edge of the chisel to avoid cuts or other injuries. |
| 4. | Avoid wearing loose clothing or jewelry that can get caught in the sharpening process. |
| 5. | Store your diamond sharpening stone in a dry place away from moisture to prolong its lifespan. |
By following these tips and safety precautions, you can confidently use a diamond sharpening stone to maintain the sharpness and performance of your chisels. Remember to always prioritize safety and take your time to achieve the best results.