
If you have ever sharpened your chisels, you may have noticed that they turn black after the process. This phenomenon can be quite puzzling, especially if you are meticulous about taking care of your tools. So, why do your chisels go black when you sharpen them? Well, the answer lies in the chemistry of metal and the process of sharpening.
When you sharpen your chisels, you are essentially removing material from the cutting edge to create a sharper and more effective tool. This process involves grinding the metal away, which generates heat. As the metal heats up, it undergoes a chemical reaction known as oxidation.
Oxidation is a process that occurs when metal comes into contact with oxygen in the air. It causes a chemical change in the metal’s surface, leading to the formation of iron oxide, better known as rust. The heat generated during sharpening accelerates the oxidation process, resulting in a blackening of the chisel.
However, it is important to note that the blackening of your chisels does not necessarily indicate a problem. In fact, it is quite common and does not affect the performance of the tool. The black layer that forms on the surface of the chisel is simply a thin coating of iron oxide, which can easily be removed.
To remove the black layer, you can use a fine grit sandpaper or a wire brush to scrub the surface of the chisel. This will help to restore the original appearance of the tool and prevent any potential rusting. Additionally, keeping your chisels clean and dry after sharpening can also help to prevent future blackening.
So, the next time you sharpen your chisels and notice them turning black, there is no need to panic. It is a natural chemical reaction that occurs during the sharpening process. By understanding the chemistry behind it and taking proper care of your tools, you can ensure that your chisels stay sharp and in excellent condition.
Why Do Chisels Turn Black?
When sharpening chisels, you may notice that they sometimes turn black. This can be a frustrating and puzzling phenomenon, but it has a scientific explanation.
The black coloration that appears on chisels after sharpening is known as a “patina.” Patina is a thin layer of oxidation that forms on the surface of metals, including the steel used in chisels. It is a natural process that occurs when the metal reacts with oxygen in the air.
When you sharpen a chisel, you remove some of the metal from the blade, exposing fresh, untreated steel. This newly exposed steel is highly reactive and more susceptible to oxidation. As a result, it quickly forms a layer of patina, which appears black or dark gray in color.
The formation of a patina on chisels is not a cause for concern. In fact, it can be considered a sign of a well-sharpened chisel. The presence of a patina indicates that the chisel’s blade has been properly ground and honed, resulting in a sharp cutting edge.
Some woodworkers even prefer the blackened appearance of chisels as it adds a touch of character to their tools. However, if you prefer a pristine look, you can remove the patina by polishing the chisel’s blade with a fine abrasive and then applying a protective coating.
Preventing Excessive Patina
If you find that your chisels are developing an excessive amount of patina, there are a few steps you can take to minimize oxidation:
- Store your chisels in a dry environment to reduce exposure to moisture.
- Clean your chisels after each use by wiping them with a dry cloth to remove any moisture or debris.
- Apply a thin layer of oil or wax to the chisel’s blade before storing it to create a protective barrier against oxidation.
By following these preventive measures, you can help minimize the formation of patina and keep your chisels in optimal condition.
Conclusion
The black color that chisels turn after sharpening is a natural occurrence known as patina. It is the result of oxidation and indicates that the blade has been properly sharpened. While some woodworkers appreciate the character that patina adds to their tools, it can be removed if desired. By following proper storage and maintenance practices, you can minimize the formation of patina and keep your chisels looking their best.
The Science Behind Chisels Turning Black
Have you ever wondered why your chisels turn black when you sharpen them? This phenomenon can be explained by the science behind oxidation and carbon buildup.
When you sharpen a chisel, you are essentially removing small amounts of metal from the blade to create a sharp edge. During this process, the metal particles are exposed to the oxygen in the air, leading to oxidation. Oxidation is a chemical reaction in which metal reacts with oxygen to form metal oxides.
The black color that appears on your chisels after sharpening is a result of the formation of iron oxide, also known as rust. Iron oxide is a common form of metal oxide and is known for its dark color. The sharpening process creates a larger surface area for the chisel blade, allowing more metal to come into contact with oxygen and accelerate the oxidation process.
In addition to oxidation, carbon buildup can also contribute to the blackening of chisels. When you sharpen a chisel, tiny carbon particles from the sharpening stone or abrasive paper can become embedded in the metal. Over time, these carbon particles accumulate and create a black layer on the chisel’s surface.
To prevent or reduce the blackening of chisels, it is important to keep them clean and dry after sharpening. Wiping the chisels with a clean cloth and storing them in a dry environment can help prevent the formation of rust and carbon buildup. Regular maintenance and proper storage can prolong the lifespan of your chisels and keep them in optimal condition.
So, the next time you notice your chisels turning black after sharpening, remember the science behind it–oxidation and carbon buildup. Understanding these factors can help you take better care of your chisels and ensure they stay sharp and corrosion-free for longer.
Factors Affecting Chisel Discoloration
When sharpening chisels, it is not uncommon to notice that they can become black or discolored. This can be a result of several factors that affect the surface of the chisel. Understanding these factors can help you prevent chisel discoloration and ensure a more effective sharpening process.
Rust and Oxidation
One of the most common reasons for chisel discoloration is rust or oxidation. When the chisel is exposed to moisture, it can cause a chemical reaction with the metal, resulting in a blackish or brownish discoloration. This can happen if the chisel is not properly stored or if it is used in a damp environment. To prevent rust and oxidation, it is essential to keep the chisel dry and store it in a clean, dry place.
Heat and Friction
Another factor that can contribute to chisel discoloration is heat and friction. When sharpening the chisel, the friction between the tool and the sharpening stone can generate heat. This heat can cause the metal to undergo a process called oxidation, leading to discoloration. To minimize heat and friction, it is important to use proper sharpening techniques such as maintaining a consistent angle and avoiding excess pressure. Using a lubricant, such as honing oil, can also help reduce the friction and heat generated during the sharpening process.
Note: If the chisel becomes excessively hot during sharpening, it can also lead to the loss of temper, resulting in a softer and less effective cutting edge.
Chemical Reactions
The type of metal used in the chisel can also affect its discoloration. Some metals, such as high-carbon steel, are more prone to discoloration compared to others. This is because they contain more iron, which is susceptible to rust and oxidation. Additionally, exposure to certain chemicals or acids, such as those found in some cleaning agents, can also cause discoloration. To prevent chemical reactions, it is important to choose a suitable metal for your chisels and avoid exposing them to corrosive substances.
In conclusion, chisel discoloration can result from rust and oxidation, heat and friction during sharpening, as well as chemical reactions caused by the metal composition or exposure to corrosive substances. By understanding and addressing these factors, you can maintain the appearance and performance of your chisels, ensuring they stay in optimal condition for your woodworking projects.
Common Mistakes During Chisel Sharpening
Sharpening chisels can be a delicate process that requires attention to detail and careful technique. Unfortunately, many people make common mistakes during chisel sharpening that can result in subpar results. Here are some of the most frequently encountered errors:
- Using incorrect angles: One of the most common mistakes is sharpening the chisel at the wrong angle. Different chisels require different angles, and using the wrong angle can lead to dull edges or excessive wear. It is essential to research and understand the correct angles for each specific chisel.
- Poor grinding technique: Another mistake is applying uneven pressure or using inconsistent grinding techniques. This can create an uneven edge or remove too much material, resulting in the chisel losing its original shape. It is important to maintain a steady hand and apply consistent pressure during the grinding process.
- Skipping the honing step: Honing, the final step in sharpening, is often overlooked or rushed. Honing helps refine the edge and remove any burrs created during the grinding process. Skipping this step can lead to less sharp and less durable chisels.
- Using dull sharpening stones: Sharpening stones need to be regularly maintained and replaced when necessary. Using dull or worn-out stones can make the sharpening process less effective and result in unsatisfactory results. It is important to invest in high-quality stones and keep them in good condition.
- Not removing burrs: After sharpening, it is crucial to remove any burrs that may have formed on the chisel’s edge. These burrs can compromise the chisel’s cutting performance and lead to inaccurate cuts. Using a deburring tool or a piece of leather can help remove these burrs effectively.
- Overheating the chisel: Excessive heat generated during sharpening can negatively affect the chisel’s hardness and tempering. Overheating can lead to a soft edge that dulls quickly or even damages the chisel. It is important to use a lubricant or water to keep the chisel cool during the sharpening process.
Avoiding these common mistakes can improve the overall sharpening process and help maintain sharp and durable chisels. Taking the time to learn proper sharpening techniques and investing in quality tools will ultimately result in better woodworking experiences.
Tips and Techniques to Prevent Chisels from Going Black
When sharpening chisels, it can be frustrating to see them turn black. This discoloration is often caused by overheating the chisel during the sharpening process. However, with the right techniques and precautions, you can prevent your chisels from going black.
Here are some tips to keep in mind:

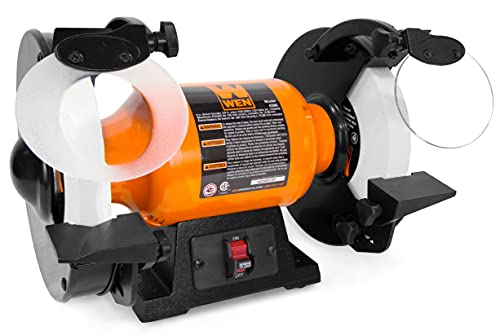
| Use a Slow Speed Grinder | High-speed grinders generate more heat, increasing the chances of the chisel going black. Opt for a slow-speed grinder to reduce heat buildup and prevent discoloration. |
| Choose the Right Grinding Wheel | Using the wrong grinding wheel can lead to overheating and discoloration. Select a wheel specifically designed for sharpening chisels, such as a white aluminum oxide wheel. These wheels run cooler and minimize the risk of blackening. |
| Keep the Chisel Cool | While sharpening, it’s crucial to keep the chisel cool. Dip it frequently in water or use a spray bottle to mist the chisel with water. This helps dissipate heat and prevent discoloration. |
| Use Light Pressure | Applying excessive pressure while sharpening can create more friction and heat. Use light and consistent pressure to prevent overheating and keep the chisel from turning black. |
| Grind in Short Intervals | Avoid prolonged grinding sessions, as they can generate excessive heat. Instead, grind the chisel in short intervals, allowing it to cool down between each grinding pass. |
| Check for Proper Alignment | A misaligned chisel can cause uneven sharpening and increase the chances of blackening. Ensure the chisel is properly aligned with the grinding wheel before sharpening to achieve consistent results. |
| Regularly Clean the Grinding Wheel | Residue buildup on the grinding wheel can lead to increased heat generation. Clean the wheel regularly to remove debris and maintain optimal performance. |
By following these tips and techniques, you can prevent your chisels from going black during the sharpening process. Remember, proper care and attention to detail will help you maintain sharp and reliable chisels for your woodworking projects.
Proper Maintenance to Keep Chisels Looking Like New
Keeping your chisels in pristine condition is essential for achieving clean and precise cuts. Regular maintenance can help avoid issues such as blackening, rusting, and dullness. Here are some tips to keep your chisels looking like new:
1. Clean the Chisels After Each Use
After using your chisels, it is important to remove any excess wood shavings, dirt, or debris. Use a brush or compressed air to gently clean the chisels, ensuring that all surfaces are free from residue.
2. Protect the Blades
When storing your chisels, it is crucial to protect the blades from any potential damage. Consider using blade guards or covers to prevent accidental nicks or scratches.
3. Avoid Moisture and Humidity
Moisture can lead to rust formation on the chisels’ blades, causing discoloration and deterioration. Store your chisels in a dry and well-ventilated area to prevent moisture build-up. Additionally, you can use silica gel packets to absorb any excess moisture.
4. Sharpen Regularly
Dull chisels not only provide unsatisfactory results but can also put extra strain on your wrist and cause accidents. Regularly sharpen your chisels using a sharpening stone or honing guide to maintain their cutting edge.
5. Apply a Protective Coating
To further protect your chisels from corrosion and blackening, consider applying a thin layer of oil or wax after sharpening. This will help prevent moisture from reaching the surface and keep the blades in optimal condition.
By following these maintenance techniques, you can ensure that your chisels remain in excellent condition, providing you with clean and precise cuts for years to come. Remember, proper care and regular maintenance are key to keeping your tools looking like new.


