

Are you looking to create a realistic prop for your next Halloween costume or theater performance? In this guide, we will show you how to make a fake crowbar that looks incredibly convincing.
What is the first step in creating your fake crowbar? Gathering the necessary materials, of course! To make this prop, you will need a few basic supplies that you may already have at home or can easily find at a local craft store.
Here is a list of the materials you will need:
- Cardboard tube (such as from a wrapping paper roll)
- Newspaper or scrap paper
- Masking tape
- Acrylic or spray paint
- Black, brown, and silver markers or paint
- Glue
- Scissors
Once you have gathered all of your materials, you can begin constructing your fake crowbar. Start by wrapping the cardboard tube with layers of newspaper or scrap paper, securing them in place with masking tape.
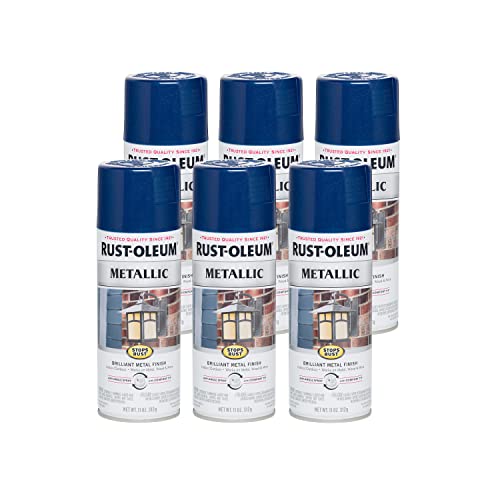
After the tube is covered and secure, it’s time to paint your prop. Use acrylic or spray paint to give your fake crowbar a metal-like appearance. Start with a base coat of black or brown paint, and then use silver paint or a marker to add highlights and details.
Create a Realistic Fake Crowbar
If you’re looking to create a realistic fake crowbar, you’ve come to the right place! Whether it’s for a costume or a theatrical production, a realistic prop can make all the difference. Here’s how to make a fake crowbar that looks and feels like the real thing.
Gather your materials
Before you get started, make sure you have all the necessary materials. You’ll need:
- A wooden dowel: Choose a dowel that is the desired length and thickness of a real crowbar.
- A saw: Use a saw to cut the dowel to the appropriate length.
- Sandpaper: Sand down any rough edges on the dowel to make it smooth.
- A silver spray paint: This will be used to give the dowel a metallic appearance.
- Black paint: Use this to add depth and realism to the prop.
Assemble your fake crowbar
Once you have gathered all your materials, it’s time to assemble your fake crowbar.
- Start by cutting the dowel to the desired length using a saw.
- Next, sand down any rough edges on the dowel until it is smooth.
- Apply a coat of silver spray paint to the entire dowel, making sure to cover it evenly.
- Allow the spray paint to dry completely.
- Once the spray paint is dry, use black paint to add depth and realism to the crowbar by lightly brushing it on certain areas and blending it in.
- Allow the paint to dry completely before using your fake crowbar.
Optional enhancements
If you want to take your fake crowbar to the next level, consider adding some additional enhancements:
- Add rubber or foam handle grips: This will make the crowbar look and feel more authentic.
- Create rust or weathering effects: Use black and brown paint to create rust or weathering effects on the crowbar for added realism.
- Attach some weight to the end: If you want your fake crowbar to have some heft, consider attaching some weight to the end, such as a metal nut or bolt.
With these steps, you can create a realistic fake crowbar that will fool anyone. Just remember to use caution when using your prop and always treat it as if it were a real crowbar. Enjoy!
Materials and Tools
- A foam pipe insulation tube, approximately 3 feet long and 1 inch in diameter
- A wooden dowel, around 2 feet long and 1 inch in diameter
- Black electrical tape
- Silver spray paint
- A small piece of cardboard or foam board
- A utility knife or scissors
- Sandpaper or a file
- A ruler or measuring tape
- A pencil
- A hot glue gun
- Optional: additional decorations like stickers or paint
These materials and tools are relatively easy to find and should be enough to create a realistic-looking fake crowbar. Make sure to gather all the necessary items before starting the project.
Preparing the Base
Before you can start creating your fake crowbar, you will need to prepare the base. The base of the crowbar will serve as the foundation for the rest of the construction. Here are the steps to prepare the base:
- Gather the materials: Start by gathering all the necessary materials for creating the base. You will need a strong and sturdy material such as wood or metal, depending on your preference and availability.
- Measure and cut: Once you have the material, measure the desired length for your crowbar and mark it on the material. Use a saw or any cutting tool appropriate for the material you have chosen to cut it to the desired length.
- Smooth the edges: After cutting, use sandpaper or a file to smooth out any rough edges or splinters on the base. This will make handling the fake crowbar safer and more comfortable.
- Paint or finish: To give the base a realistic look, you can paint it to resemble the color and texture of a real crowbar. Use paints or finishes suitable for the material you have chosen.
By following these steps, you will have a well-prepared base for your fake crowbar, ready for the next steps in the construction process.
Painting and Finishing
Once you have constructed your fake crowbar, it’s time to make it look authentic with a coat of paint and some finishing touches.
First, you will need to choose the right paint color. Most crowbars come in a standard metallic gray or black color, so consider using a spray paint specifically designed for metal surfaces. This will give your fake crowbar a realistic, professional finish.
Before painting, make sure to clean the surface of the crowbar to remove any dirt or dust. Use a damp cloth or sponge to wipe it down and let it dry completely.
Next, you will want to protect any areas of the crowbar that you don’t want to be painted. Cover the handle or any other parts with masking tape or newspaper. This will ensure that only the desired areas are painted.
When you’re ready to paint, take your spray paint can and shake it well. Hold the can about 6-8 inches away from the crowbar and apply an even coat of paint. Be sure to spray in a well-ventilated area or outdoors to avoid inhaling any fumes.
Let the first coat of paint dry completely before applying a second coat if necessary. This will help the paint adhere to the surface and give it a more uniform finish.
Once the paint has dried, you can add some finishing touches to make your fake crowbar look even more authentic. Consider using a fine-grit sandpaper to distress the edges and create a worn look. You can also use a small brush and some black or brown paint to add some dirt or rust effects to make it look used and aged.
Finally, remove any masking tape or newspaper carefully to reveal the finished product. Your fake crowbar should now look like the real deal, ready for any cosplay or theatrical production.
Adding Realistic Details
Step 1: Paint the crowbar with a base coat of metallic gray or silver paint. Make sure to cover the entire surface of the crowbar and allow it to dry completely before moving on to the next step.
Step 2: Once the base coat is dry, use a small paintbrush to add a few rust-colored streaks and patches to give your fake crowbar a weathered appearance. Alternatively, you can use a sponge or a rag to dab on rust-colored paint for a more textured look.
Step 3: For added realism, you can use sandpaper to lightly distress the paint in areas that would naturally experience wear and tear, such as the edges and handle of the crowbar.
Step 4: To add some depth to the crowbar, use a dark brown or black paint to create shadowy areas around the edges and crevices. Apply the paint sparingly and blend it well for a realistic effect.
Step 5: Finally, apply a thin layer of clear gloss sealer to give the crowbar a shiny appearance. This will also protect the paint and give it a more durable finish.
Note: It’s important to remember that creating a fake crowbar for theatrical purposes or costume use is legal and safe as long as it is not used to deceive or harm others. Always exercise caution and use props responsibly.
Final Touches and Display
Once you have completed all the steps to make your fake crowbar, it’s time to add the final touches to make it look more realistic. Here are a few suggestions:
Paint: Use metallic silver or gray paint to give your crowbar a realistic look. Apply a base coat and then add some darker shades to create a worn and weathered appearance.
Texturing: Use sandpaper or a file to add some scratches and dents to the surface of the crowbar. This will make it look like it has been used and worn over time.
Weathering: Use a small amount of black or brown wash to add some dirt and grime to the crevices and edges of the crowbar. This will make it look like it has been used in dirty and grimy environments.
Once you are satisfied with the look of your crowbar, you can find a suitable place to display it. Here are a few ideas:
Wall Mount: Attach a sturdy hook or bracket to your wall and hang the crowbar on display. Make sure it is secure and won’t fall off easily.
Prop Display: If you have a collection of props or costumes, you can create a display area where you showcase your fake crowbar along with other related items. This can be a great conversation starter.
DIY Shelf: Build a small shelf or display case to showcase your crowbar along with other collectibles or DIY projects. This will give it a special place in your home or workshop.
Remember, the most important thing is to have fun with your fake crowbar and enjoy the process of creating something unique. Whether you use it as a prop for a costume or simply as a decoration, it will definitely make a statement!


