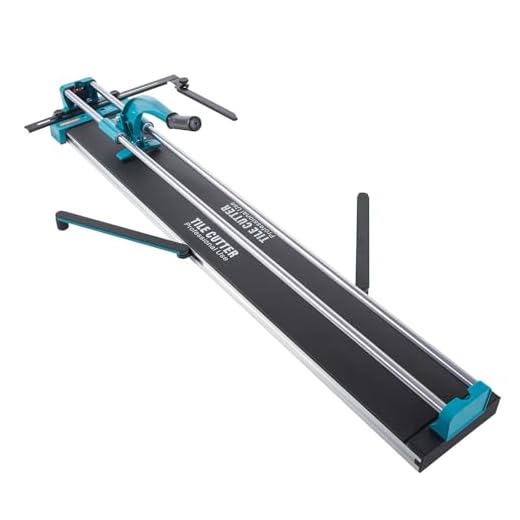

When it comes to cutting ceramic tiles, a hand held ceramic tile cutter is an invaluable tool. Whether you are a DIY enthusiast or a professional, this tool allows you to make precise cuts with ease. In this article, we will guide you through the process of using a hand held ceramic tile cutter.
First and foremost, it is important to ensure that you have the right tools and equipment. Along with a hand held ceramic tile cutter, you will also need safety goggles, a straight edge, and a pencil to mark the tile. Safety goggles are crucial to protect your eyes from any flying debris during the cutting process.
Before you start cutting, it is essential to measure and mark the area where you want to make the cut. Use a straight edge to create a clear line on the tile. This line will act as a guide for the cutter. It is advisable to use a pencil to make the marks, as it is easier to remove later on.
Once your tile is marked, it’s time to make the cut. Hold the hand held ceramic tile cutter firmly and position the cutting wheel at the beginning of the marked line. Apply gentle pressure and drag the cutter along the line. Don’t rush and make sure to stay on the marked line to achieve a clean cut.
After you have made the cut, you can use a pair of tile nippers or a file to smooth out any rough edges. Be sure to wear gloves while handling the cut tile edges to avoid any injuries. Additionally, always remember to take breaks and rest your hand to prevent fatigue.
In conclusion, using a hand held ceramic tile cutter is a skill that can be easily acquired with practice. By following the steps outlined in this article, you will be able to make precise cuts and achieve professional-looking results. So, equip yourself with the right tools, take necessary safety precautions, and get ready to master the art of cutting ceramic tiles.
Tips for Using a Hand Held Ceramic Tile Cutter
When it comes to cutting ceramic tiles, a hand held ceramic tile cutter can be a convenient and efficient tool. However, it’s important to use the tool correctly to achieve clean and precise cuts. Here are some tips to help you get the most out of your hand held ceramic tile cutter:
Prepare the Work Area
Before you start cutting, make sure the work area is clean and free of any debris. This will help prevent the tile from sliding or getting damaged during the cutting process. Additionally, protect your work surface with a drop cloth or cardboard to avoid scratching or chipping the tiles.
Choose the Right Blade
Hand held ceramic tile cutters come with different types of blades, so it’s important to choose the right one for the job. A diamond-tipped blade is ideal for cutting ceramic tiles, as it provides clean and accurate cuts. Make sure the blade is securely attached to the cutter before you start cutting.
Measure and Mark the Tile
Precision is key when cutting ceramic tiles. Use a ruler or a measuring tape to measure and mark the tile according to your desired size or shape. Double-check your measurements before proceeding to ensure accuracy.
Score the Tile
With the tile securely positioned on a stable surface, use the hand held ceramic tile cutter to score along the marked line. Apply a firm and even pressure as you move the cutter along the tile. Make sure to start the cut at the edge of the tile and continue until the score line reaches the opposite edge.
Break the Tile
Once the tile is scored, use the tile nipper or the breaker bar attachment of the hand held ceramic tile cutter to carefully break the tile along the scored line. Apply gentle and controlled pressure to avoid damaging the rest of the tile. Remember to wear protective gloves when breaking the tile to prevent injuries.
Smooth Edges
After the tile is cut, there may be some sharp or uneven edges. You can use a tile file or sandpaper to smooth out these edges and create a clean finish. Take your time and work gently to avoid accidentally damaging the tile.
Clean Up
Once you have finished cutting the ceramic tiles, it’s important to clean up the work area. Remove any debris or tile fragments, and dispose of them properly. Wipe down the tiles to remove any dust or residue, and store your hand held ceramic tile cutter in a safe place for future use.
| Tip | Example |
| Make sure the blade is always sharp | Replacing a dull blade will result in cleaner and more precise cuts. |
| Practice on scrap tiles | If you’re new to using a hand held ceramic tile cutter, practicing on scrap tiles can help you gain confidence and perfect your technique. |
| Work slowly and carefully | Rushing through the cutting process can lead to mistakes and uneven cuts. Take your time to ensure the best results. |
Choosing the Right Tile Cutter
When it comes to choosing a hand-held ceramic tile cutter, there are a few factors to consider. The right tile cutter can make all the difference in the ease and precision of your tile cutting projects. Here are some things to keep in mind:
1. Blade Type
One of the first things to consider is the type of blade on the tile cutter. There are different blades available for different types of tiles. For example, if you’re working with porcelain or glass tiles, you’ll likely want a cutter with a diamond blade. On the other hand, for ceramic or stone tiles, a tungsten carbide blade may be more appropriate. Choose a tile cutter that has a blade suitable for the type of tiles you’ll be working with.
2. Cutting Capacity
Another important factor to consider is the cutting capacity of the tile cutter. This refers to the maximum size of tile it can handle. If you’re planning on working with larger tiles, make sure the tile cutter you choose has a cutting capacity that will accommodate your needs. It’s always better to have a cutter with a larger capacity than you think you’ll need, to allow for future projects.
3. Ergonomics and Comfort
Since you’ll be holding the tile cutter for extended periods of time, it’s essential to choose one that is comfortable to use. Look for a cutter with an ergonomic design that fits comfortably in your hand. Some tile cutters also have features like rubberized grips or padded handles that can help reduce hand fatigue.
Remember, when choosing a hand-held ceramic tile cutter, there’s no one-size-fits-all solution. Consider the type of blade, cutting capacity, and ergonomics to find the right tile cutter for your needs. By choosing the right tile cutter, you’ll make your tile cutting projects more efficient and enjoyable.
Preparing the Work Area
Before you begin using a hand-held ceramic tile cutter, it’s important to prepare your work area properly. This will help ensure safety and efficiency during the tile cutting process. Follow these steps to create a clean and organized work environment:
Clear the Space
Start by clearing the area where you will be cutting the tiles. Remove any objects or debris that could interfere with your work or cause accidents. It’s also a good idea to cover nearby surfaces with a protective layer, such as a drop cloth, to prevent any tile shards from damaging them.
Gather the Tools
Next, gather all the tools and materials you’ll need for the job. In addition to the hand-held ceramic tile cutter, you’ll likely need safety goggles, a straightedge or ruler, a pencil, and some cotton gloves. Having everything within reach will save you time and make the cutting process smoother.
Set up a Cutting Station
Once the space is cleared and tools are gathered, it’s time to set up a dedicated cutting station. Find a sturdy table or workbench to serve as your cutting surface. A table with a smooth, flat surface will provide better stability and control as you cut the tiles. Place a sheet of plywood or a cutting mat on top of the table to protect both the table surface and your tiles.
| Materials | Tools |
|---|---|
| Drop cloth | Safety goggles |
| Plywood or cutting mat | Straightedge or ruler |
| – | Pencil |
| – | Cotton gloves |
With a clean and organized work area, you are now ready to start using your hand-held ceramic tile cutter to cut tiles with precision and ease.
Measuring and Marking the Tile
Before you can start cutting the tile, it’s important to measure and mark it accurately. This will help ensure that your cuts are precise and the tile fits perfectly in its designated space.
Here are the steps to measure and mark the tile:
| Step 1: | Place the tile on a flat, stable surface. Make sure it is positioned securely so that it doesn’t move while you measure and mark it. |
| Step 2: | Use a tape measure to measure the length and width of the area where the tile will be installed. Make note of these measurements. |
| Step 3: | Transfer the measurements to the tile. Use a pencil or a marker to make small marks on the surface of the tile where you will need to make the cuts. |
| Step 4: | Double-check your measurements to ensure accuracy. Measure again if necessary to avoid any mistakes. |
Once you have completed these steps, you are ready to move on to the next phase of the cutting process. Remember to always measure and mark the tile carefully to achieve the best results.
Cutting the Tile
Before cutting the tile, it is important to measure and mark the desired cutting line. Use a straight edge, such as a ruler or a level, to ensure a precise and straight cut.
Once the marking is done, follow these steps to cut the tile:
- Make sure the water reservoir is filled, as it helps to keep the blade cool and to minimize dust.
- Place the tile on a stable surface, such as a workbench or a table, ensuring that the marked line is aligned with the cutting wheel.
- Hold the tile securely with one hand, using a clamp if necessary, to prevent any movement during the cutting process.
- With the other hand, gradually apply pressure on the cutter’s handle to score the tile along the marked line. Make sure to maintain a steady and even pressure.
- After scoring the tile, use the breaker bar provided with the cutter to snap the tile along the scored line. Place the bar against the scored line, apply downward pressure, and the tile will break along the line.
- If the tile doesn’t break completely or if you need a more precise cut, use a pair of tile nippers to nibble away smaller portions until the desired shape is achieved.
Remember to wear safety goggles and gloves to protect yourself from any potential debris or tile fragments during the cutting process.
Finishing Touches and Clean Up
After using a hand held ceramic tile cutter to cut your tiles, there are a few finishing touches and clean up steps that you need to take to ensure a professional and clean result.
Cleaning up the Work Area
Start by cleaning up the work area to remove any tile debris and dust. Use a broom or vacuum cleaner to sweep up the loose pieces of tile and dust. This will help keep your work area tidy and safe.
Smoothing the Edges
When you cut ceramic tiles with a hand held cutter, the edges may not be perfectly smooth. To achieve a more polished look, you can use a tile file or sandpaper to smooth the edges. Gently rub the file or sandpaper back and forth along the cut edges until they feel smooth to the touch.
Be careful not to apply too much pressure, as ceramic tiles can be fragile and may break. Take your time and work slowly to ensure that you achieve the desired result without damaging the tile.
Cleaning the Tiles
Once you have finished smoothing the edges, it is important to clean the tiles before installing them. Use a damp cloth or sponge to wipe away any dust or debris that may have accumulated on the surface of the tile.
Make sure to remove any residual dust or particles, as they can interfere with the tile adhesive and affect the final result of your tile installation.
By following these finishing touches and clean up steps, you can ensure that your ceramic tile cutting project is successful and that your tiles are installed with a professional and polished look.