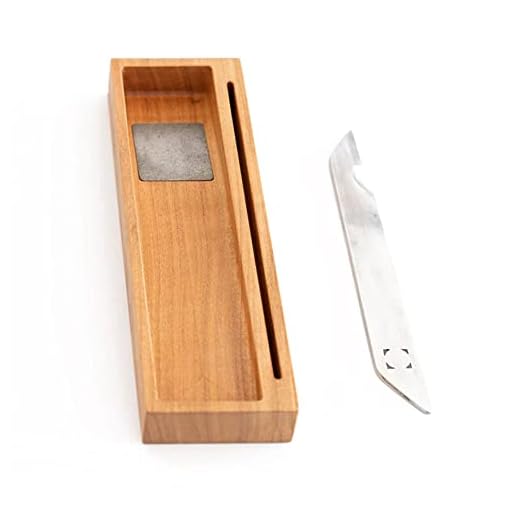


When it comes to woodworking and carpentry projects, having sharp and precise tools is crucial. One of the most commonly used tools in these fields is a carpenter’s pencil. However, like any pencil, the lead can become dull with use, making it difficult to achieve accurate markings.
Fortunately, there is a simple solution to this problem – a carpenter’s pencil sharpener. This handy tool is specifically designed to sharpen the unique rectangular shape of the carpenter’s pencil lead, allowing for cleaner and more precise lines.
Using a carpenter’s pencil sharpener is easy, even for beginners. To begin, you’ll want to hold the sharpener in one hand and the pencil in the other. Place the pencil into the sharpener, making sure that the rectangular lead is aligned with the opening. It should fit snugly, but not too tight.
Once the pencil is securely in place, start turning the sharpener in a clockwise motion. Apply gentle pressure as you turn, allowing the blade inside the sharpener to gradually shave away the wood and expose the sharp lead. It’s important to take your time and avoid applying too much pressure, as this can cause the lead to break.
Continue turning the sharpener until you have achieved a sharp point on the pencil lead. Periodically check the sharpness by removing the pencil from the sharpener and feeling the lead with your finger. Once you’re satisfied with the sharpness, you’re ready to start marking and measuring with precision!
Choosing the Right Sharpener
When it comes to choosing the right carpenter’s pencil sharpener, there are a few factors to consider. The type of sharpener you choose will depend on your specific needs and preferences. Here are some things to keep in mind when making your decision:
Durability: Look for a sharpener that is made from durable materials and built to last. Carpenters often work in demanding environments, and you want a sharpener that can withstand the rigors of the job.
Sharpening Mechanism: There are two main types of sharpeners to choose from: manual and electric. Manual sharpeners require you to manually rotate the pencil to sharpen it, while electric sharpeners do the work for you. Consider which option will be most convenient for you based on your working style.
Size: Consider the size of the sharpener. If you plan on carrying it with you on the job, you’ll want it to be compact and easy to transport. However, if you have a designated workspace, a larger sharpener may be more suitable.
Price: Set a budget for yourself and stick to it. There are sharpeners available at a range of price points, so you’re sure to find one that fits within your budget. Keep in mind that a higher price doesn’t always guarantee better quality, so be sure to read reviews and do your research.
Compatibility: Make sure the sharpener you choose is compatible with the type of carpenter’s pencil you use. Some sharpeners are designed for specific pencil sizes, so double-check before making your purchase.
By considering these factors and taking your personal preferences into account, you’ll be able to choose the right carpenter’s pencil sharpener that will best meet your needs and help you achieve clean, precise lines in your work.
Preparing the Pencil
Before using a carpenter’s pencil sharpener, it is important to prepare the pencil properly. Proper preparation ensures the best results when sharpening the pencil and using it for various carpentry tasks.
Step 1: Remove any existing lead
First, check if there is any existing lead in the pencil. If there is, carefully remove it with a small knife or a lead remover tool. Make sure the pencil is clean and free from any existing lead before proceeding.
Step 2: Inspect the pencil for damage
Next, inspect the pencil for any signs of damage, such as cracks or broken tips. If the pencil is damaged, it may affect the sharpening process and the performance of the pencil. If necessary, trim off any broken or damaged tips using a utility knife.
Step 3: Clean the pencil
Before sharpening the pencil, it is important to clean it to remove any dirt or debris that may affect the sharpening process. Use a soft cloth or a brush to gently wipe off any dirt or dust from the pencil’s surface.
Once the pencil is properly prepared, you can proceed to use a carpenter’s pencil sharpener to sharpen it. The sharpener will ensure a precise and consistent point, allowing you to work efficiently and accurately on your carpentry projects.
Inserting the Pencil into the Sharpener
Using a carpenter’s pencil sharpener is a simple process that starts with inserting the pencil into the sharpener. Follow these steps to ensure a proper fit and a sharp point:
- Hold the pencil firmly: Grip the carpenter’s pencil with a steady hand, ensuring a secure hold without applying too much pressure.
- Position the pencil: Align the tip of the pencil with the sharpener’s opening. Make sure the pencil is inserted straight and centered for an even point.
- Apply gentle pressure: Slowly push the pencil into the sharpener, while maintaining a steady grip. Be careful not to twist or force the pencil too hard, as this can lead to breakage.
- Rotate the pencil: As you push the pencil in, start rotating it in a clockwise direction. This motion helps the sharpener evenly sharpen the entire circumference of the pencil.
- Continue sharpening: Keep applying gentle pressure and rotating the pencil until you achieve your desired point. Some sharpeners may require more rotations than others, so pay attention to the sharpness of the pencil as you sharpen.
- Remove the pencil: Once you’re satisfied with the sharpness, carefully pull the pencil out of the sharpener. Take care not to touch the freshly-sharpened point to avoid smudging or breaking it.
With the pencil successfully inserted and sharpened, you’re ready to tackle your woodworking projects with precision and accuracy.
Sharpening the Pencil
Before you can start using a carpenter’s pencil sharpener, you need to sharpen your pencil. Here are the steps to follow:
- Hold the pencil firmly in one hand and the sharpener in the other hand.
- Align the end of the pencil with the opening of the sharpener.
- Insert the pencil into the sharpener, applying gentle pressure.
- Rotate the pencil in a clockwise motion while holding the sharpener steady.
- Continue rotating the pencil until the desired level of sharpness is achieved.
- Remove the pencil from the sharpener and check the tip. If it is not sharp enough, repeat the sharpening process.
When sharpening the pencil, it’s important to be cautious and avoid applying excessive pressure. Applying too much pressure can lead to the pencil breaking or a tip that is too sharp and prone to breakage.
Using a carpenter’s pencil sharpener makes the sharpening process quick and easy. The sharpener’s durable blades ensure a precise and even sharpening that is ideal for carpentry and other woodworking projects.
| Tips for Sharpening: |
| – Clean the sharpener regularly to remove any graphite residue. |
| – Consider using a pencil extender for shorter pencils to make them easier to hold while sharpening. |
| – Always store your sharpener in a safe place to prevent accidental injuries. |
Now that you know how to sharpen a pencil with a carpenter’s pencil sharpener, you can enjoy the benefits of having a consistently sharp pencil for all your carpentry needs!
Finishing Touches
After sharpening your carpenter’s pencil using a carpenter’s pencil sharpener, there are a few finishing touches you can do to enhance its performance and durability.
Firstly, check the sharpness of the pencil tip. Use your fingers to feel the sharpness of the lead. If the tip feels dull or uneven, gently sharpen it again using the sharpener until you achieve the desired level of sharpness.
Next, inspect the overall condition of the pencil. Look for any splinters or cracks on the wood. If you notice any, gently sand them down using sandpaper to ensure a smooth surface. This will prevent any discomfort or injuries while using the pencil.
Additionally, you can further protect the pencil by applying a coat of varnish or clear lacquer. This will create a protective barrier and increase the longevity of the pencil. Simply dip a small brush into the varnish or lacquer and evenly apply it onto the wood surface of the pencil. Let it dry completely before using.
Finally, consider adding a clip or a cap to your pencil. This will help prevent the pencil from rolling off surfaces or getting lost in your tool bag. Clips and caps are available in various sizes and materials, so choose one that suits your needs.
| Finishing Touches: | Benefit: |
|---|---|
| Sanding the pencil | Ensures a smooth surface |
| Applying varnish or lacquer | Increases durability |
| Adding a clip or cap | Prevents loss or damage |
Maintaining the Sharpener
Proper maintenance of your carpenter’s pencil sharpener will ensure that it continues to deliver consistently sharp pencils for your woodworking projects. Here are a few tips to help you keep your sharpener in top shape:
1. Regularly clean the sharpener: Over time, pencil shavings and debris can accumulate inside the sharpener, which can affect its performance. Use a brush or compressed air to remove any dust or shavings that may have built up inside the sharpener. This will help keep the blades clean and prevent them from becoming dull.
2. Oil the blades: Just like any other cutting tool, the blades of your pencil sharpener also need to be lubricated to ensure smooth operation. Apply a few drops of oil to the blades regularly, especially if you notice any signs of resistance or difficulty in sharpening pencils.
3. Check for loose screws: Periodically inspect the sharpener for any loose screws or fasteners. These can affect the stability and performance of the sharpener, so tighten them as needed to ensure everything is secure.
4. Replace worn blades: Over time, the blades of your sharpener will become dull and may need to be replaced. Keep an eye out for any signs of bluntness or difficulty in sharpening, and replace the blades as necessary to maintain optimal performance.
5. Store in a dry place: Moisture can cause rust and corrosion, which can affect the functionality of your sharpener. Always store it in a dry place to prevent any damage and ensure its longevity.
By following these maintenance tips, you can keep your carpenter’s pencil sharpener in excellent condition, allowing you to enjoy precise and efficient pencil sharpening for years to come.


