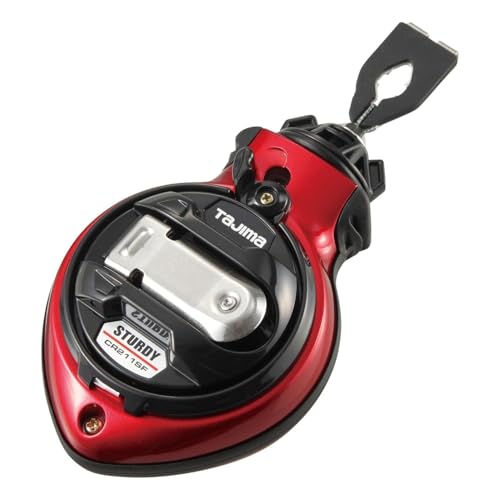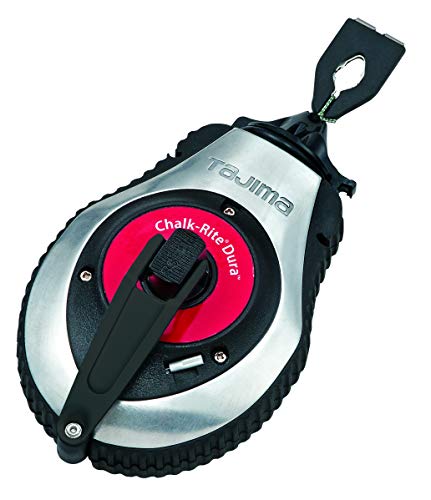


A chalk line, also known as a chalk snap line or chalk box, is a useful tool used in various construction and home improvement projects. It consists of a reel that holds a length of string or nylon line, along with a small container filled with powdered chalk. When used correctly, a chalk line can help you achieve straight and accurate lines over long distances.
The first step in using a chalk line is to determine the starting point and end point of the line you want to create. Measure the desired distance and mark both ends with a pencil or marker.
Next, extend the string or nylon line from the reel and align it with the starting point. Hold the reel firmly and pull the line taut. Position the line directly over the marked starting point.
With the line held taut, lift it slightly off the surface and allow it to snap back down. This will create a straight line of chalk on the surface. The chalk will stick to the surface due to the presence of the powdered chalk in the container. Make sure the line is aligned with the marked end point before snapping.
What is a Chalk Line?
A chalk line, also known as a snap line, is a tool used in construction and carpentry to create straight and precise lines on various surfaces. It is a simple but invaluable tool that consists of a long string or cord, wound around a reel or spool, and filled with colored chalk powder.
When using a chalk line, the user pulls out the string, extends it to the desired length, and secures it in place. Then, by snapping the string against the surface, the momentum of the snap releases a cloud of chalk powder onto the surface, leaving a straight and visible line in its wake.
The chalk line is commonly used in construction for tasks such as marking locations for wall partitions, installing tiles, hanging wallpaper, laying out foundation lines, and more. It is also used in carpentry for tasks like marking cutting lines, aligning studs, and ensuring accurate measurements.
The key advantage of using a chalk line is its ability to create long, straight lines accurately and quickly. It eliminates the need for manual measurements and ensures precision in marking out a straight line over a large distance.
Chalk lines come in various lengths and thicknesses, allowing users to choose the most suitable option for their specific needs. The chalk itself can also be refilled or replaced when it runs out.
In summary, a chalk line is a versatile and essential tool for professionals and DIY enthusiasts alike, enabling them to create straight and precise lines on surfaces for various construction and carpentry projects.
Understanding the Purpose and Function
When it comes to construction and woodworking projects, one essential tool that every tradesperson should have in their arsenal is a chalk line. A chalk line, also known as a chalk reel or chalk box, is a simple but versatile tool that is used to create straight lines over long distances.
The purpose of a chalk line is to provide a visible guide that helps ensure accuracy and precision when marking or measuring a straight line on a surface. This is particularly useful when working on large projects such as framing walls, installing tiles, or laying out flooring.
So how does it work? The chalk line consists of a thin string or braided nylon line that is wound tightly inside a small rectangular box. This box contains a compartment filled with powdered chalk. When you pull the string out and stretch it across the desired surface, it leaves a chalk mark behind, effectively creating a straight line.
The chalk line utilizes a mechanism that allows the string to be easily pulled out and locked into place at the desired length. Once the line is stretched and positioned, it is then pulled taut and snapped back onto the surface, leaving a perfect, crisp line in its wake.
The key components of a chalk line include:
- String: A thin, strong line made of nylon or other durable material.
- Chalk: A powdered substance that is housed inside the chalk box and comes in various colors such as blue, red, or black.
- Chalk box: The main housing unit that holds the string and chalk, typically made of plastic or metal.
- Retraction mechanism: The mechanism that allows the string to be pulled out, locked into place, and retracted back into the box.
Overall, the chalk line serves as a reliable and efficient tool for ensuring straight and accurate lines during construction projects. It saves time and effort compared to using a ruler or straight edge over long distances. By understanding its purpose and function, you can take advantage of this versatile tool and achieve professional results in your projects.
Remember to always replace the chalk in your chalk line regularly to maintain a consistent and visible line. Additionally, it’s important to keep the chalk line clean and dry to prevent clogging or clumping of the chalk.
Choosing the Right Chalk Line
When it comes to using a chalk line, one of the most important factors to consider is choosing the right type of chalk line for the task at hand. With several options available on the market, it’s essential to select the one that suits your specific needs.
1. Material: Chalk lines are typically made from nylon or cotton. Nylon lines are more durable and less likely to fray, making them a great choice for heavy-duty projects. On the other hand, cotton lines are more affordable and suitable for lighter projects.
2. Length: The length of the chalk line depends on the scale of your project. For smaller tasks, a 30-foot line should suffice. However, for larger projects that involve longer lines, consider opting for a 100-foot line to ensure you have enough length to work with.
3. Chalk Type: Chalk lines use various types of chalk, including permanent and temporary chalk. Permanent chalk leaves long-lasting marks that are resistant to weather conditions, making it ideal for outdoor projects. Temporary chalk lines, on the other hand, are preferable for indoor projects since the marks can be easily erased.
Keep in mind that the color of the chalk is also important. White chalk is suitable for marking on dark surfaces, while blue or red chalk works well on lighter backgrounds.
4. Features: Consider any additional features that may enhance your experience when choosing a chalk line. Some chalk lines come with built-in hooks or magnets for easy attachment to surfaces, while others have rewind systems for quick and convenient line retrieval.
By carefully considering these factors, you can choose the right chalk line for your project, ensuring accurate and reliable results every time.
Factors to Consider for Your Project
When using a chalk line for your project, there are several factors that you need to consider to ensure its success and efficiency.
The Length of the Line
One important factor is the length of the chalk line that you will be using. You need to determine the distance that you want to mark before selecting the appropriate chalk line. A longer chalk line is suitable for larger projects, while a shorter one is more suitable for smaller projects.
The Chalk Powder Color
Choosing the right chalk powder color is essential to ensure visibility during the project. Consider the background color where you will be using the chalk line, as well as the lighting conditions. For example, a darker chalk powder color may be more visible on a lighter background, while a lighter powder may be more visible in low-light situations.
Note: It’s also a good practice to test the visibility of the chalk line on a small area before proceeding with the entire project.
Additionally, consider the type of project you are working on and the purpose of the chalk line. If precision is crucial, you may want to opt for a thinner chalk line, while a thicker line may be more suitable for quick reference marks.
Remember: Using the right chalk color and line thickness will help you achieve accurate and visible markings for your project.
By considering these factors, you can ensure that your project progresses smoothly and that the chalk line is used effectively to meet your needs and requirements.
Preparation and Marking
Before using a chalk line, it’s important to properly prepare the area and make accurate marks. Here are the steps to follow:
Gather your tools
First, gather all the necessary tools for the job. Apart from the chalk line itself, you will also need a tape measure, a pencil or marker, and a level.
Prepare the surface
Next, ensure that the surface is clean and free from any debris or obstructions. This will help ensure a smooth and accurate line. If necessary, sweep or wipe down the surface before proceeding.
Tip: For outdoor projects, it’s also important to consider weather conditions. If it’s windy or raining, wait for a calmer day to ensure accurate marking.
Measure and mark your starting and ending points
Using the tape measure, carefully measure and mark the starting and ending points of the line you want to create. Make sure the measurements are accurate and double-check them if needed.
Tip: If you’re working on a long line, it may be helpful to use multiple anchor points and create intermediate marks to guide the chalk line.
Secure the chalk line
Once the measurements and marks are in place, attach one end of the chalk line to the starting point and the other end to the ending point. Make sure the line is taut and straight.
Tip: If you’re working on a vertical surface, use a level to ensure that the chalk line is perfectly straight and level.
With the preparation and marking complete, you’re now ready to use the chalk line to create a straight and precise line for your project.
Steps to Set Up and Use a Chalk Line
Setting up and using a chalk line is a simple process that can help you achieve straight and precise lines for a variety of projects. Whether you’re marking out a wall for tiling or laying out a new deck, a chalk line can be a valuable tool. Here are the steps to set up and use a chalk line effectively:
Step 1: Gather the necessary materials
Before you begin, gather the materials you’ll need. These include a chalk line reel, powdered chalk, and a tape measure or ruler.
Step 2: Fill the chalk line reel with chalk
To start, open the chalk line reel and fill it with powdered chalk. It’s important to use a compatible chalk that is designed for use with chalk lines. This will ensure that the line is visible and easy to follow.
Step 3: Extend the chalk line
Hold one end of the chalk line reel and unroll the line. Walk to the other end of the area you want to mark and pull the line tight. Make sure the line is positioned exactly where you want your mark to be.
Step 4: Secure the line to create tension
Using one hand, hold the line in place at the desired starting point. With the other hand, pull the line taut and create tension. This will ensure that the chalk line creates a straight and precise mark.
Step 5: Snap the line to create a mark
With the line held taut, lift it slightly and release it. The line will snap against the surface, leaving behind a chalk mark. Repeat this process along the length of the area you want to mark, ensuring that the line remains taut and straight.
Step 6: Clean up excess chalk
Once you have marked your line, you may have excess chalk on the surface. Use a brush or cloth to sweep away any excess chalk, leaving behind a clean and visible line.
By following these steps, you can easily set up and use a chalk line to create straight and accurate marks for your projects. Remember to use caution when handling the chalk line reel and always wear appropriate protective gear when necessary.
Tips and Tricks for Accuracy
Using a chalk line can be a great tool for achieving accuracy in your projects. Here are some tips and tricks to help you make the most of your chalk line:
1. Prepare the Surface
Before using a chalk line, it’s important to prepare the surface properly. Make sure it is clean and free from any dirt or debris that may affect the accuracy of the line. You may also need to apply a primer or create a level base to ensure the line is straight.
2. Stretch the Line Tightly
To achieve the most accurate line, it’s important to stretch the chalk line tightly. A loose line can result in an uneven mark. Pull the line tight and hold it firmly in place before snapping it. This will help ensure a straight and precise line.
3. Choose the Right Chalk
The type of chalk you use can also affect the accuracy of the line. Choose a high-quality chalk that is brightly colored and contrasts well with the surface you are marking. This will make the line more visible and easier to follow.
Pro Tip: If you’re working on a dark surface, consider using a white chalk instead. This will provide a better contrast and make the line easier to see.
4. Snap the Line Properly
When snapping the line, it’s important to do it properly to ensure accuracy. Hold the line at the desired starting point, keep it taut, and then pull it up slightly before releasing it. This will create a clean and precise mark.
5. Check the Line for Accuracy
After snapping the line, always double-check its accuracy before proceeding with your project. Use a level or a straight edge to ensure the line is straight and properly aligned. Making any necessary adjustments at this stage will save you time and effort later on.
Note: It’s always a good idea to practice using a chalk line on a scrap piece of material before starting your project. This will help you familiarize yourself with the tool and improve your accuracy.
By following these tips and tricks, you can ensure that you use a chalk line with precision and achieve accurate results in your projects.
Maximizing Efficiency and Precision
Using a chalk line effectively not only requires proper technique but also requires maximizing efficiency and precision. Here are some tips to help you achieve both:
1. Prepare Your Surface
Before using a chalk line, ensure that the surface is clean and free of any debris or obstructions that could interfere with the accuracy of the line. This step helps to ensure that your chalk line produces a straight and accurate mark.
2. Choose the Right Chalk
Using high-quality chalk is essential for obtaining precise and long-lasting lines. Look for chalk that is finely ground and brightly colored, as this will help you clearly see the line and make accurate measurements.
3. Tension the Line Correctly
To get the best results, it’s important to tension the line properly. Pull the line taut and lock it in place before snapping it against the surface. This ensures that the line remains straight and that the chalk spreads evenly onto the surface.
4. Snap the Line Firmly
When snapping the line, make sure to do it firmly and quickly. This will help ensure a clean and consistent mark. Avoid hesitating or pulling the line backward after snapping, as this can cause a jagged or blurred line.
5. Use Anchors if Needed
If you’re working on a surface that lacks a natural edge or reference point, consider using anchors to create a straight line. Anchors can be anything from nails or screws driven into the surface to clamps or weights that hold the line in place. This will help you maintain a straight and accurate line throughout your project.
6. Check Your Work
After snapping the line, take a step back and visually inspect the mark to ensure it is straight and accurate. If necessary, you can make adjustments or re-snap the line to achieve the desired result. Checking your work throughout the process helps you maintain precision and correct any mistakes before they become a more significant issue.
By following these tips and practicing proper technique, you can maximize the efficiency and precision of your chalk line, making it an invaluable tool for various projects.