

Using a chalk line reel, also known as a chalk snap line, can be a quick and efficient way to create a straight line on various surfaces. This tool is commonly used in construction, carpentry, and other trades to mark guidelines for cutting, installing, or aligning objects. While there are different types of chalk line reels available, Dewalt is a trusted brand known for its durability and reliability.
If you own a Dewalt chalk line reel or are planning to purchase one, it’s essential to know how to fill it properly. Filling the reel with chalk will ensure that you get clear and visible lines every time. In this guide, we will walk you through the steps to fill a Dewalt chalk line reel.
Before you begin, make sure you have the following materials on hand: a Dewalt chalk line reel, chalk powder (preferably in the color of your choice), and a small funnel or scoop to help with the filling process. Once you have everything ready, you can proceed with the following steps.
What is a Dewalt Chalk Line Reel?
A Dewalt chalk line reel is a tool used in construction and other industries to create a straight, level line over a long distance. It is commonly used for tasks such as marking layout lines on walls, floors, and roofs.
The chalk line reel consists of a plastic or metal case that holds a length of string or twine coated with brightly colored chalk. When the string is pulled out and snapped against a surface, it leaves a precise chalk line, which can be used as a guide for various construction tasks.
How Does a Dewalt Chalk Line Reel Work?
The Dewalt chalk line reel operates on a simple mechanism. Inside the case, there is a spool or bobbin that holds the string. The string is attached to a metal hook or handle on the outside of the case, which allows the user to pull it out.
When the string is pulled out to the desired length, it can be locked in place using a locking mechanism or a holding clip. The user then positions the reel at one end of the desired line and holds the end of the string against that surface. By pulling the string taut and snapping it against the surface, the chalk is transferred onto the surface, creating a visible line.
Some Dewalt chalk line reels come with additional features such as built-in line level indicators to ensure the line is perfectly straight. Others may have a gear mechanism that allows for quick and easy retraction of the string back into the case.
Why Use a Dewalt Chalk Line Reel?
Using a Dewalt chalk line reel offers several advantages over other methods of marking lines. First, it allows for quick and accurate marking over long distances, which can be difficult to achieve manually.
Second, the chalk line created by the reel is highly visible and can be easily seen, even in low light conditions. This ensures that the lines are clear and easy to follow during construction or other tasks.
Finally, a Dewalt chalk line reel is a durable and reliable tool that can withstand the rigors of a construction site or other demanding environments. Designed with quality materials and construction, it is built to last and provide consistent performance over time.
| Advantages of a Dewalt Chalk Line Reel: |
|---|
| Quick and accurate marking over long distances |
| Highly visible chalk lines, even in low light conditions |
| Durable and reliable construction for long-lasting performance |
Understanding the inner workings of a chalk line tool
A chalk line tool, such as the Dewalt Chalk Line Reel, is an important tool for accurately marking straight lines on various surfaces. It consists of several key components that work together to achieve this purpose.
Chalk container
The chalk container is where the chalk powder is stored. It is a compartment located within the chalk line tool that holds the chalk powder securely to prevent spillage or leakage. The container is typically made of durable plastic, ensuring that it can withstand the rigors of construction work.
Chalk line reel
The chalk line reel is the mechanism responsible for dispensing the chalk powder and creating the straight line. It consists of a reel, a handle, and a locking mechanism. When the handle is rotated, the reel unwinds the string or cord that is coated with the chalk powder. This action evenly distributes the chalk onto the surface, leaving a clear and visible line.
The locking mechanism is used to secure the line at the desired length once it has been extended. This allows the user to maintain a consistent line while working on a project. Once the line is no longer needed, the locking mechanism can be disengaged, and the reel will retract the string, returning it to its original position within the chalk line tool.
String or cord
The string or cord is an essential part of the chalk line tool. It is attached to the chalk line reel and acts as the medium through which the chalk powder is dispensed. The string is typically made of nylon or other durable materials that can withstand tension and abrasion. It is important to use a high-quality string to ensure accurate and long-lasting results.
When using the chalk line tool, it is crucial to understand how these components work together to create accurate and visible lines. By properly filling the chalk container, operating the chalk line reel correctly, and using a durable string, you can achieve precise markings on various surfaces for your construction or DIY projects.
Choosing the Right Chalk for Your Dewalt Chalk Line Reel
When it comes to using your Dewalt chalk line reel, selecting the right chalk is essential for achieving accurate and long-lasting lines. With different types and colors available, it is important to consider the following factors when choosing chalk for your chalk line reel:
Weather conditions: Consider the weather conditions in which you will be using your chalk line reel. If you will be working outdoors in damp or rainy conditions, it is best to choose a waterproof chalk that will not wash away easily.
Visibility: The color of the chalk will determine the visibility of your lines. If you are working in low light conditions or on dark surfaces, choosing a brightly colored chalk like red or orange can help increase visibility.
Surface type: Different surfaces may require different types of chalk. For smooth surfaces such as concrete or metal, a fine-textured chalk will provide better mark making. On rough surfaces such as wood or masonry, a coarser chalk will be more effective.
Personal preference: Lastly, consider your personal preference when choosing chalk. Some individuals may find certain colors or textures easier to work with, so it’s important to choose a chalk that feels comfortable for you to use.
Overall, selecting the right chalk for your Dewalt chalk line reel is crucial for achieving accurate and visible lines. By considering the weather conditions, visibility needs, surface type, and personal preference, you can ensure that you are using the most suitable chalk for your specific project.
Exploring different types of chalk and their benefits
Chalk is an essential tool for the tradesperson and DIY enthusiast alike, used for a variety of marking applications. There are different types of chalk available, each with their own unique benefits. In this article, we will explore these types and their advantages.
1. Regular chalk
Regular chalk is the most common type of chalk used in construction and carpentry. It is made from calcium sulfate and has a powdery consistency. Regular chalk is easy to use, inexpensive, and leaves a clear and visible mark on most surfaces. However, it can be easily smudged or washed away in rainy conditions.
2. Permanent chalk
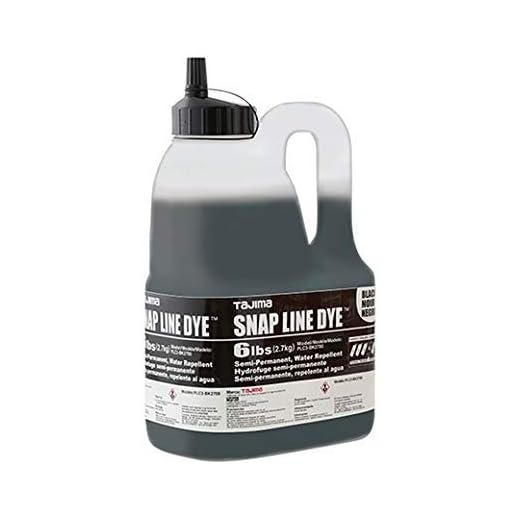
Permanent chalk, also known as carpenter’s chalk or construction chalk, is a more versatile option. It is made from a mixture of pigments, binders, and solvents that allow it to create long-lasting, weather-resistant marks. Permanent chalk is ideal for outdoor projects or when working in high-moisture environments. It can withstand rain and fading, making it suitable for long-term marking applications.
3. Colored chalk
Colored chalk is a fun alternative to regular white chalk. It is available in various vibrant hues, allowing for clear differentiation between different marks or lines. Colored chalk is particularly useful in situations where multiple lines need to be marked or for highlighting specific areas. It can also add a touch of creativity to your projects.
4. Fluorescent chalk
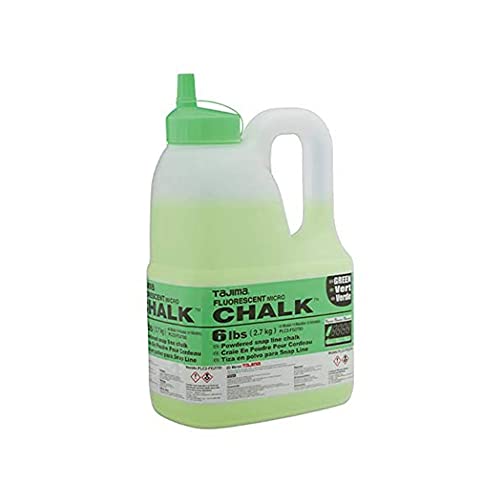
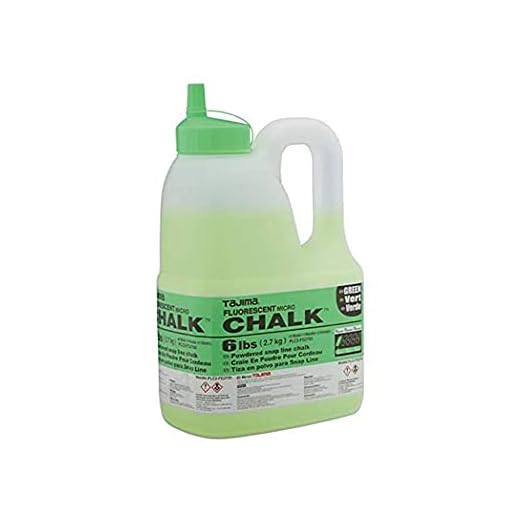
Fluorescent chalk is designed to enhance visibility in low-light conditions or dimly lit areas. It contains special pigments that create bright, glowing marks, making them easier to see and follow. Fluorescent chalk is commonly used in construction and outdoor projects that require high visibility, such as roadwork or landscaping.
Before using any type of chalk, it is important to make sure the chalk line reel is properly filled and the chalk is securely packed. This ensures accurate and reliable marking.
By understanding the different types of chalk available and their benefits, you can choose the most suitable option for your specific project needs. Whether you prefer regular chalk for its simplicity or permanent chalk for its durability, having the right chalk on hand will help you achieve precise and professional markings every time.
Preparing Your Dewalt Chalk Line Reel for Use
Before you can start using your Dewalt chalk line reel, it’s important to properly prepare it for use. This involves several steps to ensure that the chalk line reel functions properly and provides accurate and consistent lines.
Here are the steps to prepare your Dewalt chalk line reel for use:
| Step 1: | Open the chalk line reel by unscrewing the cap or removing the cover. This will provide access to the chalk line and allow you to fill it with chalk. |
| Step 2: | Choose a high-quality chalk powder that is suitable for your needs. Different colors may be available, so select the one that will provide the best contrast against the surface you will be marking. |
| Step 3: | Pour the chalk powder into the chalk line reel. Be cautious not to overfill it, as this can lead to clumping and uneven line distribution. |
| Step 4: | Replace the cap or cover securely, ensuring it is tightly sealed. This will prevent chalk from spilling out and maintain the integrity of the chalk line reel. |
| Step 5: | Hold the chalk line reel firmly and extend the line to the desired length. This can be done by pulling the line out from the reel and locking it in place. |
| Step 6: | Test the chalk line reel on a scrap piece of material or surface to ensure that the chalk is distributing evenly and the line is straight. Adjustments may be necessary, such as adding more chalk or adjusting the tension of the line. |
Following these steps will help you prepare your Dewalt chalk line reel for use and ensure that it functions optimally. By properly filling the chalk line reel and testing it beforehand, you will be ready to confidently use it for marking straight and accurate lines in various projects.
Step-by-step guide to setting up your chalk line reel
A chalk line reel is a useful tool for marking straight lines on various surfaces. Whether you’re a professional contractor or a DIY enthusiast, learning how to properly fill and use a chalk line reel is essential. Follow these simple steps to set up your chalk line reel effectively:
Step 1: Gather the necessary materials
Before you start, ensure that you have the following materials:
- A chalk line reel: Choose a high-quality chalk line reel that suits your needs.
- Chalk: Opt for chalk specifically designed for chalk line reels, as it will provide better results.
- Measuring tape: You’ll need a measuring tape to determine the length of the line you want to mark.
Step 2: Open the chalk line reel
Unscrew the cap or open the hatch on the chalk line reel to expose the empty chalk line reel compartment.
Step 3: Fill the reel with chalk
Pour the chalk into the exposed compartment of the chalk line reel until it’s nearly full. Be careful not to overfill it.
Step 4: Secure the chalk line
Attach one end of the chalk line to the reel’s hook or notch, usually located near the opening. Make sure the line is taut and free from any tangles or knots.
Step 5: Pull out the desired length of line
Extend the chalk line from the reel by pulling it out to the desired length. Use the measuring tape to accurately determine the length you need.
Step 6: Lock the chalk line in place
Once you’ve reached the desired length, engage the locking mechanism on the chalk line reel to secure the line in place. This will ensure that the line doesn’t retract while you’re using it.
Step 7: Snap and release the chalk line
Hold the chalk line firmly against the surface you want to mark and snap it quickly. This will create a straight and visible line. Release the line gently and let it retract back into the reel.
By following these step-by-step instructions, you’ll be able to set up your chalk line reel correctly and mark precise straight lines with ease. Remember to always handle the chalk line reel with care and clean it regularly to maintain its optimal performance.
Using a Dewalt Chalk Line Reel
Using a Dewalt Chalk Line Reel is a simple and effective way to create straight lines for various projects, such as laying tiles or framing walls. Here are the steps to use a Dewalt Chalk Line Reel:
- Start by selecting the appropriate chalk color for your project. Dewalt offers a range of chalk colors, including red, blue, and yellow, to suit different applications.
- Locate the chalk fill opening on the chalk line reel. This is usually located on the side of the reel.
- Open the chalk fill opening by twisting it counterclockwise. This will expose the chalk reservoir inside the reel.
- Pour the desired amount of chalk into the chalk reservoir. It is recommended to fill the reservoir about three-quarters full to avoid overflowing or spilling chalk.
- Close the chalk fill opening by twisting it clockwise until it is securely closed.
- Hold the end of the chalk line and stretch it out to the starting point of your desired line.
- Aim the chalk line reel at the starting point and hold it firmly with one hand.
- Use your other hand to pull the chalk line away from the reel and extend it to the desired length.
- Once the chalk line is extended, pull it taut and snap it against the surface you want to mark. This will release the chalk and create a straight line.
- Repeat the process as needed to create additional straight lines.
- To retract the chalk line, hold the handle of the reel and turn it in the opposite direction of the line. This will wind the line back into the reel.
Using a Dewalt Chalk Line Reel can help you achieve precise and professional-looking results in your projects. Make sure to follow the manufacturer’s instructions and guidelines for the specific model you are using.
Techniques and tips for achieving precise marks
When using a Dewalt chalk line reel, getting precise marks is essential for accurate measurement and layout. Here are some techniques and tips to help you achieve precise marks:
| 1. Prepare the surface | Clean the surface where you will be marking to ensure the chalk line adheres properly. Remove any dust, dirt, or debris that may interfere with the line’s accuracy. |
| 2. Use a level | Before making your mark, ensure that your reference point is level. Use a leveling tool to check for any slopes or unevenness that could affect the accuracy of your line. |
| 3. Apply consistent tension | When filling the chalk line reel with chalk, make sure to apply consistent tension. This will help ensure an even distribution of the chalk on the line, resulting in a more accurate mark. |
| 4. Adjust the line length | Depending on your project requirements, you may need to adjust the length of the line. Pull out the desired amount of line and secure it in place using the reel’s locking mechanism. |
| 5. Reel in the line slowly | When retracting the line into the reel, do it slowly and steadily. This will prevent any sudden jerks or movements that could cause the line to snap and result in an inaccurate mark. |
| 6. Double-check your marks | Once you have made your mark, double-check its accuracy using a measuring tool or a straight edge. Rectify any mistakes or misalignments to ensure a precise layout. |
| 7. Maintain your chalk line reel | Regularly clean and lubricate your chalk line reel to ensure smooth operation and prevent any buildup of debris or dust that could affect the accuracy of your marks. |
By following these techniques and tips, you can enhance your accuracy and achieve precise marks with your Dewalt chalk line reel.


