Getting a straight chalk line is essential for various construction and DIY projects. Whether you are installing tiles, marking a wall for painting, or laying out a deck, having a straight line as your reference point is crucial for achieving accurate and professional-looking results.
So, how do you ensure that your chalk line is perfectly straight? Here are some tips to help you achieve a straight chalk line every time.
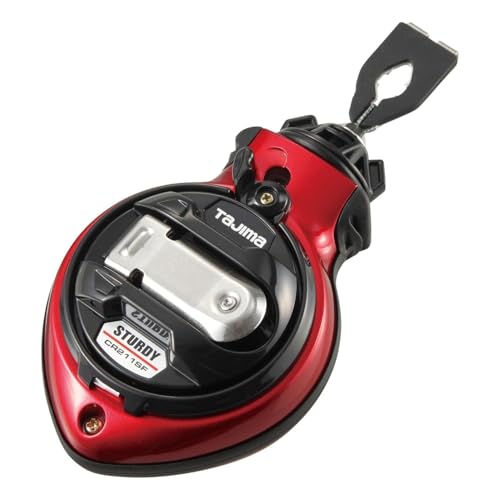
1. Use a High-Quality Chalk Line Reel: Investing in a good-quality chalk line reel is the first step towards getting a straight line. Look for a reel that has a sturdy construction and a high-tensile strength line. A quality reel ensures smooth operation and prevents the line from sagging.
2. Secure the Chalk Line Tightly: Before you start snapping the line, make sure it is tightly secured at both ends. Attach one end firmly to an anchor point and extend the line to the other end, ensuring there is no slack. A loose line can result in uneven marks.
Remember, a tight line is a straight line.

3. Double Check for Alignment: Before snapping the chalk line, use a level or a straight edge to ensure that the line is aligned properly. This step helps you eliminate any potential errors in your measurements or layout.
4. Snap the Line with Precision: When snapping the chalk line, hold the reel in one hand and the other end of the line in the other hand. Then, pull the line away from the surface and let it snap back, striking the surface evenly. Practice your technique to ensure consistent results.
5. Test the Straightness: After snapping the line, check for any deviations. Use a straight edge or level to verify that the line is perfectly straight. If you notice any issues, redo the process and make adjustments as needed.
By following these tips and practicing your technique, you can achieve a straight chalk line every time, making your projects more accurate and professional-looking.
Step-by-Step Guide to Get a Straight Chalk Line
Getting a straight chalk line is crucial when it comes to various construction and home improvement projects. It helps ensure precise measurements and alignment of materials. Follow these steps to achieve a straight chalk line:
Step 1: Gather the necessary materials
Before you start, make sure you have all the materials you need. This includes a chalk line reel, chalk, a tape measure, and a stable surface to work on.
Step 2: Prepare the chalk line reel
Unwind the string from the chalk line reel. Attach one end of the string to the hook or anchor point on the reel, making sure it is secure.
Step 3: Measure and mark the desired distance
Using a tape measure, measure the distance where you want the chalk line to be. Make a small mark at each end of the line where you will secure the chalk line string.
Step 4: Secure the chalk line string
Take the loose end of the chalk line string and hold it firmly on one of the marked points. Pull the string tight and stretch it to the other marked point. Make sure the string is level and aligned with the desired line.
Step 5: Snap the chalk line
Once the string is properly stretched, lift it and pull it back slightly to create tension. With your other hand, grab the string near the center and release it to snap back against the surface. This will create a straight line of chalk across the desired area.
Step 6: Clean up and assess the line
After snapping the chalk line, carefully wind the string back into the chalk line reel. Use a brush or cloth to clean up any excess chalk on the surface. Assess the straight line you’ve created to ensure it meets your desired specifications.
Remember, practicing these steps will lead to better accuracy and consistency in getting a straight chalk line. Take your time and follow the steps carefully for the best results.
Determine the Starting Point
Before beginning the process of creating a straight chalk line, it is important to determine the starting point. This will be the reference from which the line will be created.
Start by identifying the area where the straight line is needed. This could be a wall, a floor, or any other surface. Mark the starting point with a small dot or X using a pencil or a marker.
Once the starting point has been marked, examine the surface and identify any obstacles or irregularities that could affect the placement of the chalk line. These could include furniture, cables, or uneven surfaces.
Clear the Area
If there are any obstacles in the path of the straight line, it is important to clear them before proceeding. Move furniture out of the way, untangle cables, and smooth out any uneven surfaces.
Measure the Distance
Next, measure the distance from the starting point to the end point of the straight line. This will help determine the length of the chalk line that needs to be used.
Using a measuring tape or a ruler, carefully measure the distance and make note of it. It may be helpful to write down the measurement to ensure accuracy.
Prepare the Chalk Line Tool
Before using a chalk line to get a straight line, it’s important to properly prepare the tool. Follow these steps to ensure the best results:
Gather the Materials
Make sure you have all the necessary materials before you start. You will need a chalk line reel, which is a small tool that holds a string covered in chalk. You will also need chalk powder or chalk sticks, depending on the type of chalk line reel you have. Additionally, have a tape measure or ruler handy to measure the desired length of the line.
Load the Chalk Line Reel
Start by loading the chalk line reel with chalk. If you have chalk sticks, insert one into the chalk line reel and securely close it. If you are using chalk powder, pour a small amount into the chalk line reel’s compartment. Make sure the chalk is distributed evenly and covers the line in the reel.
| Tip | Warning |
|---|---|
| It’s a good idea to wear gloves when handling chalk to avoid getting it on your hands. | Be careful not to overfill the chalk line reel with chalk powder as it may cause clogging or make the line too thick. |
Once the chalk line reel is loaded, close it securely to prevent any chalk from spilling out during use.
Position the Chalk Line
Positioning the chalk line correctly is crucial to getting a straight line. Follow these steps to ensure proper alignment:
Step 1: Measure and Mark
Start by measuring the desired distance for your straight line. Use a tape measure or ruler to mark the starting and ending points on the surface.
Step 2: Anchor Points
Identify at least two anchor points along the marked line. These points should be solid and easily visible. They can be corners, edges, or other fixed objects.
Step 3: Secure the Chalk Line
Attach one end of the chalk line to one of the anchor points. Make sure it is tightly secured, ensuring that the line will remain in place while being stretched.
Step 4: Stretch the Chalk Line
Hold the other end of the chalk line and walk towards the second anchor point. Keep the line taut as you go, making sure it remains straight and aligned with the marked points.
Step 5: Snap the Line
With the chalk line fully stretched, hold it slightly above the surface and release it. Let it snap back onto the surface, leaving a straight chalk line behind.
By following these steps, you will be able to position the chalk line accurately and achieve a straight line for your project.
Tighten the Chalk Line
Once you have determined the starting point and the endpoint for your straight chalk line, it is important to ensure that the line is tight before snapping it. A loose line can result in an inaccurate reference line.
Steps to tighten the chalk line:
- Hold the chalk line reel firmly in one hand.
- Extend the chalk line to the endpoint and make sure it is aligned with the starting point.
- With your free hand, pull the line taut.
- Using your fingers, wrap the line around the reel until it is tight.
- Once the line is tight, make sure it is still aligned with the starting point.
- Hold the line taut with one hand, while using your other hand to hold the chalk line reel steady.
- Snap the chalk line by quickly releasing the line from your taut hand.
By tightening the chalk line properly, you ensure that the line is straight and accurately aligned with your intended reference line. A tight line also prevents the line from sagging or shifting during the snapping process.
Snap the Chalk Line
Once you have your chalk line set up, it’s time to snap it and create a straight line on your surface. Here’s how to do it:
1. Prepare the Chalk Line: Hold the hook end of the chalk line against your starting point, making sure it is securely anchored. If you’re working on a wall, you can use a nail or another anchor device to hold the chalk line in place.
2. Stretch the Line: Holding the line taut, walk to your end point with the chalk box in hand. Make sure the line is straight and the correct distance from the surface.
3. Align the Line: Once you’re at the end point, adjust the chalk line to make it perfectly aligned with your desired mark. This step is crucial for achieving a straight line.
4. Snap the Line: With one hand on the chalk line, use your other hand to pull the string away from the surface until it is at tension. Release the string, allowing it to snap back onto the surface. The chalk inside the box will leave a straight line on the surface, marking your desired path.
5. Check the Line: After snapping the line, check the quality of the mark. Make sure it is visible and straight. If needed, repeat the process to ensure a clear and precise line.
Note: When using a chalk line outdoors, consider securing the line with stakes to prevent movement caused by wind or other factors.
By following these steps, you’ll be able to snap a straight chalk line and achieve accurate results for your project.
Check the Straightness
Before you start using the chalk line, it’s important to ensure that your surface is straight. This will help you achieve a straight line and accurate measurements.
Here are a few steps to check the straightness of your surface:
| Step | Description |
|---|---|
| 1 | Place a straight edge, such as a level or a long piece of wood, along the surface you want to mark. Make sure it extends beyond the area where you plan to use the chalk line. |
| 2 | Check for any gaps or inconsistencies between the straight edge and the surface. If there are any, you may need to correct them before proceeding. |
| 3 | Use a measuring tape or ruler to measure the distance between the straight edge and the surface at different points along the area you want to mark. The measurements should be consistent and indicate a straight line. |
| 4 | If you notice any deviations or irregularities, you may need to make adjustments to ensure a straight line. This could involve sanding or leveling the surface. |
Taking the time to check the straightness of your surface will help ensure that your chalk line is accurate and your project turns out as planned.