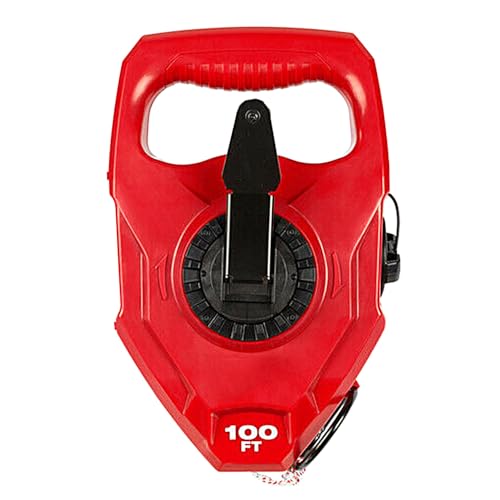


If you are using a Milwaukee chalk line, it’s important to know how to put chalk in it properly. The chalk line is a useful tool for marking straight lines on various surfaces, such as walls, floors, and lumber.
To put chalk in your Milwaukee chalk line, you’ll need to follow a few simple steps. First, locate the chalk reservoir on your chalk line. This is usually a small opening or cap on the side or bottom of the tool. Make sure to have your chalk handy, as you’ll need to refill the reservoir.
Once you’ve located the reservoir, unscrew the cap or open the cover. Take your chalk and pour it into the reservoir. You can use either loose chalk or chalk sticks, depending on your preference. Make sure not to overfill the reservoir, as this can cause clumping or clogging.
After you’ve filled the reservoir with chalk, screw the cap back on or close the cover tightly. This will prevent the chalk from spilling out while you’re using the chalk line. Now, you’re ready to start using your Milwaukee chalk line to mark straight lines with precision and accuracy.

Remember to keep your chalk line clean and dry to ensure optimal performance. If you notice any issues with your chalk line, such as uneven chalk distribution or clogging, you may need to clean or replace the chalk line string.
By following these simple steps, you’ll be able to put chalk in your Milwaukee chalk line and use it effectively for all your marking needs. Enjoy the convenience and accuracy that this tool can provide, whether you’re a professional tradesperson or a DIY enthusiast.
Step 1: Prepare the Chalk Line
Before you can put chalk in your Milwaukee chalk line, you need to prepare the chalk line tool. Follow these steps to get started:
- Hold the chalk line tool firmly in one hand.
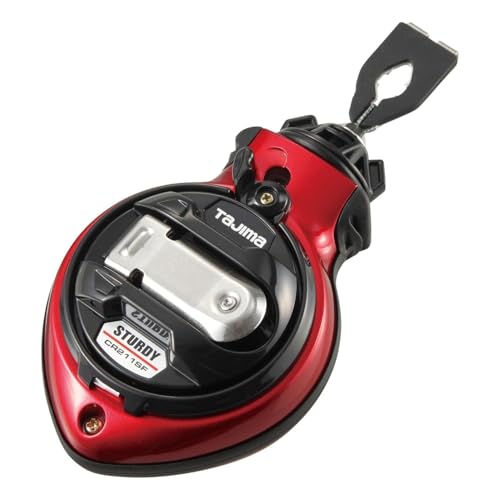
- Locate the chalk line reel, which is usually a round container attached to the chalk line tool.
- Twist the chalk line reel counterclockwise to open it. Some models may have a latch that you need to release.
- Once the chalk line reel is open, you will see a cavity or compartment where you can add the chalk.
- Select the color of chalk that you want to use. Different colors may be available, depending on your preferences or specific job requirements.
- Take a chalk stick and break it into smaller pieces that can fit into the cavity of the chalk line reel.
- Insert the broken chalk pieces into the cavity, making sure they are evenly distributed for uniform chalk line marking.
- Carefully close the chalk line reel by twisting it clockwise or securing the latch, depending on the model.
- Once the chalk line reel is closed, give it a few shakes to distribute the chalk evenly.
By following these steps, you have successfully prepared your Milwaukee chalk line with chalk. Now, you can move on to the next step of using the tool for your intended purposes.
Step 2: Open the Chalk Compartment
Before you can put chalk in your Milwaukee chalk line, you need to open the chalk compartment. This is where the chalk will be loaded into so that it can be dispensed when you use the chalk line.
Locate the chalk compartment on your Milwaukee chalk line. It is typically located near the handle of the tool. The chalk compartment may have a small latch or button that needs to be pressed or pulled in order to open it.
Once you have found the latch or button, use your fingers or a small tool to engage it and open the chalk compartment. Be careful not to force it open, as this may cause damage to the compartment or the chalk line itself.
After opening the chalk compartment, you will see a small cavity where the chalk will be inserted. This is where you will load the chalk, ensuring that it is securely in place before closing the compartment.
Pro Tip: Make sure to check the user manual or manufacturer’s instructions for your specific Milwaukee chalk line, as the steps to open the chalk compartment may vary slightly.
Now that you have successfully opened the chalk compartment, you are ready to move on to the next step of putting chalk in your Milwaukee chalk line.
Step 3: Pour Chalk into the Compartment
After opening the chalk line, the next step is to pour the chalk into the designated compartment. This is where the chalk will be stored and dispensed when you use the chalk line.
To pour the chalk, locate the compartment on the chalk line. It is usually located on the side or at the bottom of the tool. Open the compartment by sliding or rotating the cover, depending on the design of your chalk line.
Once the compartment is open, take your chosen color of chalk and carefully pour it into the compartment. Make sure to pour the chalk slowly and avoid any spillage. You can use a small funnel to help guide the chalk into the compartment if needed.
Ensure that the compartment is not overfilled. Leave some space at the top to prevent the chalk from jamming or clogging the line. Excess chalk can easily be wiped away with a cloth or brush.
Once you have poured the desired amount of chalk into the compartment, securely close the cover to prevent any chalk from escaping during use. Double-check that the cover is properly aligned and locked in place.
With the chalk now in the compartment, you are ready to start using your Milwaukee chalk line for marking lines on various surfaces.
Step 4: Close the Chalk Compartment
Once you have filled the chalk compartment with chalk, it is important to securely close it to prevent any accidental spills or leaks. Follow these steps to properly close the chalk compartment:
- Make sure that the chalk line is fully retracted into the chalk reel.
- Locate the lid or cover for the chalk compartment.
- Align the lid with the chalk compartment and ensure that it is properly seated on top.
- If there are any locking mechanisms, such as latches or clips, make sure that they are fully engaged.
- Gently press down on the lid to ensure a tight seal.
By closing the chalk compartment properly, you will protect the chalk inside and prevent any messes or wasted chalk. This step is crucial for maintaining the integrity of your chalk line tool and ensuring its long-term usability.
Step 5: Test and Adjust the Chalk Line
Once you have successfully loaded chalk into your Milwaukee chalk line, it is important to test and adjust the line to ensure it is working properly. Follow these steps to test and adjust the chalk line:
- Extend the line: Hold the chalk line firmly and slowly extend it to its full length. Make sure the line is taut and straight.
- Test the chalk release: Depress the chalk release button or lever, and observe the line as the chalk is released. Ideally, the chalk should release evenly and create a clear, straight line on the surface.
- Adjust the chalk flow: If the chalk is not releasing evenly or creating a clear line, you may need to adjust the chalk flow. Refer to the manufacturer’s instructions for the specific adjustments on your Milwaukee chalk line.
- Retest the chalk release: After making any necessary adjustments, repeat step two to test the chalk release again. Continue adjusting as needed until the line is clear and consistent.
- Reel in the line: Once you are satisfied with the chalk line’s performance, slowly reel in the line, keeping it taut and straight as you go.
Testing and adjusting the chalk line is crucial to ensure accurate and professional results in your projects. By following these steps, you can confidently use your Milwaukee chalk line for marking precise lines on various surfaces.