When it comes to construction and woodworking projects, accuracy is key. One of the best tools to ensure precision is a chalk line. A chalk line is a simple yet effective tool that can help you create straight lines over long distances. Whether you’re laying tiles, building a wall, or installing flooring, knowing how to properly use a chalk line is essential.
Step 1: Choose the right chalk line.
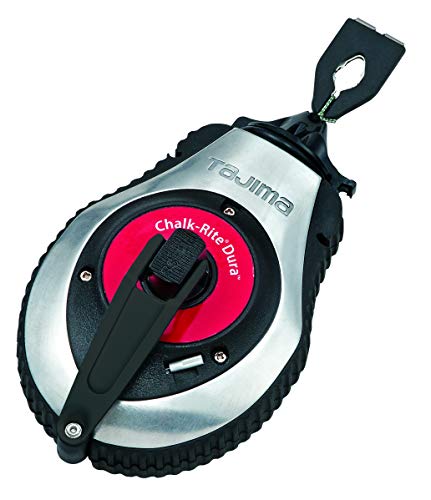
There are several types of chalk lines available, so it’s important to choose the right one for your project. Look for a chalk line that has a sturdy construction, a reliable rewind mechanism, and a high-quality chalk. Additionally, consider the length of the line and the amount of chalk it can hold. These factors will determine the accuracy and efficiency of your chalk line.
Step 2: Prepare the area.
Before using a chalk line, you need to prepare the area where you want to snap the line. Remove any obstacles, such as furniture or debris, that may interfere with the line. Ensure that the surface is clean and dry to prevent the chalk from smudging or bleeding. If necessary, use a level to ensure that your line will be straight.
Step 3: Load the chalk line.
The next step is to load the chalk line with chalk. Most chalk lines have a removable cap or a door that allows you to access the chalk compartment. Open the compartment and fill it with chalk, making sure not to overfill it. Replace the cap or close the door securely to prevent chalk spillage.
Step 4: Snap the line.
Hold one end of the chalk line at your starting point and extend it to where you want the line to end. Make sure the line is tight and straight, and then pull it back slightly so that it is raised off the surface. In one swift motion, release the line, allowing it to snap back against the surface. This will leave a straight line of chalk on the surface, marking the path you need to follow.
Step 5: Use the line as a guide.
Once the line is snapped, you can use it as a guide for your project. Whether you’re cutting, nailing, or measuring, align your tools or materials with the chalk line to ensure accuracy. As you work, periodically check the line to make sure it hasn’t been smudged or erased. If needed, you can easily re-snap the line by following the same steps.
Remember, practice makes perfect.
Snapping a straight chalk line may take some practice, especially if you’re working with longer distances. Don’t be discouraged if your first attempts aren’t perfect. With time, you’ll improve your technique and achieve flawless results. So, get your chalk line ready and start snapping those straight lines with confidence!
Why Use a Chalk Line?
A chalk line is a simple yet essential tool for any construction or carpentry project. Here are a few reasons why you should consider using a chalk line:
- Straight Lines: With a chalk line, you can easily create straight lines on various surfaces such as walls, floors, or ceilings. This is particularly useful when you need to mark precise measurements or lay out a grid.
- Precision: Unlike freehand drawing, a chalk line ensures accuracy and consistency in your markings. You can trust that the line will be straight and level, giving you confidence in your measurements and cuts.
- Speed: Using a chalk line is a quick and efficient way to mark long distances without the need for a ruler or measuring tape. Simply reel out the line, snap it, and you’re done.
- Visibility: Chalk lines create a highly visible mark that stands out against different surfaces. This makes it easy to follow the line while making cuts or laying tiles, saving you time and reducing the chances of mistakes.
- Durability: Chalk lines are designed to withstand the rigors of construction work. They are built with durable materials that can handle being dropped or exposed to rough conditions, ensuring they will last for multiple projects.
Overall, using a chalk line is a cost-effective and practical solution for ensuring accuracy and efficiency in your construction or carpentry projects. It’s a tool that every DIY enthusiast or professional should have in their toolbox.
Choosing the Right Chalk Line
When it comes to snapping a straight chalk line, choosing the right chalk line tool is crucial. Here are some factors to consider when selecting the perfect chalk line for your project:
Material
Chalk lines are typically made from either nylon or cotton. Nylon lines are more durable and resistant to stretching, making them a better choice for heavy-duty projects. Cotton lines, on the other hand, are more absorbent and provide better visibility, making them ideal for lighter tasks.
Length
The length of the chalk line will depend on the scale of your project. For smaller projects or tight spaces, a shorter line will be sufficient. However, for larger projects that require longer distances, it is advisable to opt for a longer chalk line to ensure accuracy and reduce the need for frequent line reloading.
Chalk Capacity
The chalk capacity of the chalk line will determine how often you need to refill it with chalk. If you have a large project, it would be wise to choose a chalk line with a higher chalk capacity to save time and effort.
Pro Tip: Look for a chalk line with a removable cap for easy refilling and maintenance.
Additionally, consider the shape and size of the chalk line box. A larger box may be more comfortable to hold and rewind, while a smaller box may be more portable and easier to maneuver in tight spaces.
By considering these factors, you can choose the right chalk line tool that suits your project’s needs, ensuring accurate and straight lines every time.
Preparing the Surface
Before snapping a straight chalk line, it’s important to properly prepare the surface to ensure accurate and straight lines. Follow these steps to prepare the surface:
1. Clear the Area
Start by clearing the area where you will be snapping the chalk line. Remove any obstructions, debris, or loose materials that may interfere with the line.
2. Clean the Surface
Next, clean the surface to remove any dust, dirt, or grease that could affect the adhesion of the chalk line. Use a broom, vacuum, or damp cloth to thoroughly clean the surface.
3. Level the Surface
Before snapping the chalk line, ensure that the surface is level. Use a spirit level or a laser level to check for any unevenness or slope. If necessary, make any adjustments to level the surface.
4. Secure the Surface
To prevent any movement or shifting during the snapping process, secure the surface. This can be done by using clamps, weights, or adhesive to hold the surface firmly in place.
By properly preparing the surface, you will achieve more accurate and straight lines when snapping a chalk line.
Snapping the Chalk Line
To create a straight chalk line for your project, follow these steps:
Step 1: Measure and Mark
Begin by measuring the desired length for your chalk line. Use a measuring tape or ruler to ensure accuracy. Once you have determined the length, make a small mark at each endpoint.
Step 2: Secure the Line
Next, take a chalk line reel and unwind the string. Attach one end of the string to one of the marked endpoints. Make sure it is tightly secured so that the line remains straight.
Step 3: Align and Snap
Keeping tension on the string, walk to the other marked endpoint. Extend the string along this line, making sure it is aligned with any other reference points or measurements. Once in position, lift the string slightly and release it. This will create a snap that transfers the chalk powder to the surface, leaving a straight line.
Note: It is important to wear safety goggles and gloves when snapping chalk lines to protect yourself from any potential particles or debris.
Remember to always double-check your measurements and make any adjustments before snapping the chalk line. This will ensure the line is straight and accurate for your project.
Following these steps will help you snap a straight chalk line and provide a reliable guide for your woodworking, construction, or DIY project.
Tips and Tricks
Snapping a straight chalk line can be a straightforward process, but it’s important to keep a few tips and tricks in mind to ensure accuracy and efficiency.
1. Choose the Right Chalk
Using the right type of chalk is key to achieving a straight line. Opt for high-quality chalk that is specifically designed for snapping lines. It should be brightly colored and easy to see on your work surface.
2. Prepare the Surface
Before snapping the chalk line, make sure the surface is clean and free from debris. Any dirt or loose particles can affect the accuracy of the line. Consider using a brush or blower to remove any unwanted materials.
3. Secure the Line
When snapping a long chalk line, ensure that it is securely attached to the start and end points. This will help prevent the line from shifting or moving during the snapping process. You can use clamps, weights, or stakes to keep the line taut.
4. Check for Level
Before snapping the line, it’s crucial to ensure that it will be level. Use a spirit level or a laser level to check the alignment of the line. This is especially important for projects that require precise measurements.
5. Snap with Care
When snapping the chalk line, avoid rushing the process. Slowly and steadily pull the string or guide the device along the surface. This will help create a clean, straight line without any unnecessary wobbling or unevenness.
6. Double Check Measurements
After snapping the line, take a moment to double check your measurements. Use a tape measure or ruler to verify the accuracy of the line. It’s better to catch any mistakes early on rather than during the construction process.
7. Clean Up
Once you have finished using the chalk line, be sure to clean up any excess chalk residue from the surface. This will help prevent any staining or unwanted marks on your materials.
By following these tips and tricks, you can ensure that your chalk lines are straight, accurate, and ready to guide your construction or home improvement projects.