When it comes to hanging or aligning items on walls, having a straight reference line is essential. However, if you’re dealing with uneven walls, achieving accuracy can be a challenge. That’s where a chalk line comes in handy. A chalk line is a simple yet effective tool that allows you to create a straight and level line on uneven surfaces, ensuring your project is perfectly aligned.
Step 1: Choose the right chalk line
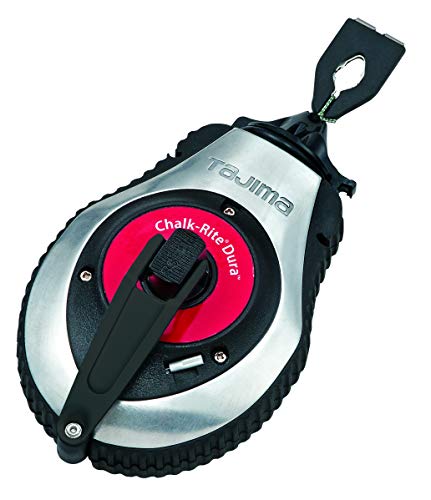
Before you begin, it’s important to select a chalk line that suits your needs. Consider factors such as the length of the line, the thickness of the line, and the type of chalk used. A longer line will save you time and effort when working on larger projects, while a thicker line will provide better visibility. Additionally, choosing a high-quality chalk will ensure a clean and crisp line.
Step 2: Prepare the wall
Ensure that the wall surface is clean and free from dirt or debris. This will prevent any interference with the chalk line and ensure a smoother operation. If the wall has any imperfections or loose paint, it’s recommended to fix these issues before proceeding.
Step 3: Set up the chalk line
Unroll the chalk line and find a starting point on the wall. Hold one end of the line against the wall at this point and use your other hand to stretch the line taut. Once the line is taut, use your thumb or finger to snap the line against the surface, leaving a straight line mark with chalk.
Step 4: Repeat and adjust as needed
If you’re working with a long wall or multiple walls, continue snapping the chalk line at intervals to create a straight reference line. If you encounter any inconsistencies or bumps along the way, simply adjust the tension or angle of the line to compensate for the unevenness. This will help you maintain a level line throughout the project.
By following these simple steps, you can easily use a chalk line on uneven walls and achieve accurate and straight reference lines for your projects. Whether you’re hanging pictures, installing shelving, or working on any other task that requires precision, a chalk line will prove to be an invaluable tool.
Preparing the Chalk Line
Before using a chalk line on uneven walls, it is important to prepare the chalk line tool and the surface properly. Here are the steps to follow:
- Clean the surface: Remove any dirt, dust, or debris from the wall using a brush or a damp cloth. This will ensure that the chalk line adheres properly to the surface.
- Secure the chalk line tool: Attach one end of the chalk line to a secure point on the wall, such as a nail or a hook. Make sure it is tightly secured to prevent it from moving or slipping.
- Extend the chalk line: Hold the other end of the chalk line and walk to the opposite end of the wall. Align the chalk line with the desired height or reference point, and pull it taut. This will help you create a straight and level line.
- Check for levelness: Use a level to ensure that the chalk line is perfectly horizontal or vertical, depending on your needs. Adjust the position of the chalk line if necessary.
- Set the chalk: Once you are satisfied with the position of the chalk line, snap it against the wall. This will leave a visible line of chalk on the surface, marking your reference point.
By following these steps, you can properly prepare the chalk line and ensure accurate markings on uneven walls. This will help you in various tasks such as hanging wallpaper, installing shelves, or laying tiles.
Choosing the Right Chalk
When it comes to using a chalk line on uneven walls, the type of chalk you choose is crucial. Different chalks have different qualities, and choosing the right chalk can make all the difference in achieving a straight and accurate line.
Here are some factors to consider when choosing the right chalk:
| Factor | Description |
|---|---|
| Color | Chalk lines come in various colors, including blue, red, and yellow. Choose a color that contrasts well with the surface you’re working on, so the line is easily visible. |
| Visibility | Some chalks are more opaque than others, allowing the line to be seen clearly. Look for chalk that is highly visible, especially on textured or uneven walls. |
| Weather resistance | If you’re working outdoors or in a humid environment, choose chalk that is weather-resistant. This will ensure that your chalk line stays intact even in adverse conditions. |
| Erasability | Consider how easy it is to remove the chalk line once you’re done. Some chalks can be easily wiped away with a damp cloth, while others may require more effort to erase. |
By taking these factors into account, you’ll be able to choose the right chalk for your project and create accurate chalk lines on uneven walls.
Inspecting the Chalk Line
Before using a chalk line on uneven walls, it is important to inspect the chalk line itself to ensure it is in proper working condition. Here are a few steps to follow when inspecting the chalk line:
| Step 1: | Check the chalk line for any knots or tangles. Untangle any knots and smooth out the line to ensure it can be easily extended. |
| Step 2: | Inspect the chalk line reel or holder. Make sure it is secure and in good condition. If there are any loose parts or damage, repair or replace the reel to avoid any issues during use. |
| Step 3: | Examine the chalk box or container. Ensure that there is enough chalk inside for a clean and visible line. If the chalk is low or empty, refill it before proceeding. |
| Step 4: | Check the chalk line’s accuracy. Extend the line along a straight surface, such as a level or straight board. If the line is not straight, adjust it using the reel or holder until it consistently produces a straight line. |
By carefully inspecting the chalk line and addressing any issues beforehand, you can ensure that it functions properly and helps you achieve accurate markings on uneven walls.
Preparing the Walls
Before using a chalk line on uneven walls, it is important to properly prepare the surface to ensure accurate and precise measurements. This will help create straight lines and minimize any potential errors. Follow these steps to prepare your walls:
|
1. Clean the walls: Start by cleaning the walls thoroughly to remove any dirt, dust, or debris. Use a damp cloth or sponge to wipe the surface clean. This will help the chalk line adhere better to the walls and prevent any interference with the line’s marking action. |
|
2. Repair any damage: Inspect the walls for any cracks, holes, or other types of damage. If you notice any, it is essential to repair them before proceeding. Fill in the holes or cracks with appropriate patching material and allow it to dry completely. Sand the repaired areas smooth to ensure a level surface. |
|
3. Determine the reference point: Select a reference point on the wall that will serve as a starting point for your chalk line. This point should be a stable and level surface, such as a corner or edge. Mark it with a pencil so that you can easily find it later. |
|
4. Measure and mark: Use a measuring tape to determine the desired distance for your chalk line. Starting from the reference point, carefully measure and mark the wall at regular intervals along the line. This will ensure even spacing and accurate alignment when you snap the chalk line. |
|
5. Protect adjacent surfaces: If necessary, cover any adjacent surfaces or areas that you do not want the chalk line to mark. Use painter’s tape or other protective materials to shield these areas from accidental chalk transfer. |
By following these steps, you can ensure that your walls are properly prepared for using a chalk line on uneven surfaces. Taking the time to clean, repair, and measure accurately will greatly enhance the effectiveness and precision of your chalk line markings.
Cleaning the Walls
Before using a chalk line on uneven walls, it’s important to clean the surface to ensure proper adhesion of the chalk line. Follow these steps to clean the walls:
1. Remove any loose debris
Start by removing any loose debris, such as dirt, cobwebs, or loose paint, from the walls. Use a broom or vacuum cleaner with a brush attachment to gently sweep the surface. Be careful not to scratch or damage the walls while cleaning.
2. Wipe down the walls
Next, use a damp cloth or sponge to wipe down the walls. This will help remove any remaining dust or dirt. You can use a mild soap or detergent diluted in water to create a cleaning solution if necessary. Make sure to wring out the cloth or sponge well to avoid leaving excess moisture on the walls.
Note: If you’re working in a kitchen or bathroom, where grease or grime may be present, you may need to use a stronger cleaning solution or degreaser.
Allow the walls to air dry completely before using the chalk line. This will ensure that the chalk line adheres properly to the surface, providing accurate and precise markings.
Remember, a clean surface is essential for achieving professional-looking and accurate chalk lines on uneven walls.
Marking Uneven Areas
When it comes to marking uneven areas on walls, it’s important to take extra care to ensure accurate measurements and straight lines. Here are some steps to help you mark uneven areas using a chalk line:
1. Prepare the Chalk Line
Before starting, make sure your chalk line is loaded with chalk and in working condition. A chalk line consists of a reel with a string or cord coated in chalk. It is used to create straight lines on surfaces.
2. Identify the Uneven Areas
Begin by identifying the areas on the wall that are uneven. These may include bumps, ridges, or depressions. It’s important to be aware of these uneven sections as they can affect the accuracy of your measurements.
3. Measure and Mark the Starting Point
Measure the desired distance from the starting point of your line and mark it lightly on the wall using a pencil. This starting point should be on a flat and even part of the wall, away from any uneven areas.
4. Extend the Chalk Line
Hold the chalk line reel at the starting point and extend it along the wall, keeping it taut. Make sure the string is positioned over the uneven areas lightly to avoid the chalk transferring to them.
5. Snap the Chalk Line
Once the chalk line is properly positioned, take hold of the string near the starting point and pull it away from the wall. Release it, allowing it to snap back and leave a straight chalk line on the wall. Be cautious when releasing the string, as it can create an uneven line if not done carefully.
6. Repeat the Process
If the uneven areas span a significant portion of the wall, it may be necessary to repeat the process for multiple sections. Use additional measurements and marks to ensure a straight and accurate line across the uneven areas.
7. Evaluate the Marked Uneven Areas
After marking the uneven areas, stand back and evaluate the lines you’ve created. Take note of any additional adjustments that may be needed to ensure accuracy and straightness.
Remember to check your chalk line reel periodically to ensure enough chalk is present on the string. This will help maintain a visible and durable line as you continue your project.
| Tips |
|---|
| – Use a level to verify the accuracy of your chalk lines. |
| – Take your time and be patient when working with uneven areas. |
| – Clean any excess chalk from the wall once you have finished marking the lines. |