Using a chalk line is a great way to make accurate straight lines over long distances. It’s a handy tool for construction projects, woodworking, or any task that requires precise measurements. However, using a chalk line by yourself can be a bit challenging. The good news is that with a few clever tricks and some practice, you can easily use a chalk line alone.
Step 1: Choose the Right Chalk Line
Before you start, make sure you have the right chalk line for the job. There are different types of chalk lines available, so choose one that suits your needs. Look for a chalk line with a long enough reel and enough chalk capacity.
Step 2: Set Up the Chalk Line
Find the starting point of your line and secure one end of the chalk line there. You can use a hook, a nail, or any other sturdy anchor point. Make sure it’s tightly secured so that it doesn’t move when you pull the line. Extend the line to the other side, and hold it at the desired height.
Step 3: Align and Snap the Line
Align the chalk line with your desired path, making sure it’s straight. Once you’re confident about the alignment, pull the line away from the wall and snap it against the surface. This will create a straight and clearly visible chalk line.
Step 4: Repeat as Needed
If you need to create multiple parallel lines, repeat the previous steps as necessary. Make sure the chalk line is taut and straight each time before snapping it against the surface. This will ensure consistent and accurate results.
Using a chalk line alone may take some practice, but it’s definitely doable. With the right technique and equipment, you can easily create straight lines even without a helper. So go ahead and give it a try!
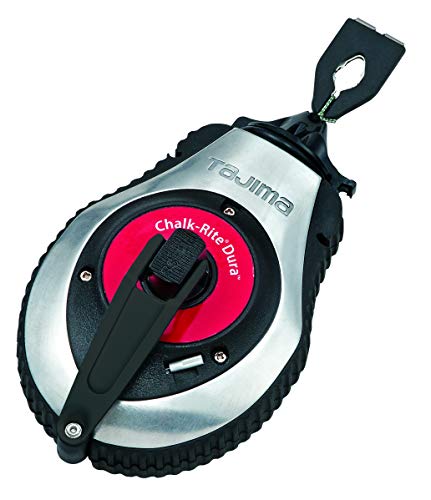
What is a chalk line?
A chalk line is a simple yet effective tool that is commonly used in construction and carpentry to create straight lines on various surfaces. It consists of a long, thin string or cord that is coated with chalk. The chalk line is housed in a case or reel that allows for easy winding and rewinding.
When using a chalk line, the user pulls the string out of the case and stretches it taut across the surface where the line needs to be created. The string is then snapped or tapped against the surface, leaving a straight line of chalk in its wake. The resulting line serves as a visual guide for various tasks, such as laying tiles, framing walls, or installing cabinets.
How does a chalk line work?
A chalk line works based on a simple principle of physics. The string is coated with powdered chalk, which acts as a temporary marking agent. When the string is snapped against the surface, the impact causes the chalk to transfer from the string onto the surface, leaving a visible line. The chalk adheres to the surface, allowing for accurate measurements and markings.
Chalk lines are available in various lengths and thicknesses to accommodate different applications. They are a versatile tool that can be used by both professionals and DIY enthusiasts. Their simplicity and efficiency make them an essential tool in any construction or woodworking toolbox.

Why is a chalk line important for construction?
A chalk line is an essential tool in construction because it helps ensure accurate and straight lines when marking surfaces for various purposes. Whether it’s laying out foundations, installing tiles or working on carpentry projects, a chalk line helps streamline the process and improve the overall quality of the work.
1. Accuracy
One of the main reasons why a chalk line is important is its ability to provide accurate measurements. By snapping a line with a chalk-coated string, construction professionals can precisely mark where to cut, install, or align materials. This accuracy is crucial for achieving a level and seamless finish, reducing errors, and avoiding costly mistakes.
2. Efficiency
Using a chalk line can significantly improve efficiency on the job site. Instead of relying on manual measurements or makeshift straight edges, a chalk line allows for quick and consistent marking on surfaces. This eliminates the need for repeated measurements and helps save time by ensuring the job is done right the first time.
Additionally, a chalk line is a versatile tool that can be used on various materials, such as concrete, wood, or drywall. Whether it’s creating reference lines, ensuring proper alignment, or marking patterns, the versatility of a chalk line makes it a valuable asset in any construction project.
Using a Chalk Line Safely
While a chalk line is a handy tool, it’s essential to use it safely to prevent injuries or accidents. Here are a few tips:
| 1. | Ensure the surface is clean and dry before applying the chalk line. |
| 2. | Hold the chalk line taut to maintain accuracy. |
| 3. | Use proper eye protection to avoid getting chalk dust in the eyes. |
| 4. | Avoid pulling the chalk line too aggressively as it may damage the string or cause the chalk to break. |
| 5. | Keep the chalk line away from children or untrained individuals. |
By following these safety guidelines, construction professionals can use a chalk line effectively and confidently to achieve precise and efficient results.
Step-by-step guide
Step 1: Determine where you want to create your straight line using the chalk line. This could be a wall, a floor, or any other surface.
Step 2: Measure the length of the line you want to create and cut a piece of chalk line string slightly longer than that measurement.
Step 3: Attach one end of the chalk line string to one end of the line you want to create. This can be done by tying a knot or using the attachment mechanism on your chalk line tool.
Step 4: Hold the free end of the chalk line string and pull it taut. Make sure the string is straight and aligned with your desired line.
Step 5: With one hand holding the chalk line string, use your other hand to snap the string against the surface. This will leave a straight chalk mark.
Step 6: Release the tension on the chalk line string and carefully reel it back into your chalk line tool.
Step 7: Repeat steps 3-6 as necessary to extend your straight line or create additional lines in different directions.
Step 8: Once you have finished using the chalk line, you can easily remove the chalk mark from the surface by wiping it away with a damp cloth or erasing it with a chalk line eraser.
Step 9: Remember to store your chalk line tool and chalk line string properly to keep them in good condition for future use.
Prepare the surface
Before using a chalk line, it’s important to prepare the surface to ensure accurate and straight lines. Here are some steps to follow:
- Clean the surface: Remove any dirt, dust, or debris from the area where you’ll be using the chalk line. This will help the chalk adhere better and create a more defined line.
- Smooth out imperfections: If the surface has any bumps or unevenness, consider using sandpaper or a sander to make it smooth. This will help the chalk line glide smoothly and prevent any disruptions in the line.
- Apply primer (if necessary): Depending on the surface you’re working with, you may need to apply a primer before using the chalk line. This is especially true for porous surfaces, such as wood or drywall. The primer will help the chalk adhere better and prevent it from smudging or fading.
- Mark your starting point: Before using the chalk line, it’s helpful to mark your starting point with a pencil or a small piece of tape. This will give you a reference point to begin your line and ensure it starts where you want it to.
By preparing the surface properly, you’ll be able to achieve clean and precise lines when using a chalk line, even when working alone.
Fill the chalk line with chalk
Before using a chalk line, it is important to fill it with chalk. This will ensure that you have a visible and straight line for your project. Here is how you can fill a chalk line with chalk:
Step 1: Open the chalk line container
Start by opening the chalk line container. Most chalk lines have a screw cap or a sliding chamber that holds the chalk. Make sure to open it carefully to prevent any spills.
Step 2: Pour the chalk into the container
Next, take your chosen chalk powder and pour it into the container. It is important to choose a quality chalk powder that is specifically designed for chalk lines. This will ensure a smooth flow and clear line.
Step 3: Close the chalk line container
After filling the container with chalk powder, securely close the container. Make sure to tighten any screw caps or slide the chamber back into place. This will prevent any leakage or spills while using the chalk line.
Once you have successfully filled the chalk line with chalk, you are ready to use it. Simply extend the line to the desired length, snap it down to create a straight line, and start working on your project with confidence!
Stretch the line and create a straight line
To use a chalk line with just one person, it’s important to properly stretch the line and create a straight line. This will ensure accurate and precise measurements and markings.
Here are the steps to stretch the line and create a straight line:
- Start by finding the two endpoints where you want the straight line to be. These can be two distant points on a wall, floor, or any surface you are working on.
- Tie one end of the chalk line to a fixed point or object near one of the endpoints. Ensure that it is securely tied and won’t come loose.
- Hold the chalk line reel and walk towards the other endpoint, ensuring that the line is straight and taut as you walk. If there are obstacles in the way, gently lift the line over them or go around them to maintain a straight path.
- Once you reach the other endpoint, make sure the line is still straight and taut. If needed, adjust the position of the line by moving the chalk line reel closer or further away from the endpoint.
- When you are satisfied with the position of the line, hold the line taut with one hand and use your other hand to pull the chalk line away from the surface and then release it. The chalk line will snap back onto the surface, leaving a straight and visible line.
By following these steps, you can easily stretch a chalk line and create a straight line without the need for additional assistance.
Mark the line
Once you have determined where you want to create your line, you are ready to mark it using the chalk line. Follow these steps:
- Secure the line: Place one end of the chalk line against a fixed point, such as a wall or post, ensuring it is taut.
- Hold the case: Hold the chalk line case firmly in one hand, making sure it is level with the ground.
- Extend the line: With your other hand, pull the free end of the chalk line away from the fixed point, stretching it along the desired path.
- Release the line: Once the line is extended, let go of the free end and allow it to snap back, leaving a straight, visible line of chalk on the surface.
- Check the line: Use a level or straight edge to ensure the chalk line is straight and even.
- Repeat if necessary: If the line is not straight or not as visible as you would like, you can repeat the process until you achieve the desired result.
Note: It is important to be careful when snapping the line back, as it can leave a messy chalk mark if done too forcefully. Additionally, make sure the chalk line is fully extended to prevent any sagging or curvature in the line.
Tips and tricks
- Make sure the chalk line is properly filled with chalk before starting to use it. This will ensure a clear and visible line.
- Hold the chalk line taut and level before snapping it. This will help create a straight line.
- If working on a windy day, consider using a chalk line reel with a built-in locking mechanism. This will prevent the wind from blowing the line off track.
- When snapping the chalk line, use a quick and firm motion. This will help create a clean and precise line.
- If the chalk line is not long enough to reach your desired distance, use a measuring tape or ruler to mark the starting and ending points. Then, connect the dots by snapping the chalk line in between.
- If using a chalk line on a vertical surface, such as a wall, make sure to secure the line at the starting and ending points using a nail or screw. This will prevent the line from sagging or falling off the surface.
- If the chalk line becomes too faint or fades over time, simply refill it with more chalk to maintain visibility.
- Practice using the chalk line on scrap or unused surfaces before starting your actual project. This will help you become familiar with the device and ensure more accurate results.
- Store the chalk line in a cool and dry place to prevent the chalk from clumping or drying out.