Having a level ceiling is crucial for the overall aesthetic appeal and functionality of a room. However, achieving a perfectly level ceiling can be a challenging task. Fortunately, with the advancement of technology, leveling a ceiling has become easier and more accurate, thanks to the use of lasers.
A laser level is a precise tool that emits a straight beam of light, allowing you to determine if a surface is level or not. It is especially useful when it comes to leveling ceilings, as it eliminates the need for tedious and time-consuming manual measurements.
To level a ceiling with a laser, start by selecting a suitable laser level for the job. You can choose between a rotary laser level, which emits a 360-degree beam, or a line laser level, which emits a straight line. Both types will get the job done, but the choice depends on the specific requirements of your project.
Once you have your laser level, set it up on a stable tripod or mount it securely to a wall. Position the laser level in a central location in the room, ensuring that it is at the desired height for the level ceiling. Turn on the laser level and let it emit its beam of light.
Understanding the Importance of a Level Ceiling
A level ceiling is an essential aspect of any well-designed space. It not only adds aesthetic appeal but also has functional benefits. Understanding the importance of a level ceiling can guide you in ensuring that your ceiling is properly aligned and leveled.
1. Aesthetics
A level ceiling plays a crucial role in the overall aesthetics of a room. It creates an impression of order and symmetry, giving the space a clean and polished look. A ceiling that is uneven or sloping can make a room appear unbalanced and visually unappealing. By ensuring that your ceiling is level, you can enhance the beauty and attractiveness of your living or working area.
2. Structural Integrity
Aside from its visual impact, a level ceiling is also important for structural reasons. An uneven or sagging ceiling can be an indicator of structural issues such as inadequate support or water damage. It can potentially compromise the stability of the entire structure. By leveling your ceiling, you can detect and address any structural problems early on, preventing further damage and ensuring the safety of the building.
Tip: When leveling a ceiling, it is important to consult a professional if you suspect any structural issues to ensure proper assessment and repairs.
3. Proper Lighting and Acoustics
A level ceiling is essential for proper lighting and sound distribution in a room. Uneven ceilings can cause shadows and uneven light distribution, making the space feel dim or poorly illuminated. Additionally, an unlevel ceiling can disrupt sound waves, impacting the acoustics of the room. By leveling the ceiling, you can create an even lighting effect and achieve optimal sound quality for better ambiance and functionality.
In conclusion, a level ceiling is more than just a visually appealing feature of a space. It contributes to the structural integrity of the building, enhances lighting and acoustics, and improves the overall aesthetic appeal. By understanding the importance of a level ceiling, you can prioritize its alignment and invest in the necessary adjustments to create a harmonious and functional environment.
Tools and Materials Needed
In order to level a ceiling with a laser, you will need the following tools and materials:
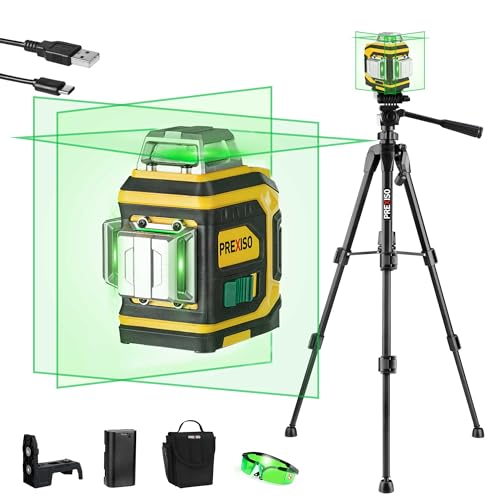
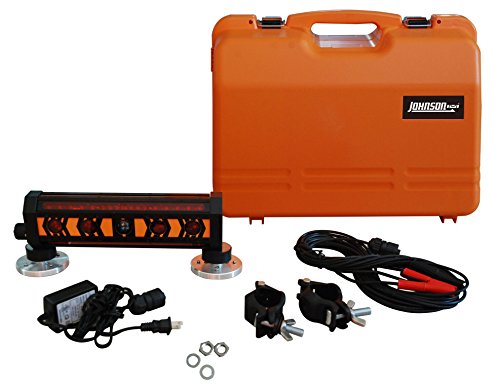
Laser Level
A laser level is the main tool you will need for this project. It is important to choose a laser level that is accurate and easy to use. Look for a level that has both horizontal and vertical leveling capabilities.
Tripod
A tripod is necessary to secure the laser level in place and ensure that it remains steady while you work. Look for a tripod that is adjustable and stable.
Measuring Tape
A measuring tape is essential for accurately measuring the distance between the ceiling and the floor. This will help you determine how much the ceiling needs to be leveled.
Pencil
A pencil will be used to mark reference points on the ceiling and walls. This will help you keep track of the areas that need to be leveled.
Spackle and Putty Knife
If there are any cracks or holes in the ceiling, you will need spackle and a putty knife to fill them in. This will ensure a smooth and even surface.
Sandpaper
Sandpaper will be used to sand down any rough areas on the ceiling surface. This will help create a smooth and level finish.
Drop Cloth
A drop cloth is important to protect the floor and furniture from dust and debris while you are working on the ceiling.
Make sure you have all of these tools and materials ready before you begin leveling the ceiling with a laser. This will help ensure that the process goes smoothly and efficiently.
Step-by-Step Guide to Leveling a Ceiling with a Laser
If you’re looking to level your ceiling, using a laser can be a precise and efficient way to achieve professional results. Here is a step-by-step guide to help you get started:
Step 1: Prep the Room
Before you begin, make sure the room is clean and free from any furniture, fixtures, or decorations. This will give you a clear and unobstructed view of the ceiling.
Step 2: Set Up the Laser Level
Place the laser level on a sturdy tripod or mount it securely on a flat surface. Make sure the laser is positioned at a convenient height, so it is easy for you to work with. Follow the manufacturer’s instructions for setting up the laser level.
Step 3: Turn on the Laser
Once the laser level is set up, turn it on and adjust the settings according to your needs. Most laser levels have vertical and horizontal modes, so choose the appropriate mode for leveling the ceiling.
Step 4: Find a Reference Point
Select a reference point on the ceiling where you want the laser line to align. This can be a corner or any other spot that you want to use as the basis for leveling the rest of the ceiling.
Step 5: Align the Laser Line
Using the laser level’s adjustments, align the laser line with the chosen reference point. Make sure the line is straight and level according to your desired measurements. This will serve as your baseline for leveling the rest of the ceiling.
Step 6: Mark the Ceiling
Using a pencil or a marker, mark the points where the laser line intersects the ceiling. These marks will help you to identify any high or low spots in the ceiling as you proceed with the leveling process.
Step 7: Check the Entire Ceiling
Continue moving the laser level across the ceiling, making sure the laser line remains aligned with the marked reference points. Check for any inconsistencies or deviations from the desired level.
Step 8: Adjust as Needed
If you notice any high or low spots, make the necessary adjustments to level the ceiling. This may involve using shims, spacers, or other leveling tools to even out the surface. Repeat the marking and checking process until the entire ceiling is level.
Step 9: Clean Up
Once you have leveled the entire ceiling, clean up the room, removing any markings and debris. This will give you a clean and finished look, ready for any further ceiling treatments or installations.
By following these step-by-step instructions, you can efficiently level your ceiling using a laser and achieve professional and precise results. Remember to take your time and double-check your measurements to ensure an accurate and level surface.
Tips and Precautions
Leveling a ceiling with a laser can be a precise and efficient way to achieve a perfectly level surface. However, there are a few tips and precautions to keep in mind to ensure the best results:
1. Safety first: Always wear proper safety gear, including goggles and gloves, when working with a laser level.
2. Prepare the room: Before starting the leveling process, remove any furniture or objects that may obstruct the laser beam or get in the way.
3. Clear the ceiling: Make sure the ceiling is free of any dust, debris, or loose materials that could interfere with the accuracy of the laser level.
4. Check the batteries: Ensure that the batteries in the laser level are fully charged or replace them if needed. A weak or dying battery can affect the accuracy of the laser.
5. Position the laser level: Place the laser level on a sturdy tripod or mount it securely to a wall. Ensure that it is at a suitable height and position to project the laser beam evenly across the ceiling.
6. Take measurements: Use a tape measure or ruler to mark reference points on the walls for accurate leveling. These marks will help guide you as you adjust the ceiling to achieve a level surface.
7. Adjust the leveling screws: Use the leveling screws on the laser level to fine-tune the position and alignment of the laser beam. Make small adjustments and check the levelness frequently to ensure accuracy.
8. Double-check the levelness: After making adjustments, double-check the levelness of the ceiling by taking measurements at multiple points. This will help confirm that the surface is truly level.
9. Be patient: Achieving a level ceiling can take time, especially if there are significant uneven areas. Take your time, be patient, and make small adjustments as needed to achieve the desired levelness.
10. Clean up: Once you have completed the leveling process, clean up any debris or dust that may have accumulated during the process. This will ensure a clean and professional-looking finish.
By following these tips and taking necessary precautions, you can effectively level a ceiling using a laser level and achieve a smooth and level surface.