Having a laser spirit level can make all the difference when it comes to accuracy and precision in your projects. However, in order for it to function properly, you need to make sure that the batteries are correctly installed. In this guide, we will walk you through the steps on how to put batteries in your Laser Pro Spirit Level.
Step 1: Gather the Required Tools
To begin, you will need a small Phillips head screwdriver and the appropriate type and number of batteries for your Laser Pro Spirit Level. Make sure to check the user manual or the label on the device to determine the correct battery type and quantity.
Step 2: Locate the Battery Compartment
Next, you will need to locate the battery compartment on your Laser Pro Spirit Level. This is typically located on the backside or the bottom of the device. Look for a small cover or a panel with screws holding it in place.
Step 3: Remove the Battery Cover
Using the small Phillips head screwdriver, carefully unscrew the screws holding the battery cover in place. Place the screws in a safe place to avoid losing them. Once the screws are removed, gently lift the battery cover off the device.
Step 4: Insert the Batteries
With the battery compartment now exposed, it is time to insert the batteries. Ensure that you are inserting the correct type of batteries according to the device’s specifications. Align the batteries with the polarity markings inside the compartment and firmly press them into place, following the correct orientation.
Step 5: Reattach the Battery Cover
Once the batteries are securely in place, carefully put the battery cover back on the device. Align the screw holes and use the small Phillips head screwdriver to tighten the screws. Make sure not to overtighten them, as this could damage the screw holes or the cover.
Step 6: Test the Laser Spirit Level
Finally, turn on your Laser Pro Spirit Level to test if the batteries are properly installed. Check the display or laser output to ensure that it is functioning correctly. If everything is in order, you are ready to start using your Laser Pro Spirit Level for your various projects with confidence and accuracy.

By following these simple steps, you can easily put batteries in your Laser Pro Spirit Level and ensure that it functions optimally. Remember to always refer to the user manual or label for the correct battery type and quantity, and handle the device with care during the battery installation process.
Getting Started with Your Laser Pro Spirit Level
Welcome to the world of precision levelling with the Laser Pro Spirit Level! This handy tool will help you achieve perfect alignment and accuracy in all your DIY and professional projects. To get started, follow the steps below:
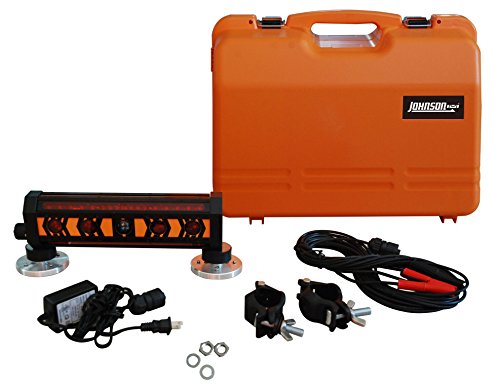
Step 1: Unboxing and Inspection
Before using your Laser Pro Spirit Level, take a moment to inspect the package and its contents. Ensure that all the accessories and components are present and in good condition. If you notice any damage or missing parts, please contact the manufacturer or retailer for assistance.
Step 2: Familiarize Yourself with the Controls and Features
It’s important to understand how your Laser Pro Spirit Level operates. Take a few moments to read the user manual thoroughly and familiarize yourself with the various controls and features. This will ensure that you can make the most out of your level and achieve the best results.
Step 3: Installing the Batteries
To power your Laser Pro Spirit Level, you’ll need to install the batteries. Locate the battery compartment, usually on the back or side of the level, and open it using the provided latch or screw. Insert the batteries as indicated by the polarity symbols, typically marked as “+” and “-“. Close the battery compartment securely.
Step 4: Calibrating the Level
Before using your Laser Pro Spirit Level, it’s essential to calibrate it to ensure accurate readings. Follow the instructions in the user manual to calibrate the level properly. This step may involve adjusting the bubble vials or using calibration buttons or switches.
Step 5: Mounting and Adjusting the Level
Now that your Laser Pro Spirit Level is powered and calibrated, you can mount it on the desired surface using the provided mounting accessories. Secure the level firmly, ensuring that it sits level and stable. Utilize the adjustable features of the level, such as the bubble vials or laser lines, to align the level precisely.
By following these steps, you’ll be ready to use your Laser Pro Spirit Level effectively and achieve accurate and reliable levelling results for all your projects. Happy leveling!
Installing the Batteries
To begin installing the batteries in your Laser Pro Spirit Level, follow these steps:
- Locate the battery compartment on the back of the spirit level.
- Using a small Phillips head screwdriver, carefully remove the screws securing the battery compartment cover.
- Once the cover is removed, you will see where the batteries should be placed.
- Insert the batteries into the compartment, ensuring that the positive (+) and negative (-) ends are facing the correct direction.
- Replace the battery compartment cover and secure it with the screws.
- Confirm that the cover is tightly secured to prevent any damage to the batteries.
It is important to only use the specified type and quantity of batteries recommended by the manufacturer. Using the wrong type of batteries may damage the spirit level and void your warranty.
Once the batteries are correctly installed, you can now power on your Laser Pro Spirit Level and begin using it for accurate measurements.
Leveling Your Work Area
Achieving a level work area is essential for precise measurements and accurate results. Here are some steps to help you level your work area before using your Laser Pro Spirit Level:
1. Clear the Workspace
Before beginning, remove any clutter or debris from your work area. This will ensure a clean and unobstructed surface for leveling.
2. Find the Highest Point
Identify the highest point in your work area. This can be determined by using a traditional level or by visually inspecting the area. Knowing the highest point will help you establish a reference point for leveling.
3. Place the Spirit Level
Position your Laser Pro Spirit Level on a stable surface or tripod. Make sure it is secure and will not move during the leveling process.
4. Turn on the Laser
Switch on the laser in your Laser Pro Spirit Level. This will project a red laser beam onto the surfaces, aiding in the level measurement process.
5. Align the Laser Beam
Align the laser beam with the highest point in your work area. This can be done by adjusting the position or angle of the laser level.
6. Adjust the Spirit Level
Using the built-in leveling mechanisms on your Laser Pro Spirit Level, adjust the bubble or digital display until it is centered. This indicates that your work area is now level.
7. Check Other Areas
After leveling the highest point, check other areas of your work area to ensure they are also level. This can be done by moving the laser level or using a traditional level.
By following these steps, you will be able to create a level work area using your Laser Pro Spirit Level. This will provide the foundation for accurate measurements and precise results in your projects.
Using the Laser Pro Spirit Level
The Laser Pro Spirit Level is a versatile tool that can be used for various tasks such as hanging pictures, installing shelves, or aligning objects. By following a few simple steps, you can effectively utilize the features of this device to ensure accurate and level measurements.
Step 1: Inserting the batteries
Before using the Laser Pro Spirit Level, it is important to make sure that the batteries are properly inserted. Locate the battery compartment on the back of the level and slide open the cover. Insert the required batteries, making sure to follow the correct polarity indicated by the markings inside the compartment. Close the cover securely.
Step 2: Turning on the device
To turn on the Laser Pro Spirit Level, locate the power button typically located on the side or front of the device. Press and hold the power button until the indicator light or laser beam turns on. Some models may have additional buttons for specific functions, such as switching between manual leveling and automatic leveling modes.
Step 3: Leveling the device
Once the Laser Pro Spirit Level is turned on, it is important to ensure that the device itself is level. Place the level on a stable surface or attach it to a tripod using the provided mounting threads. Adjust the position of the level until the bubble indicator or built-in digital display indicates a level position. This ensures that the measurements taken by the laser or spirit level are accurate.
Pro Tip: If your Laser Pro Spirit Level has a built-in laser, make sure to avoid shining the laser beam directly into your eyes or the eyes of others. Always exercise caution and follow the safety instructions provided by the manufacturer.
Step 4: Taking measurements
Once the Laser Pro Spirit Level is properly leveled and set up, you can start taking measurements. Align the laser or spirit level with the object or surface you want to measure or align. Use the bubble indicator, laser beam, or digital display to determine if the object is level or if adjustments need to be made. Make any necessary adjustments until the desired level position is achieved.
Pro Tip: Some Laser Pro Spirit Levels come with additional features such as angle measurements or distance calculations. Take advantage of these extra functionalities to make your tasks even more accurate and efficient.
By following these steps and utilizing the features of the Laser Pro Spirit Level effectively, you can achieve precise and professional results with your leveling and measurement tasks.