A laser level rod is a vital tool used in various construction projects to measure vertical distances accurately. Whether you are a professional contractor or a DIY enthusiast, understanding how to read a laser level rod is essential for ensuring the accuracy of your measurements.
Reading a laser level rod may seem intimidating at first, but with a little practice and knowledge, you can become proficient in using this tool. The laser level rod is marked with graduations that represent measurements in feet, inches, or metric units, depending on the scale used. These graduations help you determine the height of a point relative to a reference point, such as the ground or a known benchmark.
To read a laser level rod, first, ensure that the rod is properly calibrated and zeroed. This means that the zero mark on the rod should align precisely with the reference point. If the rod is not zeroed correctly, your measurements may be inaccurate.
Next, position yourself at the reference point and look through the telescope or sight of the laser level to focus on the rod. Take note of the graduation on the rod that lines up with the laser beam or crosshair on the laser level. This graduation represents the height of the point being measured.
Understanding the Laser Level Rod
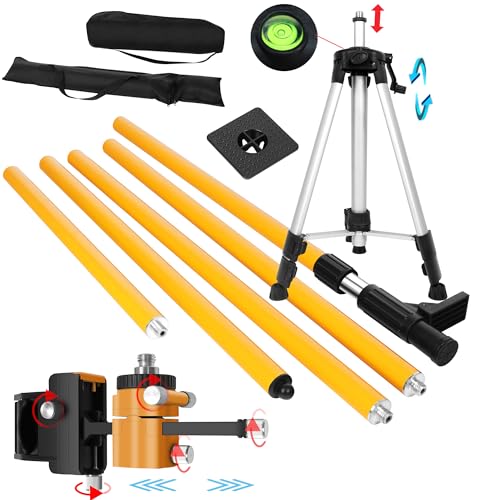
When using a laser level for construction or surveying, it is important to understand how to read the laser level rod accurately. The laser level rod, also known as a grade rod or leveling rod, is a long, narrow stick that is used to measure the height or elevation of a specific point relative to a reference point.
Here are some key tips to help you understand how to read the laser level rod:
- Start at the reference point: Before taking any measurements, it is important to establish a reference point. This can be a benchmark or a known elevation point. The laser level rod should be set up at this reference point.
- Extend the rod: Extend the laser level rod fully, making sure it is stable and secure. The rod should be held upright, with the bottom end touching the ground and the top end reaching towards the laser level.
- Align the target: Look through the laser level or use the receiver to locate the laser beam and align the target on the rod with the laser beam. The target is usually a movable red or green line or dot on the rod.
- Read the measurement: The laser level rod is typically marked with graduations representing specific measurements. Read the measurement at the point where the laser beam intersects the rod. This will give you the height or elevation of that point.
- Take multiple measurements: It is recommended to take multiple measurements at different points to ensure accuracy. This will help identify any inconsistencies or errors in the readings.
By following these steps and understanding how to read the laser level rod, you can ensure accurate measurements and achieve precise leveling or surveying results.
Preparing the Laser Level Rod
Before using a laser level rod, it is important to properly prepare it to ensure accurate measurements. Follow these steps to prepare the laser level rod:
| Step 1: | Inspect the rod for any signs of damage or wear. Check for bends, cracks, or loose components. If the rod is damaged, it may affect the accuracy of the measurements. |
| Step 2: | Clean the rod with a mild detergent and a soft cloth to remove any dirt or debris. Make sure to dry it thoroughly before use to prevent any interference with the laser level. |
| Step 3: | Attach the laser detector to the top of the rod. The detector should be securely fastened and aligned properly with the rod to ensure accurate readings. |
| Step 4: | Adjust the height of the rod based on your specific measurement needs. The rod should be extended to the appropriate height to reach the desired point of measurement. |
| Step 5: | Securely tighten any locks or clamps on the rod to keep it in place once it is adjusted to the correct height. This will prevent the rod from moving and affecting the accuracy of the measurements. |
By properly preparing the laser level rod, you can ensure accurate and reliable measurements when using a laser level.
Proper Placement of the Laser Level Rod
When using a laser level rod, it is essential to ensure proper placement to achieve accurate measurements. Here are some important considerations to keep in mind:
Choose a Stable Surface
Before beginning any measurements, it is crucial to place the laser level rod on a stable surface. This could be a level ground or a sturdy tripod. A stable surface will ensure that the rod doesn’t wobble or move during the measurement process, resulting in precise readings.
Align the Rod with the Laser Beam
Once the laser level is set up, align the rod with the laser beam. This can be done by positioning the rod vertically and adjusting its height until the laser beam illuminates the desired mark on the rod. Take your time to ensure the alignment is accurate, as any misalignment can lead to incorrect measurements.
Note: Some laser level rods come with a built-in detector that beeps or flashes when it is aligned with the laser beam. This feature can be beneficial in ensuring proper alignment.
Keep the Rod Steady
While taking measurements, it is crucial to keep the laser level rod steady. Any movement or shaking can lead to inaccurate readings. Place one hand firmly on the rod, while the other hand operates any adjustment controls if needed. Keeping the rod steady will ensure reliable and consistent measurements.
Final Thoughts
Proper placement of the laser level rod is essential for accurate measurements. Make sure to choose a stable surface, align the rod with the laser beam precisely, and keep it steady during measurements. By following these guidelines, you can use a laser level rod effectively and obtain reliable results.
Reading the Measurements on the Laser Level Rod
Once you have set up your laser level and attached the rod, it’s time to start reading the measurements. The laser level rod is equipped with markings that allow you to accurately measure the height or distance from the ground to a specific point. Here is how to read the measurements on the laser level rod:
1. Determine the Units of Measurement
Before reading the markings on the laser level rod, it is important to know the units of measurement being used. The most common units of measurement are feet and inches or centimeters. Make sure you are familiar with the units being used to avoid any confusion when reading the measurements.
2. Identify the Starting Point
Look for the starting point on the laser level rod. This is typically indicated by a zero or another distinct marking. It represents the baseline or reference point from which the measurements will be taken. Position the rod so that the starting point aligns with the desired reference point on the ground.
3. Read the Markings on the Rod
As you move the laser level rod up or down, different markings will come into view. These markings represent specific measurements at different distances from the starting point. Carefully read the markings and determine the corresponding height or distance from the ground.
4. Take Accurate Readings
To ensure accurate readings, it is essential to keep the laser level rod level and perpendicular to the ground. Avoid any tilting or leaning that may affect the measurements. Take multiple readings at different locations to confirm consistency and accuracy.
Using a laser level rod allows you to achieve precise measurements in various construction and surveying applications. By understanding how to read the markings correctly, you can ensure accuracy and efficiency in your work.
| Measurement | Description |
|---|---|
| Starting Point | The baseline or reference point from which measurements are taken |
| Markings | Specific measurements at different distances from the starting point |
| Units of Measurement | The system used to measure height or distance (e.g., feet and inches, centimeters) |
Interpreting the Measurements on the Laser Level Rod
When working with a laser level rod, it’s important to understand how to interpret the measurements correctly. The laser level rod is marked with various measurements that indicate the height or elevation of a certain point. Here are the key things to look for when reading a laser level rod:
1. Units of Measurement
Before you begin, make sure you know the units of measurement used on the laser level rod. Most rods will have markings in feet, inches, and tenths of an inch. Some may also include metric units such as centimeters or millimeters. It is crucial to be aware of the units to avoid any misinterpretation.
2. Zero Point
The zero point is the reference measurement on the laser level rod. It represents a specific elevation, which is usually set at the ground level or a known benchmark. The zero point may be indicated by a bold line, a number, or a highlighted section on the rod. Always start your measurements from this point.
3. Reading the Measurements
Typically, laser level rods have markings at regular intervals, indicating the elevation above or below the zero point. These markings are usually numbered and labeled accordingly. To interpret the measurements, align the laser level detector or receiver with the laser beam and read the corresponding measurement on the rod.
For example, if the laser level detector indicates “2.5” on the rod, it means that the point being measured is 2 feet and 5 tenths of an inch above (or below) the zero point.
Some laser level rods also have additional markings or features, such as a built-in bubble level or a measuring tape. These can provide further assistance in achieving accurate measurements.
Remember to keep the laser level rod stable and perpendicular to the ground while taking measurements. This will ensure accurate and reliable results.
Tips for Using a Laser Level Rod
When using a laser level, it’s important to properly read the measurements on the laser level rod to ensure accuracy. Here are some helpful tips:
1. Familiarize yourself with the laser level rod
Before using the laser level rod, take the time to understand its features and how it works. This will help you navigate the rod more effectively and make accurate measurements.
2. Choose the right rod for your laser level
Make sure to select a laser level rod that is compatible with your specific laser level. Different rods may have different scales and features, so it’s important to choose one that suits your needs.
3. Zero the rod before taking measurements
Before taking any measurements, it’s important to zero the laser level rod. This ensures that you start with a reference point of zero and can accurately measure the height or distance from there.
4. Hold the rod upright and steady
When taking measurements, it’s crucial to hold the laser level rod in an upright position and keep it steady. Any movement or tilting can result in inaccurate measurements, so make sure to hold it securely.
5. Use a leveling bubble
Many laser level rods come with a built-in leveling bubble. This bubble helps you ensure that the rod is perfectly vertical, which is important for accurate measurements. Take the time to level the rod before taking any measurements.
6. Read the measurements carefully
When reading the measurements on the laser level rod, take your time and read them carefully. It’s easy to make mistakes if you rush through the process, so double-check your readings to ensure accuracy.
By following these tips, you can effectively use a laser level rod and obtain accurate measurements for your projects. Remember to take your time, stay steady, and double-check your readings for the best results.