Setting slope with a laser level can be a crucial step in many construction projects. Whether you’re aligning a foundation, grading a driveway, or installing a drainage system, ensuring accurate slope is essential for proper functionality. Fortunately, with the advancements in technology, using a laser level makes this task much easier and more precise.
One of the main advantages of using a laser level to set slope is its ability to provide a consistent and accurate reference point. Unlike traditional methods that rely on manual measurements and visual estimates, a laser level emits a laser beam that creates a perfectly level line across the desired surface. This allows you to easily measure and adjust the slope as needed.
To set slope with a laser level, you will first need to establish your desired slope angle or pitch. This can be done by consulting the project plans or specifications, or by using a slope calculator to determine the proper slope for your specific application.
Once you have determined the desired slope, you can begin setting up your laser level. This typically involves placing the laser level on a tripod or mounting it to a stable surface. Ensure that the laser level is positioned at the correct height and angle to align with your desired slope.
Why Use a Laser Level for Setting Slope?
Achieve Accurate and Precise Slopes:
Using a laser level allows you to effortlessly achieve accurate and precise slopes. The laser beam emitted by the level creates a perfectly straight line, ensuring that the slope you set is consistent and level across the entire area. This is especially important when working on projects such as landscaping, construction, or drainage systems, where precise slopes are crucial for ensuring proper water flow and stability.
Save Time and Effort:
Using a laser level for setting slopes can significantly reduce the time and effort required compared to traditional methods. With a laser level, you can quickly and easily determine the desired slope and make adjustments as needed. This eliminates the need for manual measurements and guesswork, saving you valuable time and effort while delivering accurate results.
Increase Efficiency and Productivity:
By using a laser level, you can increase your overall efficiency and productivity. The level ensures that slopes are set accurately and consistently, minimizing the need for rework and adjustments. This allows you to complete projects more efficiently, saving you time and resources.
Enhance Safety:
A laser level can also contribute to enhancing safety on a worksite. By providing a clear and visible line, it helps ensure that workers can easily identify and follow the designated slope. This reduces the risk of tripping, falling, and other accidents that can occur when working on uneven surfaces.
Versatility in Applications:
Laser levels are highly versatile tools that can be used in various applications beyond just setting slopes. They can be employed for tasks such as aligning and leveling objects, installing fixtures and cabinets, or even for surveying and measuring distances. Investing in a laser level offers you the convenience of a multi-functional tool that can be utilized in a wide range of projects.
Overall, using a laser level for setting slopes provides numerous benefits, including accuracy, time and effort savings, increased efficiency, enhanced safety, and versatility. Whether you are a DIY enthusiast or a professional contractor, having a laser level in your toolbox can greatly simplify and improve your slope-setting tasks.
Step-by-Step Guide to Setting Slope with a Laser Level
Setting slope with a laser level is an essential task in various construction projects. It ensures that surfaces, such as floors or driveways, have the desired angle for proper drainage or to meet specific design requirements. Here is a step-by-step guide to help you set slope with a laser level effectively.
1. Gather the Required Tools and Materials
Before starting, gather all the necessary tools and materials to ensure a smooth process. Here are the items you will need:
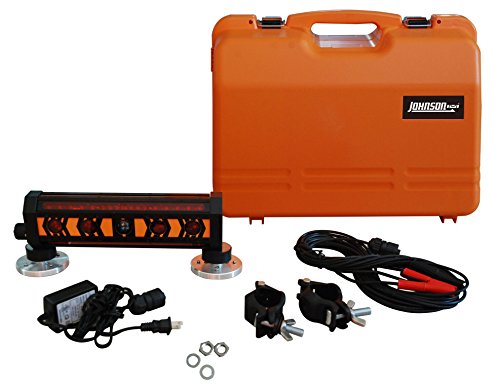
- Laser level
- Tripod
- Receiver
- Grade rod
- Measuring tape
- Marking chalk
- Safety goggles
2. Choose the Desired Slope
Determine the slope you want to set for your project. This could be a specific angle or a percentage of incline. Make sure to consult the project plans or specifications to ensure accuracy.
3. Set Up the Laser Level
Set up the laser level on a stable surface or tripod, ensuring it is level. Follow the manufacturer’s instructions for proper setup and calibration.
4. Position the Receiver and Grade Rod
Place the receiver on a grade rod and position it at the starting point of the slope. Make sure the receiver is securely attached and aligned with the laser level’s beam.
5. Determine the Starting and Ending Points
Identify the starting and ending points of the slope on the surface you are working on. Use a measuring tape and marking chalk to make accurate and visible marks at both ends.
6. Take Initial Height Measurements
Measure the initial height at the starting point using the grade rod and receiver. Make a note of this measurement for reference while adjusting the slope.
7. Adjust the Laser Level
Using the laser level’s controls, adjust the slope as needed. Follow the specific instructions provided with the laser level to ensure accurate adjustments.
8. Check the Slope at Regular Intervals
As you adjust the laser level, periodically check the slope at various intervals using the grade rod and receiver. Compare the current height measurements with the desired slope to ensure accuracy.
9. Finalize the Slope
Continue adjusting the laser level and checking the slope until you achieve the desired angle or percentage of incline. Make sure the slope is consistent along the entire length of the project area.
10. Verify the Accuracy
Once you have set the slope, verify its accuracy by taking final height measurements at the starting and ending points. Adjust if necessary to ensure the slope meets the desired specifications.
By following this step-by-step guide, you can effectively set slope with a laser level for your construction projects. Remember to exercise caution and always wear safety goggles when working with laser levels.
Tips and Tricks for Achieving Accurate Slope Measurements
When using a laser level to set slope, follow these tips and tricks to ensure accurate measurements:
1. Choose the Right Laser Level: Make sure to select a laser level that is specifically designed for measuring slopes. Look for features such as self-leveling capabilities and a clear, bright laser beam.
2. Set Up the Laser Level Properly: Take the time to set up the laser level correctly. Make sure it is mounted on a stable surface and positioned at the desired starting point of your slope measurement.
3. Use a Tripod: For optimal accuracy, use a tripod to support the laser level. This will help minimize any movement or vibrations that could affect the measurements.
4. Check the Calibration: Before starting your slope measurement, double-check the calibration of the laser level. If it is not calibrated properly, your measurements may be inaccurate.
5. Ensure a Clear Line of Sight: Make sure there are no obstacles blocking the laser beam’s path. This will ensure that the slope measurements are not interrupted or skewed by any objects in the way.
6. Take Multiple Measurements: For increased accuracy, take multiple measurements at different points along the slope. This will help identify any inconsistencies or variations in the slope.
7. Work in Pairs: If possible, work in pairs when setting slope with a laser level. One person can operate the laser level, while the other can take measurements and ensure everything is aligned properly.
8. Take Environmental Factors into Account: Consider any environmental factors that may affect the slope measurements, such as wind or uneven terrain. Make adjustments accordingly to ensure accurate results.
By following these tips and tricks, you can achieve accurate slope measurements when using a laser level, allowing for precise and efficient construction or landscaping projects.