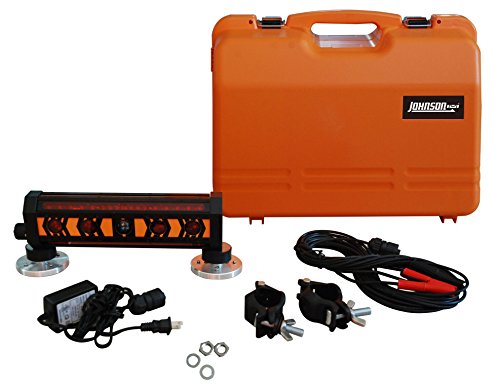
Accurate measurements are crucial in any construction or DIY project, and a laser level is an essential tool for ensuring precision and consistency. However, not all laser levels are created equal, and it’s important to know how to determine if a laser level is accurate before relying on its measurements.
One of the first steps in evaluating the accuracy of a laser level is to check its calibration. Calibration refers to the process of aligning the laser beam with a known reference point. If a laser level is not properly calibrated, it can produce inaccurate measurements. To check the calibration, place the laser level on a stable surface and project the beam onto a vertical or horizontal surface. Use a bubble level or a measuring tape to compare the projected beam with the desired level or plumb line. If there is a significant deviation, the laser level may need to be recalibrated or repaired.
Another factor to consider when determining the accuracy of a laser level is its range. Laser levels have a maximum working range, and measurements taken beyond this range may not be accurate. To ensure accurate measurements, always check the maximum range of the laser level and make sure you are within that distance. If you need to measure beyond the maximum range, consider using a different laser level or a different measuring method.
The quality of the laser diode is also an important factor in determining accuracy. A high-quality laser diode will produce a straight, sharp, and clearly visible beam. On the other hand, a low-quality laser diode may produce a distorted or dim beam, which can result in inaccurate measurements. To assess the quality of the laser diode, project the beam onto different surfaces and distances and observe the visibility and clarity of the beam. If the beam appears weak or distorted, it may be a sign of a low-quality laser diode.
Lastly, a reliable way to determine the accuracy of a laser level is to compare its measurements with other measurement tools. Use a traditional bubble level or a measuring tape to cross-check the measurements taken with the laser level. If there is a significant discrepancy between the measurements, it may indicate that the laser level is not accurate.
In conclusion, ensuring the accuracy of a laser level is essential for precise and reliable measurements in construction and DIY projects. By checking the calibration, considering the range, assessing the quality of the laser diode, and cross-checking measurements with other tools, you can determine if a laser level is accurate and make informed decisions based on its measurements.
Methods for Testing Laser Level Accuracy
In order to ensure the accuracy of your laser level, there are several methods that you can use to test its performance. These methods can help you determine if the laser level is providing a level and plumb line or if it requires calibration or adjustments.
1. Visual Inspection
The first method is a simple visual inspection. Place your laser level on a flat, stable surface and turn it on. Look for any obvious misalignments or irregularities in the projected laser line. Check if the line appears straight and consistent across the entire length. Any deviations or variations may indicate a potential accuracy issue.
2. Plumb Line Test
To test the plumb line accuracy, set up your laser level on a stable surface. Place a plumb bob or a weight with a pointed tip directly underneath the laser and align it with the projected vertical line. Measure the distance between the laser line and the vertical line produced by the plumb bob at various heights. If the measurements are consistently equal, the laser level is accurate. Any variations indicate a potential inaccuracy in the level’s plumb line projection.
It is important to note that these methods provide a general indication of the laser level’s accuracy, but they may not reveal slight deviations or errors that may only become apparent in specific conditions or with specialized tools.
If you suspect that your laser level is inaccurate, it is recommended to consult the manufacturer’s instructions for calibration or contact a professional for assistance. Regular calibration and maintenance of your laser level can help ensure its accuracy and reliability in various construction and leveling tasks.
Visual Inspection of the Laser Beam
One of the primary ways to determine the accuracy of a laser level is through a visual inspection of the laser beam it produces. This inspection involves looking at several key factors that can indicate whether the laser level is accurate or not.
Beam Straightness
First and foremost, you should check the straightness of the laser beam. Place the laser level on a stable surface and turn it on. Look at the beam projected onto a wall or other flat surface. The beam should appear perfectly straight without any noticeable curves or bends. If the beam appears curved or bent, this may indicate that the laser level is not accurate and should be recalibrated.
Beam Thickness
Next, pay attention to the thickness of the laser beam. A high-quality laser level will produce a thin, consistent beam that does not widen or narrow significantly over long distances. If the beam widens or narrows noticeably, this can be a sign of inaccuracy and may affect the levelness of your work.
It’s important to note that the thickness of the laser beam can vary depending on the distance and the laser level itself. However, any drastic changes in beam thickness should be a cause for concern.
Additionally, check if there are any variations in beam thickness along the length of the beam. A constant thickness indicates greater accuracy, while significant variations may indicate inconsistencies in the laser level.
By carefully examining the straightness and thickness of the laser beam, you can make an initial assessment of the accuracy of the laser level. However, it’s important to remember that a thorough calibration process is necessary to ensure maximum accuracy in your measurements.
Alignment Test using Fixed Points
One way to determine the accuracy of a laser level is to perform an alignment test using fixed points. This test allows you to check if the laser beam aligns correctly with a set of known points, ensuring that the level is accurate and reliable.
Procedure:
1. Set up the laser level on a stable surface or mount it securely on a tripod.
2. Choose a few fixed points in the room or area where you want to test the laser level. These fixed points can be marked with tape, nails, or other visible markers. Ensure that they are positioned at various distances and heights from the laser level.
3. Turn on the laser level and allow it to stabilize. Most laser levels have a bubble vial or other indicator to show when the laser is levelled.
4. Position the laser level so that the laser beam intersects with the fixed points. Adjust the laser level if necessary to align the beam with each fixed point.
5. Use a measuring tool, such as a tape measure or ruler, to measure the distance from each fixed point to the laser beam. Record these measurements.
6. Repeat the process with different fixed points to ensure accuracy. Compare the recorded measurements to check if they are consistent and within an acceptable range.
Tips:
1. Double-check the stability of the laser level and the fixed points. Ensure that the laser level is securely set up and that the fixed points are firmly in place. Any movement or instability can affect the accuracy of the alignment test.
2. Measure the distance from each fixed point to the laser beam at multiple points along the beam. This will help identify any potential deviations or inconsistencies in the alignment.
3. Perform the alignment test in different locations and lighting conditions. This can help identify any potential factors that may affect the accuracy of the laser level, such as uneven surfaces or bright ambient light.
4. Consult the manufacturer’s instructions. The manufacturer may provide specific guidance on performing alignment tests for their laser level model.
By following this alignment test procedure and considering the provided tips, you can ensure that your laser level is accurate and suitable for your specific needs.
Distance Measurement Test
One way to determine if a laser level is accurate is by conducting a distance measurement test. This test involves measuring the distance between two points using the laser level and comparing it to a known distance.
To perform the test, follow these steps:
- Set up the laser level: Place the laser level on a stable surface or mount it on a tripod. Make sure the level is properly calibrated and aligned.
- Select two points: Choose two points that are a known distance apart. For example, you can use the width of a room or a set of calibration marks.
- Measure the distance: Use the laser level to project a beam between the two points. Use a tape measure or ruler to measure the distance between the points indicated by the laser beam.
- Compare the measurements: Compare the measured distance to the known distance. If the measurements are very close, within an acceptable margin of error, then the laser level is accurate. However, if there is a significant difference between the measured and known distance, the laser level may not be accurate.
- Repeat the test: To ensure accuracy, repeat the test multiple times, taking measurements from different angles and distances. This will help detect any inconsistencies or errors in the laser level.
It is important to note that environmental factors such as lighting conditions, temperature, and humidity can also affect the accuracy of a laser level. Therefore, it is recommended to perform the distance measurement test in controlled conditions whenever possible.
By conducting a distance measurement test, you can determine if a laser level is accurate and reliable for your specific needs. Remember to always consult the manufacturer’s instructions and guidelines for accurate usage and calibration of your laser level.
Rotational Test on Plain Surface
The rotational test is an effective way to determine the accuracy of a laser level on a plain surface. Here is how you can perform the rotational test:
- Place the laser level on the plain surface in a central position.
- Rotate the laser level horizontally, ensuring it remains in a fixed position vertically.
- Observe the laser line projected on the plain surface.
- Check if the laser line remains straight and level as you rotate the laser level.
- If the laser line deviates or becomes uneven during rotation, it indicates that the laser level might be inaccurate.
During the test, it is important to pay attention to any irregularities or fluctuations in the laser line. These could be indications of potential inaccuracies in the laser level. It is advisable to repeat the test multiple times to ensure consistent results.
Note: It is crucial to perform the rotational test on a plain surface to eliminate any external factors that might affect the accuracy of the laser level. Uneven or textured surfaces could cause the laser line to appear distorted, leading to false readings.
By conducting the rotational test on a plain surface, you can confidently assess the accuracy of your laser level and make adjustments as needed.
Compare Readings with Spirit Level
A spirit level can be a useful tool to help determine the accuracy of a laser level. By comparing the readings of both instruments, you can get a better idea of the laser level’s precision and make adjustments if necessary.
To start, place the laser level on a flat surface and ensure it is properly calibrated. Next, position the spirit level adjacent to the laser level, making sure they are parallel to each other.
Turn on the laser level and align the bubble in the spirit level. Observe both the laser line projected by the laser level and the bubble in the spirit level. If the bubble remains centered while the laser line appears straight and level, it indicates that the laser level is accurate.
However, if the bubble indicates any deviation from the level position while the laser line appears straight, it suggests that the laser level may be inaccurate. In such cases, adjustments may be needed to bring the laser level into alignment with the spirit level.
It’s important to note that environmental factors, such as uneven surfaces or vibrations, can affect the accuracy of both the laser level and the spirit level. Therefore, it is essential to use these tools in stable conditions to obtain the most reliable results.
Conclusion:
Comparing readings with a spirit level can provide valuable insight into the accuracy of a laser level. By ensuring proper calibration and observing the alignment of the laser line and the bubble in the spirit level, you can determine if any adjustments are needed to achieve precise leveling. Remember to use these tools in stable conditions for the most accurate results.
Professional Calibration Services
When it comes to ensuring the accuracy of your laser level, professional calibration services are the way to go. These services are provided by specialized technicians who have the expertise and tools necessary to accurately calibrate your laser level.
Calibration involves measuring the accuracy of your laser level against a known standard. This is done by comparing the readings of your laser level to a reference device that is traceable to a national or international standard. Professional calibration services use highly precise equipment and follow strict procedures to ensure reliable and accurate results.
Benefits of Professional Calibration Services
There are several benefits to opting for professional calibration services for your laser level:
- Accuracy: Professional calibration services guarantee that your laser level will be accurately calibrated, ensuring precise measurements every time.
- Reliability: By entrusting your laser level calibration to professionals, you can have confidence in the reliability of your equipment.
- Compliance: Some industries have specific calibration requirements that must be met for compliance purposes. Professional calibration services ensure that your laser level meets these requirements.
- Peace of mind: Knowing that your laser level has been calibrated by professionals gives you peace of mind, eliminating concerns about accuracy and reliability.
The Calibration Process
The calibration process typically involves the following steps:
- Inspection: The technician thoroughly inspects your laser level for any physical damage or issues that may affect its accuracy.
- Adjustment: If any adjustments are needed, the technician makes the necessary changes to bring the laser level into alignment with the reference standard.
- Testing: The laser level is then tested at various points and distances to ensure consistent and accurate readings.
- Documentation: Detailed documentation is provided, outlining the calibration results and any adjustments made.
Frequency of Calibration
The frequency of calibration depends on several factors, such as the manufacturer’s recommendations and the conditions in which the laser level is used. In general, it is recommended to calibrate your laser level annually or whenever you suspect a loss of accuracy.
By utilizing professional calibration services, you can ensure that your laser level is accurate and reliable, giving you confidence in your measurements and peace of mind in your work.
| Benefits of Professional Calibration Services | The Calibration Process | Frequency of Calibration |
|---|---|---|
| – Accuracy | – Inspection | – Manufacturer’s recommendations |
| – Reliability | – Adjustment | – Conditions of use |
| – Compliance | – Testing | – Recommended annually or when accuracy is compromised |
| – Peace of mind | – Documentation |