Landscaping can be a challenging task, especially when it comes to creating a level surface. Uneven terrain can make it difficult to achieve a consistent and professional-looking result. However, with the help of a laser level, you can easily tackle this problem and ensure that your landscaping project is a success.
A laser level is a handy tool that uses laser beams to project a straight and level line over a long distance. It is commonly used in construction and surveying, but it can also be a valuable asset for landscapers. By using a laser level, you can easily determine the high and low points of your land, allowing you to make the necessary adjustments for a level surface.
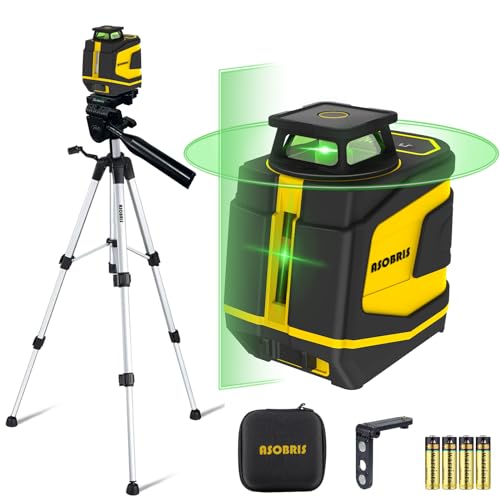
To use a laser level for landscaping, first, you need to set it up properly. Find a stable surface and place the laser level on top, ensuring that it is secure and won’t move during operation. Then, turn on the laser level and adjust it to your desired height. You can use a tripod to ensure stability and to easily adjust the height as needed.
Once the laser level is set up, you can start using it to measure the levelness of your land. Walk around the perimeter of your project area, holding a measuring rod or stick. As the laser level projects the laser beam, align the measuring rod with the laser line and take note of the readings. This will give you an accurate measurement of the high and low points of your land.
Based on the measurements you’ve obtained, you can start making the necessary adjustments to level your land. If there are areas that are higher than others, you can remove the excess soil or pave the area to bring it down to the desired level. Conversely, if there are areas that are lower, you can add soil or other fillers to raise the surface. Continuously check the levelness using the laser level as you make the adjustments to ensure that you achieve an even surface.
Using a laser level for landscaping is a cost-effective and efficient way to achieve a level surface. It eliminates the guesswork and allows you to make precise adjustments, resulting in a professional-looking landscape. Whether you’re working on a DIY project or a larger landscaping job, a laser level is a valuable tool to have in your arsenal.
What is a Laser Level?
A laser level is a useful tool for both professional landscapers and DIY enthusiasts. It is a device that emits a laser beam to create a straight, horizontal or vertical line on a surface. This line serves as a reference point for various landscaping tasks, such as leveling the ground, installing pavers, and aligning fence posts.
Laser levels are valuable because they help ensure accuracy and precision in landscaping projects. They eliminate the need for traditional methods like using a string or a bubble level, which can be time-consuming and less accurate. With a laser level, you can quickly and easily establish level lines over long distances.
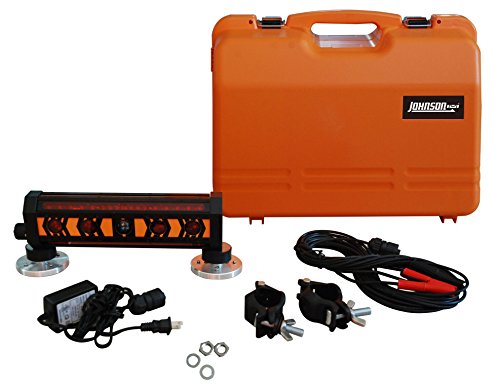
The Components of a Laser Level
A typical laser level consists of several components:
- Laser Diode: This is the source of the laser beam. It emits a powerful, focused beam of light.
- Leveling Base: The laser diode is mounted on a base that allows it to rotate horizontally and sometimes vertically. This rotation enables the laser beam to create a level line on the desired surface.
- Receiver: Some laser levels come with a receiver that can detect the laser beam over long distances or in bright conditions.
Types of Laser Levels
There are various types of laser levels available, each designed for specific landscaping tasks:
- Line Laser Levels: These laser levels emit a laser beam that creates a straight line in either a horizontal or vertical orientation.
- Rotary Laser Levels: Rotary laser levels project a laser beam that rotates 360 degrees, creating a level line around a room or outdoor area.
- Dot Laser Levels: Dot laser levels emit multiple laser dots, making them ideal for tasks that require precise point alignment.
When choosing a laser level for landscaping, consider the specific requirements of your project to ensure you select the right type of laser level.
Key Benefits of Using a Laser Level for Landscaping
Accurate Measurements: One of the key benefits of using a laser level for landscaping is its ability to provide accurate measurements. With its laser beam, you can easily establish level grades and determine the slope of the land. This ensures that your landscaping project is level and correctly sloped, resulting in a professional and aesthetically pleasing end result.
Ease of Use: Laser levels are designed with user-friendliness in mind. They are lightweight and portable, making them easy to carry around your landscaping site. They also have a simple interface, allowing you to quickly and easily adjust settings and take measurements. Whether you are a professional landscaper or a DIY enthusiast, a laser level is a convenient tool to have in your landscaping arsenal.
Time-Saving: Using a laser level can significantly save you time during your landscaping project. By providing accurate measurements, you can quickly and efficiently plan your project, eliminating the need for trial and error. This allows you to streamline your workflow and complete your project in a shorter amount of time while still achieving high-quality results.
Enhanced Precision: Laser levels offer a level of precision that is difficult to achieve with traditional leveling tools. The laser beam projects a straight and level line, allowing for precise measurements and markings. This precision is essential for tasks such as installing retaining walls, laying pavers, or setting up irrigation systems. With a laser level, you can ensure that your landscaping features are properly aligned and spaced.
Versatility: Laser levels are versatile tools that can be used for various landscaping tasks. From grading and levelling land to setting up outdoor structures, a laser level can handle a wide range of projects. Its versatility makes it a valuable investment that can be used for future landscaping projects or shared with friends and family.
Professional Results: Ultimately, using a laser level for landscaping produces professional results. You can achieve precise and accurate measurements, ensuring a level and visually appealing landscaping design. Whether you are a professional or a DIY landscaper, a laser level can help you achieve a professional-looking end result that will enhance the beauty and functionality of your outdoor space.
Step-by-Step Guide to Using a Laser Level for Landscaping
Landscaping projects often require precise measurements and leveling to ensure the final result is both aesthetically pleasing and functional. One tool that can greatly assist with this is a laser level. Here is a step-by-step guide to using a laser level for landscaping:
Step 1: Choose the Right Laser Level
There are various types of laser levels available, so it’s important to choose the right one for your landscaping project. Consider the size of the area, the type of tasks you’ll be working on, and any specific features you may need, such as a rotating laser for long-distance leveling.
Step 2: Set Up the Laser Level
Once you have the appropriate laser level, find a stable and level surface to set it up on. Follow the manufacturer’s instructions for mounting or securing the laser level to ensure it remains stable throughout your project. Make sure to check the battery life and adjust the laser beam’s brightness and visibility as needed.
Step 3: Determine the Line of Sight
Before you can start using the laser level, you need to establish the line of sight. This is the path along which the laser beam will project. Position the laser level so that the laser beam is at the height and angle you desire for your landscaping task.
Step 4: Mark Reference Points
Once the laser level is set up, use a pencil or marker to mark reference points along the laser beam. These points will serve as guides when working on your landscaping project. Make sure the reference points are clearly visible and easily identifiable.
Step 5: Measure and Adjust
Now it’s time to start using the laser level to measure and adjust your landscaping project. Place a measuring tape or ruler on the reference points you marked and compare the height or position of other elements to ensure they are level and aligned. Use the laser level to make any necessary adjustments as you go along.
Step 6: Recheck and Repeat
Throughout your landscaping project, it’s crucial to recheck and repeat the measuring and leveling process using the laser level. This will help ensure accuracy and consistency across the entire project. Keep adjusting as needed, referring back to your reference points and laser level.
| Benefits of Using a Laser Level for Landscaping: |
|---|
| 1. Precise measurements: A laser level provides accurate measurements, helping you achieve the desired level of precision in your landscaping project. |
| 2. Time-saving: By using a laser level, you can streamline the leveling process, saving you time and effort compared to traditional methods. |
| 3. Versatile: Laser levels can be used for various landscaping tasks, including leveling patios, aligning fence posts, and creating even flower bed borders. |
| 4. Efficiency: With a laser level, you can work more efficiently, ensuring all elements of your landscaping project are level and visually appealing. |
| 5. Professional results: Using a laser level can help you achieve professional-looking results that are pleasing to the eye. |
Tips for Maximizing the Accuracy of Your Laser Level
Using a laser level can greatly improve the accuracy and efficiency of your landscaping projects. To ensure the best results, consider the following tips:
1. Calibration is Key
Before starting any project, it is important to calibrate your laser level. This involves setting it up on a stable surface and adjusting it to ensure that the laser line is perfectly level or plumb. Follow the manufacturer’s instructions for calibration to ensure accurate readings.
2. Choose the Right Laser Level for the Job
Not all laser levels are created equal, so it is important to choose the right one for the specific requirements of your landscaping project. Consider factors such as the desired accuracy, range, and visibility of the laser level before making a purchase.
3. Take Note of Environmental Factors
Environmental factors can affect the accuracy of your laser level. Be aware of factors such as bright sunlight, dust, or uneven terrain that may interfere with the laser’s visibility or accuracy. Whenever possible, choose a time of day and conditions that minimize these factors.
4. Use a Laser Detector for Longer Distances
If you need to work over longer distances, consider using a laser detector. This device can help you locate the laser line even when it is not directly visible. By using a laser detector, you can ensure accurate measurements and alignments over a greater distance.
5. Practice Proper Setup and Alignment
Proper setup and alignment are crucial for accurate measurements. Take the time to properly set up your laser level on a stable tripod or mounting system. Ensure that it is aligned with your reference point and double-check the accuracy before proceeding with your project.
By following these tips, you can maximize the accuracy of your laser level and achieve precise and professional results in your landscaping projects.