
Tiling walls can be a daunting task, especially when you want to achieve a professional and even finish. One of the crucial tools that can help you achieve this is a laser level. A laser level is a device that emits a visible laser beam, allowing you to create straight and level lines on your walls.
Using a laser level for wall tiling is a simple yet effective way to ensure that your tiles are properly aligned and evenly spaced. It eliminates the guesswork and saves you time and effort. Whether you are a DIY enthusiast or a professional, knowing how to use a laser level for wall tiling is a valuable skill.
To start, make sure you have a good quality laser level that is suitable for wall tiling. Look for a level that has a high accuracy rating and is easy to operate. Once you have your laser level ready, mark the desired height of your tiles on the wall using a measuring tape and a pencil.
Next, position the laser level at one end of the wall and turn it on. The laser beam should be projected onto the wall, creating a straight line. Adjust the position of the laser level and the height of the beam if necessary, to ensure that the line is exactly where you want your first row of tiles to be.
What is a Laser Level?
A laser level is a device that emits a highly focused beam of laser light to create a straight and level reference line or plane. It is commonly used in construction and home improvement projects to ensure that surfaces, such as walls, floors, and ceilings, are positioned accurately.
Laser levels are available in various types, including line laser levels and rotary laser levels. Line laser levels project a visible laser line onto a surface, indicating its levelness or alignment. They are ideal for tasks such as installing tiles, hanging pictures, or mounting shelves. Rotary laser levels, on the other hand, emit a 360-degree laser beam, which creates a level reference plane. They are often used for larger construction projects, such as installing foundations, grading land, or aligning windows and doors.
Using a laser level is a straightforward process. Once the device is set up and leveled, it projects a visible laser beam or line onto the surface. This helps guide the user in aligning objects or installing materials with precision.
Some laser levels feature additional functions, such as the ability to rotate the laser beam, adjust the brightness, or create specific angles. These advanced features can be helpful in more complex projects or tasks that require precise measurements and alignments.
In conclusion, a laser level is an invaluable tool for anyone involved in construction or home improvement projects. Its ability to create accurate and level reference lines helps ensure that surfaces are aligned correctly, resulting in professional-looking results. Whether you are tiling a wall, installing flooring, or working on a larger construction project, a laser level can greatly simplify the process and improve the overall quality of your work.
Why Use a Laser Level for Wall Tiling
When it comes to wall tiling, precision is key. Ensuring the tiles are level and evenly spaced can make a significant difference in the overall appearance of the finished project. While traditional methods like using a spirit level and measuring tape can get the job done, using a laser level offers several advantages that make it worth considering.
Accuracy and Efficiency
One of the primary reasons to use a laser level for wall tiling is the accuracy it provides. A laser level emits a straight and level beam of light, which allows you to easily mark reference lines on the walls. This ensures that your tiles are perfectly aligned and eliminate the risk of uneven tiles or crooked lines.
The laser level also helps to speed up the tiling process. Instead of measuring and marking each tile individually, you can use the laser level’s beam as a reference point. This saves you time and effort, making the tiling process more efficient.
Versatility
Laser levels come in various types and have different features, allowing for greater versatility in wall tiling projects. Some laser levels include additional functions such as adjustable angles, multiple laser lines, or even the ability to project vertical and horizontal lines simultaneously. This versatility makes it easier to handle complex tiling patterns or challenging wall surfaces.
Additionally, laser levels can be used for other tasks beyond wall tiling, such as installing shelves, cabinets, or aligning artwork. Investing in a laser level means you can use it for multiple projects around the house, making it a valuable tool to have in your toolkit.
Reliability
Using a laser level eliminates human error and provides consistent results. Once you set up the laser level, it will maintain the same level and accuracy throughout the tiling process, ensuring a professional-looking finish. This reliability is especially important for large tiling projects or when working in areas with strict dimensional requirements.
Furthermore, laser levels are designed to be durable and withstand the demands of construction projects. They are often built with shock-resistant housing and robust components, ensuring they can handle rough conditions and last for a long time.
In conclusion, using a laser level for wall tiling offers unparalleled accuracy, efficiency, versatility, and reliability. It is a worthwhile investment for both professional tilers and DIY enthusiasts, ensuring that your tiling projects are completed with precision and a high level of quality.
Step 1: Prepare Your Work Area
Before you start using a laser level for wall tiling, it’s important to properly prepare your work area. This will ensure accurate and precise tiling results.
Clean the Surface
The first step is to clean the surface where you will be installing the tiles. Remove any dirt, dust, or debris using a broom or vacuum cleaner. It’s important to have a smooth and clean surface to ensure that the tiles adhere properly.
Remove any Obstacles
Next, you’ll want to remove any obstacles from the area that might impede the tiling process. This can include furniture, appliances, or any other objects that are in the way. Clearing the area will give you more space to work and make the process easier.
Note: If you can’t move certain obstacles, such as heavy furniture, you can simply tile around them. Just make sure to measure and mark the area properly.
Protect the Surrounding Areas
It’s important to protect the surrounding areas from any potential damage during the tiling process. This can include nearby walls, floors, or any other surfaces that are not being tiled. Use painter’s tape or any other suitable protective material to cover and protect these areas.
Tip: It’s a good idea to overlap the protective material slightly onto the surface where you will be tiling. This will prevent any accidental spills or splatters from reaching the unprotected areas.
By properly preparing your work area before you start tiling, you’ll ensure that the process goes smoothly and that the end result is as precise and professional-looking as possible.
Clean the Wall Surface
Before using a laser level for wall tiling, it’s important to ensure that the wall surface is clean and free from any debris or dirt. This will not only help the tiles adhere properly but also provide a smooth and level surface for accurate tiling.
Start by removing any loose paint, wallpaper, or other materials from the wall using a scraper or sandpaper. This will help create a clean slate for the tiling process.
Next, use a mild detergent or cleaning solution to wash the wall surface, especially if it is stained or greasy. Make sure to remove any residue from the cleaning solution by rinsing the wall with water and allowing it to dry completely.
Inspect the wall for any cracks, holes, or other imperfections. These should be repaired before tiling to ensure a seamless and professional-looking finish. Fill any holes or cracks with a suitable filler and sand them down until smooth.
Additionally, it’s important to ensure that the wall surface is level. Use a spirit level or laser level to check for any uneven spots or deviations from the horizontal line. If necessary, use a suitable filler or leveling compound to even out any irregularities.
By taking the time to properly clean and prepare the wall surface, you’ll ensure a successful tiling project and a professional-looking result.
Mark the Starting Point
Before you can start tiling your wall, you need to mark the starting point. This will ensure that your tiles are level and aligned correctly throughout the entire wall.
Here’s how to mark the starting point using a laser level:
|
Step 1: |
Position the laser level on a sturdy surface or tripod at the desired height. Make sure it is placed securely and levelled properly. |
|
Step 2: |
Turn on the laser level and adjust the beam until it is aligned with the starting point on the wall. This could be a corner, an edge, or any other defined spot you choose. |
|
Step 3: |
Use a pencil or marker to mark the laser line on the wall. This mark will serve as your reference point for laying the first row of tiles. |
Once you have marked the starting point, you can begin tiling the wall. The laser level will help you ensure that your tiles are straight and level, resulting in a professional-looking finished product.
Step 2: Set Up the Laser Level
Once you have chosen a suitable location for your wall tiling project, it’s time to set up your laser level. Here are the steps to follow:
1. Insert Batteries
Check the manufacturer’s instructions to determine what type and how many batteries are required for your laser level. Open the battery compartment and insert the batteries according to the polarity markings. Close the compartment securely.
2. Adjust the Height
Place the laser level on a stable surface or mount it on a tripod. Adjust the height of the laser level to your desired measurement. Make sure the laser level is level and stable.
3. Turn on the Laser
Locate the power switch or button on your laser level and turn it on. The laser beam should now be visible and projecting onto the wall at the desired height.
4. Position the Laser Level
Position the laser level at one end of the wall where you want to start tiling. Make sure it is secure and not likely to be bumped or moved during the tiling process.
Note: For larger areas or if you want to tile multiple walls, you may need to reposition the laser level and repeat the setup process.
By setting up your laser level properly, you will ensure that your wall tiling project is accurate and level, helping you achieve professional-looking results.
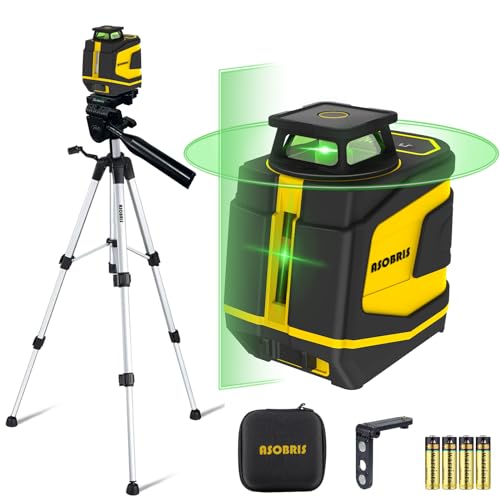
Choose the Right Laser Level
When it comes to wall tiling, using a laser level is essential for achieving a professional and accurate result. However, not all laser levels are created equal, and it’s important to choose the right one for your specific needs.
Types of Laser Levels
There are several types of laser levels available, each with their own strengths and applications. The two main types to consider for wall tiling are:
| Type | Features | Best for Wall Tiling |
|---|---|---|
| Line Laser Level | Projects a horizontal or vertical line on the wall | Ideal for aligning tiles and ensuring straight lines |
| Rotary Laser Level | Projects a 360-degree line, suitable for large rooms | Great for larger wall tiling projects or when working with multiple walls |
Features to Consider
When choosing a laser level, consider the following features:
- Accuracy: Look for a laser level with a high level of accuracy, preferably within 0.2mm/m.
- Visibility: Ensure that the laser level has a bright and visible laser beam, even in well-lit conditions.
- Self-Leveling: Opt for a laser level that self-levels, as it will save you time and effort during setup.
- Durability: Choose a laser level that is built to withstand the rigors of construction work.
- Additional Features: Some laser levels come with extra features like a remote control or a pulse mode for outdoor use.
By considering these factors and selecting the right laser level for your wall tiling project, you’ll be able to achieve precise and professional results with ease.


