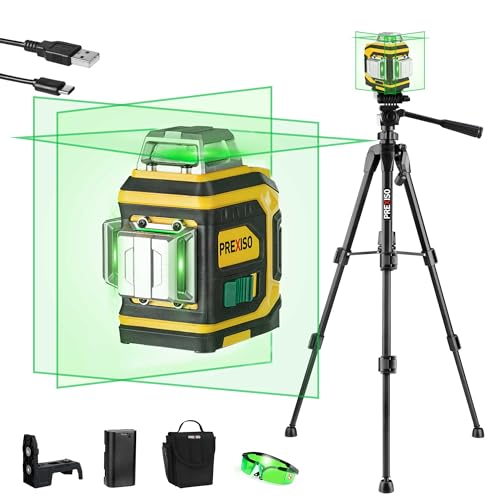
A small laser level is a versatile tool that can greatly simplify any construction or home improvement project. Whether you’re hanging pictures, installing shelves, or aligning tiles, a laser level allows for quick and accurate measurements. In this article, we will guide you through the steps to effectively use a small laser level.
Step 1: Set up the laser level
Start by placing the laser level on a stable and level surface. Make sure the device is secured properly to prevent any accidental movements. If your laser level comes with a tripod, attach it for additional stability. Then, turn on the laser level and wait for it to self-level. Some models may require manual adjustment, so consult the user manual for specific instructions.
Step 2: Determine the desired height
Before you begin measuring, determine the height at which you want your reference line or reference point to be. This will depend on the type of project you are working on. For example, if you’re hanging a picture, decide the height at which you want the top edge of the picture to be. If you’re installing tiles, determine the level at which you want them to be aligned.

Step 3: Align the laser level
Position the laser level where you want your reference line or point to be. Adjust the position until the laser beam aligns with your desired height. Use a pencil or tape to mark the location of the laser line. You can also use a wall bracket or magnetic mount to keep the laser level in place while you work.
Step 4: Begin your project
Once the laser level is set up and aligned, you can start your project with confidence. Use the laser line as a guide to hang your pictures, shelves, or complete any other task you need to accomplish. Remember to always follow safety precautions and use appropriate tools for each specific project.
Using a small laser level can save you time and ensure accurate measurements in your construction or home improvement projects. By following these steps, you can easily utilize this valuable tool and achieve professional results.
Choosing the Right Small Laser Level
When it comes to choosing a small laser level, there are several factors to consider to ensure you have the right tool for the job. Here are some important things to keep in mind:
Accuracy
One of the most crucial factors in selecting a laser level is its accuracy. The level you choose should have a high level of precision to ensure your measurements are accurate. Look for a laser level with a rating of at least ±1/8 inch at 30 feet.
Range
Consider the range of the laser level before purchasing. The range determines how far the laser beam can reach. For most small-scale projects, a range of 30 to 50 feet is typically sufficient. However, if you’re working on larger projects, you may need a laser level with a longer range.
Visibility
The visibility of the laser beam is another important consideration. Look for a laser level that has a bright and highly visible beam, even in well-lit conditions. This will ensure that the laser is easy to see and use, improving the efficiency and accuracy of your work.
Mounting Options
Consider the mounting options available with the laser level. It should come with versatile mounting options that allow you to easily attach the tool to different surfaces such as tripods, poles, or walls. This flexibility will enable you to use the laser level in various positions and angles, depending on your specific needs.
| Feature | Recommended | Optional |
|---|---|---|
| Accuracy | ±1/8 inch at 30 feet | ±1/4 inch at 30 feet |
| Range | 30 to 50 feet | 50 to 100 feet |
| Visibility | Bright and highly visible | Visible in well-lit conditions |
| Mounting Options | Versatile mounting options | Basic mounting options |
Preparing the Area for Use
Before using a small laser level, it’s important to prepare the area to ensure accurate and efficient measurements. Follow these steps to get the best results:
1. Clear the Workspace
Remove any obstacles or debris from the area where you plan to use the laser level. This includes furniture, tools, and other objects that may interfere with the laser beam. A clean and clutter-free workspace will help you achieve precise measurements.
2. Check for Level Surface
Make sure the surface where you’ll position the laser level is level itself. Uneven or sloping surfaces can affect the accuracy of the laser beam. Use a bubble level or a straightedge to check if the surface is level horizontally and vertically. If it’s not, adjust the level of the surface before proceeding.
3. Choose the Right Height
Determine the desired height at which you want the laser beam to be projected. This will depend on the specific task you’re working on. For example, if you’re installing shelves, you may want the laser beam at the height where the shelves will be positioned. Adjust the laser level accordingly to achieve the desired height.
Note: Some laser levels come with adjustable tripods or mounting brackets that allow you to easily set the height.
4. Consider Lighting Conditions
Ensure that the lighting conditions in the room are suitable for using a laser level. Bright sunlight or strong artificial lighting can make it difficult to see the laser beam. If necessary, close curtains or blinds to reduce the amount of light entering the room. It’s also a good idea to position your laser level away from direct light sources.
By following these steps, you’ll be well-prepared to use a small laser level effectively and achieve accurate measurements for your project.
Calibrating the Small Laser Level
Calibrating your small laser level is an important step to ensure accurate and reliable measurements. Follow these steps to calibrate your laser level:
- Find a flat and stable surface where you can place your laser level. It is important to choose a surface that is not prone to movement or vibrations.
- Turn on your laser level and let it stabilize for a few seconds.
- Locate the calibration screws or knobs on your laser level. These screws or knobs are typically located near the base or on the side of the laser level.
- Use a bubble level or a known level surface to check the accuracy of your laser level. Place the bubble level or level surface against the laser beam and check if it aligns perfectly.
- If the laser level is not aligned, use the calibration screws or knobs to make adjustments. Turn the screws or knobs in small increments until the laser beam aligns with the bubble level or level surface.
- Repeat the process of checking and adjusting until the laser level is properly calibrated. It may take a few tries to achieve the desired accuracy.
- Once the laser level is calibrated, double-check the accuracy by testing it on a known horizontal or vertical surface. Make sure the laser beam aligns perfectly with the surface.
Remember to recalibrate your small laser level regularly, especially if you notice any inconsistencies or inaccuracies in the measurements. By properly calibrating your laser level, you can ensure accurate and reliable measurements for your projects.
Using the Small Laser Level for Horizontal Applications
A small laser level is a handy tool for various applications, including horizontal leveling. Whether you need to hang a picture frame, install shelves, or lay out tiles, this device can provide you with precise and accurate horizontal lines.
To begin, make sure your small laser level has a horizontal mode. This mode is usually indicated by a symbol or a button with a horizontal line on it. Once you’ve selected the horizontal mode, follow these steps:
- Place the laser level on a stable surface or mount it securely on a tripod. Ensure that it is positioned at a convenient height for your work.
- Turn on the laser level and wait for it to self-level. Some models may have a pendulum or bubble level indicator to let you know when it is level.
- Aim the laser level at the area where you want to create a horizontal line. Adjust the position and angle of the level until the laser beam is aligned with your desired horizontal line.
- Secure the level in place, either by tightening the tripod mount or using a mounting bracket.
- Once the laser level is securely positioned, the laser beam will create a horizontal line on the surface. Depending on the model, the line may be solid, dashed, or pulsating.
- Use the laser line as a guide for your horizontal application. You can align objects, measure distances, or mark points accurately based on the laser line’s position.
- After you have completed your work, turn off the laser level and store it in a safe place.
Remember to always exercise caution while using a small laser level, especially when working with reflective surfaces or bright light. Avoid looking directly into the laser beam and wear appropriate protective eyewear if necessary.
By following these simple steps, you can effectively use a small laser level for horizontal applications and achieve professional-looking results in your home improvement projects.
Using the Small Laser Level for Vertical Applications
When it comes to vertical applications, a small laser level can be a valuable tool. Whether you’re hanging shelves, installing cabinets, or mounting artwork, the laser level can ensure that everything is perfectly aligned.
To use the laser level for vertical applications, follow these steps:
|
Step 1: |
Attach the laser level to a tripod or mount it securely to a wall using the provided hardware. Make sure it is level and stable before proceeding. |
|
Step 2: |
Turn on the laser level and adjust the vertical line to the desired height. Most laser levels have buttons or knobs that allow you to control the position of the laser line. |
|
Step 3: |
Position the laser level against the surface where you want to create a vertical line. Ensure that the laser line is touching the surface. Use a bubble level or the built-in level on the laser level to make sure it is perfectly vertical. |
|
Step 4: |
Once the laser level is positioned and aligned, mark the laser line on the surface using a pencil or masking tape. This mark will serve as a guide for your vertical application. |
|
Step 5: |
Now you can proceed with your vertical application. Whether you’re drilling holes, installing brackets, or hanging objects, use the marked laser line as a reference point to ensure everything is vertically aligned. |
|
Step 6: |
Double-check the alignment with the laser level as you progress to make any necessary adjustments. This will ensure that your vertical application is precise and level. |
By following these steps, you can effectively use a small laser level for vertical applications. Remember to always follow the manufacturer’s instructions and take necessary safety precautions when using the laser level.