Bosch Laser Level is a versatile tool that can greatly simplify your construction and DIY projects. Whether you are hanging pictures, installing shelves, or aligning tiles, a laser level can provide accurate and consistent measurements to ensure a professional finish. In this guide, we will walk you through the process of using a Bosch Laser Level with a tripod, allowing you to achieve precise results with ease.
The first step in using a Bosch Laser Level with a tripod is to set up the tripod at a suitable location. Select an area that offers a stable surface and is in close proximity to the area you will be working on. Make sure the legs of the tripod are securely tightened and adjust the height according to your needs. For maximum stability, extend the legs fully and position them evenly on the ground. If your tripod comes with a built-in bubble level, use it to ensure the tripod is perfectly level.
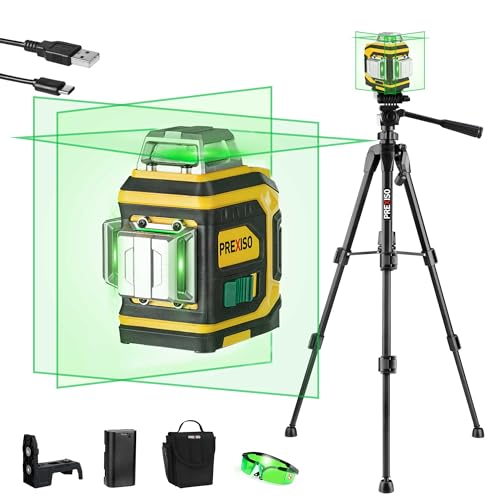
Next, attach the Bosch Laser Level to the tripod. Most Bosch Laser Levels come with a mounting base or bracket that can be easily attached to the tripod. Align the base with the mounting hole on the bottom of the laser level and slide it onto the tripod. Secure the laser level in place by tightening the mounting screw or lever. Ensure that the laser level is securely attached and positioned at a suitable height.
Once the tripod and laser level are set up, you can turn on the laser and adjust its position. Most Bosch Laser Levels have different modes, such as horizontal or vertical lines, cross lines, or even adjustable angles. Select the desired mode and adjust the laser level accordingly. Use the built-in controls or buttons to fine-tune the laser’s position and brightness to meet your specific requirements. It is important to note that you should never look directly into the laser beam, as it can cause eye damage.
Finally, with the Bosch Laser Level set up and adjusted, you can start using it for your project. Use the laser level as a reference point or guide to ensure accurate alignment and positioning. Whether you are hanging a series of pictures, installing tiles, or aligning shelves, simply follow the laser line projected by the laser level to maintain a straight and consistent result. With its high accuracy and ease of use, the Bosch Laser Level with tripod can greatly enhance your construction and DIY projects.
By following these simple steps, you can effectively use a Bosch Laser Level with a tripod to achieve precise measurements and alignments. This versatile tool can save you time and effort, while ensuring professional results in your construction and DIY projects.
Setting Up the Bosch Laser Level
Before you can start using the Bosch laser level with a tripod, it is important to properly set up the device. Follow these steps to set up the Bosch laser level:
1. Choose an Ideal Location
Find a suitable location where you want to set up the Bosch laser level. Make sure the ground is level and free of any debris or obstacles that could interfere with the laser level’s accuracy.
2. Assemble the Tripod
Begin by assembling the tripod according to the instructions provided with the device. Extend the tripod legs and lock them into place to ensure stability during use.
3. Attach the Bosch Laser Level
Once the tripod is assembled, securely attach the Bosch laser level to the tripod’s mounting platform. Make sure the laser level is securely fastened to prevent any movement during operation.
4. Adjust the Level
Use the built-in bubble vials or electronic level indicators on the Bosch laser level to ensure it is perfectly level on the tripod. Adjust the tripod legs as needed to achieve a level position.
5. Power On the Laser Level
After ensuring the Bosch laser level is level, turn on the device using the power button or switch. The laser beam should now be emitted from the laser level.
6. Fine-Tune Alignment
If necessary, make any fine adjustments to align the laser beam where you need it. Use the elevation or rotation controls on the Bosch laser level to achieve the desired orientation and position of the laser beam.
7. Verify Accuracy
For precise measurements, use a measuring tape or ruler to verify the accuracy of the Bosch laser level’s laser beam. Measure the distances between various points and ensure they match the laser level’s readings.
By following these steps, you can easily set up the Bosch laser level with a tripod and ensure accurate measurements and leveling for your projects.
Calibrating the Bosch Laser Level
Calibrating your Bosch laser level is an important step to ensure accurate leveling and alignment. Before beginning the calibration process, make sure that your laser level is securely mounted on the tripod and the battery is fully charged.
Here is a step-by-step guide to calibrating your Bosch laser level:
| Step 1: | Turn on the laser level by pressing the power button. |
| Step 2: | Place the laser level on a stable surface and wait for the laser to self-level. This may take a few seconds. |
| Step 3: | Check the bubble vials on the laser level to ensure that the unit is leveled. Adjust the tripod legs if necessary to achieve a level position. |
| Step 4: | Now, you need to calibrate the laser level. Use the fine adjustment knobs on the laser level to align the laser beam with a reference point. This can be a mark on a wall or a measuring tape. |
| Step 5: | Rotate the laser level 180 degrees and align the laser beam with the same reference point again. The laser beam should overlap or be very close to the initial reference point. |
| Step 6: | If the laser beam does not overlap with the reference point, use the fine adjustment knobs to make the necessary adjustments. Repeat this step until the laser beam accurately aligns with the reference point. |
By following these calibration steps, you can ensure that your Bosch laser level provides accurate measurements and precise leveling. Remember to regularly calibrate your laser level to maintain its accuracy.
Using the Bosch Laser Level with a Tripod
When it comes to achieving precise leveling and alignment, the Bosch Laser Level with a tripod is a perfect tool for the job. By using this combination, you can ensure accurate measurements and eliminate any chance of human error. Here are the steps to effectively use the Bosch Laser Level with a tripod:
- First, set up the tripod by extending the legs to the desired height. Make sure the tripod is stable and secure before proceeding.
- Attach the Bosch Laser Level to the tripod by securing it onto the mounting plate. Ensure that it is tightly fastened to avoid any wobbling or movement during operation.
- Power on the Bosch Laser Level and make sure the batteries are fully charged or replace them if necessary.
- Position the laser level at the desired location where you want to establish a level or align objects.
- Adjust the tripod height and position to ensure the laser level is at the desired height and angle.
- Once the laser level is in position, activate the laser beam by selecting the appropriate mode on the device. This could be a horizontal, vertical, or cross-line laser beam.
- Use the leveling vials on the laser level to fine-tune the position and ensure it is perfectly level. Adjust the tripod legs if needed.
- With the laser beam activated and the level confirmed, you can now proceed with your desired tasks such as hanging pictures, installing shelving, or aligning tiles.
- Remember to always follow the safety precautions provided by Bosch when using the laser level. Avoid looking directly into the laser beam and keep it away from children or unauthorized personnel.
- After completing your tasks, power off the Bosch Laser Level and carefully detach it from the tripod.
- Lastly, collapse the tripod legs for easy storage and transportation.
By following these steps, you can effectively use the Bosch Laser Level with a tripod to achieve precise measurements and alignments. The combination of the laser level’s accuracy and the stability of the tripod ensures reliable results for your project.