The Hammerhead Laser Level is a versatile tool that can be used in a variety of construction and DIY projects. Whether you’re hanging pictures, installing shelving, or aligning tiles, this laser level will help you achieve precise and accurate results.
Before you start using the Hammerhead Laser Level, it’s important to familiarize yourself with its features and functions. The laser level is equipped with a self-leveling mechanism, which means that it automatically adjusts to ensure that the laser line is perfectly horizontal or vertical. This feature saves you time and effort, allowing you to focus on the task at hand.
To use the Hammerhead Laser Level, begin by placing it on a stable surface or mounting it on a tripod for added stability. Ensure that the level is positioned at the desired height and angle for your project. Once in position, turn on the laser level and wait for it to self-level. You will know it’s ready to use when the laser line stops flashing and remains steady.
Next, align the laser line with the reference point or guideline on your surface. The laser line is highly visible, making it easy to see and align with precision. You can also use the built-in bubble vials on the laser level to double-check the accuracy of your alignment. Once the laser line is aligned, you can begin your construction or DIY tasks with confidence, knowing that your measurements and installations will be spot on.
In addition to its self-leveling feature, the Hammerhead Laser Level also offers a manual mode. This mode allows you to set the laser line at a specific angle or position, which can be useful for tasks that require non-standard alignments. To switch to manual mode, simply press the corresponding button on the laser level and manually adjust the angle or position of the laser line using the provided knobs. Make sure to double-check your measurements and alignments in this mode to ensure accuracy.
Overall, the Hammerhead Laser Level is a reliable and easy-to-use tool that can greatly enhance your construction and DIY projects. Its self-leveling mechanism and high-visibility laser line make it a valuable asset for anyone looking to achieve precise and professional results. So whether you’re a seasoned professional or a weekend warrior, consider adding the Hammerhead Laser Level to your toolkit!
What is a Hammerhead Laser Level
A Hammerhead laser level is a versatile tool that uses laser technology to project a level line on surfaces. It is commonly used in construction and renovation projects to ensure accurate and straight alignments.
The Hammerhead laser level consists of a unit that emits a laser beam and a base that can be attached to various surfaces. The laser beam emitted by the level creates a visible line, which helps users align objects, such as shelves, pictures, or tiles, with precision and ease.
One of the key features of the Hammerhead laser level is its self-leveling capability. It automatically adjusts and aligns itself within a specified range, ensuring accuracy even on uneven surfaces. This feature eliminates the need for manual adjustments and saves time during the leveling process.
The Hammerhead laser level is also equipped with a locking mechanism that keeps the laser beam fixed on a specific angle or position. This is particularly useful when working on repetitive tasks or when the user needs a fixed reference line.
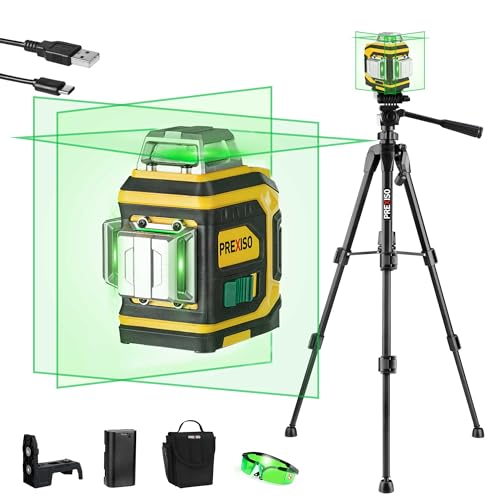
Additionally, the Hammerhead laser level often comes with a range of accessories, including wall-mount brackets and tripods, that further enhance its usability. These accessories allow for hands-free operation, making it easier for the user to focus on the task at hand.
Overall, the Hammerhead laser level is a reliable and efficient tool that simplifies the process of leveling and aligning objects. Its accuracy, self-leveling capabilities, and user-friendly features make it a valuable asset for professionals and DIY enthusiasts alike.
Choosing the Right Hammerhead Laser Level
When it comes to choosing the right Hammerhead laser level, there are several factors to consider. Whether you are a professional contractor or a DIY enthusiast, selecting the appropriate laser level can greatly enhance your accuracy and efficiency in a wide range of projects.
1. Type of Laser Level
Hammerhead offers different types of laser levels, including line laser levels and cross-line laser levels. Line laser levels project a straight line on a surface, making them ideal for tasks like installing tiles or aligning cabinets. Cross-line laser levels, on the other hand, project both horizontal and vertical lines, making them suitable for tasks like hanging pictures or installing shelves.
2. Range and Accuracy
The range and accuracy of a laser level are crucial factors to consider. The range refers to the maximum distance at which the laser beam remains visible and accurate. Depending on your project requirements, choose a laser level with a range that meets your needs. Additionally, consider the accuracy of the laser level, which is usually measured in millimeters per meter. Higher accuracy levels ensure precise measurements, especially in demanding tasks.
Hammerhead laser levels come with varying ranges and accuracy levels to suit different project requirements.
3. Self-Leveling Feature
Most Hammerhead laser levels come with a self-leveling feature, which automatically adjusts the laser to ensure a straight and accurate projection. This feature is particularly handy when working on uneven surfaces or when setting up the laser level at different angles. The self-leveling feature saves time and effort, allowing you to focus on the task at hand.
4. Durability and Portability
Consider the durability and portability of the Hammerhead laser level. Look for models with sturdy construction that can withstand rough handling and job site conditions. Additionally, choose a laser level that is lightweight and easy to transport, especially if you frequently work on different sites.
Keep these factors in mind when choosing your Hammerhead laser level, and you will be well on your way to achieving precise and efficient results in your projects.
Factors to Consider
When using a Hammerhead Laser Level, there are several important factors to consider to ensure accurate and efficient leveling:
1. Surface Condition
Before using the laser level, it is crucial to ensure that the surface is clean, stable, and free from any debris or obstructions. Uneven or unstable surfaces can cause inaccurate readings and affect the overall leveling accuracy.
2. Ambient Lighting
Ambient lighting conditions can affect the visibility of the laser beam. It is important to use the laser level in a well-lit environment to clearly see the laser line. In situations with excessive brightness, such as direct sunlight, it may be necessary to use the laser level with a laser target or receiver for enhanced visibility.
3. Distance and Range
Consider the distance and range requirements for your specific leveling tasks. Different Hammerhead Laser Level models have different maximum range capabilities. It is essential to choose the appropriate model that meets your needs. Additionally, be aware of any potential obstructions or obstacles that could hinder the laser beam’s visibility or affect its accuracy over longer distances.
4. Mounting Stability
Properly mounting the laser level on a stable surface or tripod is essential for accurate leveling. Ensure that the mounting mechanism is secured tightly and does not wobble or vibrate during operation.
5. Safety Precautions
Always prioritize safety when using a Hammerhead Laser Level. Avoid pointing the laser beam towards yourself or others’ eyes, as it can cause eye damage. Additionally, be cautious when using the laser level in busy or high-traffic areas to prevent any accidents or injuries.
By considering these important factors, you can maximize the effectiveness and accuracy of your Hammerhead Laser Level for various leveling tasks.
Setting Up Your Hammerhead Laser Level
Setting up your Hammerhead Laser Level is a simple and straightforward process that will ensure accurate measurements and level lines. Here are the steps you need to follow:
|
Step 1: |
Place the laser level on a stable and flat surface. Make sure the surface is level and clean to avoid any interference with the accuracy of the laser. |
|
Step 2: |
Turn on the laser level by pressing the power button. Most Hammerhead laser levels have a simple on/off switch. |
|
Step 3: |
Adjust the orientation of the laser level until the bubble vials indicate that the level is perfectly horizontal or vertical. |
|
Step 4: |
If your laser level has a built-in tripod mount, attach it securely to a tripod for added stability. This is especially important when working on large projects or in outdoor environments. |
|
Step 5: |
Once the laser level is properly set up, you can start using it to measure, align, or level various objects and surfaces. Follow the manufacturer’s instructions for specific measurements and alignments. |
By following these simple steps, you will be able to set up your Hammerhead Laser Level quickly and efficiently, ensuring accurate measurements and level lines for your projects.
Step-by-Step Guide
Step 1: Familiarize yourself with the Hammerhead Laser Level by reading the user manual and understanding its features.
Step 2: Ensure that the device is charged or has fresh batteries, depending on the model you have.
Step 3: Calibrate the Laser Level on a flat and stable surface. Follow the instructions in the user manual to achieve accurate results.
Step 4: Turn on the Laser Level and select the desired mode for your project, such as horizontal, vertical, or cross-line.
Step 5: Position the Laser Level at your starting point and align the laser beam with the reference point.
Step 6: Adjust the Laser Level’s position or angle as needed to achieve the desired alignment or levelness.
Step 7: Secure the Laser Level in place using the provided mounting accessories, such as a tripod or wall mount.
Step 8: Use the Laser Level’s built-in bubble vials or digital displays to ensure that it is perfectly level or plumb.
Step 9: Mark the reference point or the laser line on the surface where you need to work.
Step 10: Proceed with your project, such as installing shelves, tiles, or anything that requires accurate alignment or levelness.
Step 11: Once you have completed your project, turn off the Hammerhead Laser Level and store it in a safe place.
Note: Remember to always follow safety precautions and wear appropriate protective gear when using the Hammerhead Laser Level.
Using Your Hammerhead Laser Level
When it comes to using your Hammerhead laser level, there are a few key steps to follow to ensure accurate and precise measurements. Here’s a step-by-step guide on how to effectively use your laser level:
1. Prepare Your Work Area
Before starting, make sure your work area is clean, well-lit, and free from any obstructions that may interfere with the laser beam. Remove any dust, debris, or objects that may obstruct the projected laser line.
2. Insert Batteries
Check that your Hammerhead laser level has fresh batteries installed. Open the battery compartment and insert the batteries correctly, following the polarity markings inside the compartment. Close the compartment securely.
3. Power On
To power on the laser level, locate the power button or switch. Press or slide it to turn on the device. A laser beam should now be emitted from the level.
4. Adjust the Level
Ensure that the level itself is positioned correctly. Use the built-in bubble vials to check if the level is horizontally and vertically aligned. Adjust the level by turning the adjustment knobs until the bubble is centered in the vial.
5. Project the Laser Beam
Aim the laser beam at the desired reference point, such as a wall or surface where you want to create a level line or mark. Adjust the position and angle of the laser level to achieve the desired projection.
6. Lock the Level
Some Hammerhead laser levels come with a locking mechanism to secure the level in a specific position or projection. If your model has this feature, activate the lock to prevent accidental movement.
7. Take Measurements
Once the laser beam is projected and the level is locked, you can use it as a reference point for measurements or for aligning objects. Place a measuring tape or ruler against the projected laser line to determine distances or ensure objects are aligned correctly.
8. Power Off
After completing your measurements or tasks, turn off the laser level by pressing or sliding the power button or switch to the off position. This will conserve battery life and ensure safe storage of the device.
Following these steps will help you effectively use your Hammerhead laser level and achieve accurate and precise measurements for your projects. Always refer to the user manual provided by the manufacturer for specific instructions related to your model.
Tips and Tricks
When using the Hammerhead Laser Level, here are some tips and tricks to help you get the most out of your tool:
1. Leveling Accuracy: To ensure accurate leveling, make sure the laser level is placed on a stable surface. Any wobbling or instability can affect the accuracy of the laser beams. It is also recommended to calibrate the level before use.
2. Choosing the Right Mode: The Hammerhead Laser Level offers different modes for various applications. Select the mode that best suits your needs, whether it’s horizontal leveling, vertical alignment, or square layout.
3. Marking Reference Points: Before starting, mark reference points on the surface where you want to align or level objects. This will help you easily identify if the laser lines are correctly aligned and will save time during your project.
4. Locking the Pendulum: When not in use, always remember to lock the pendulum of the laser level. This will protect the delicate internal components during storage and transportation.
5. Working Range: Be aware of the working range of the Hammerhead Laser Level. Ensure that your desired measurement area is within the specified range for accurate results. If the distance is too great, the laser beams may not be visible or may become too faint to use effectively.
6. Safety Precautions: Always wear appropriate safety gear when using the Hammerhead Laser Level, such as safety glasses to protect your eyes from laser beams. Additionally, avoid pointing the laser directly at people or reflective surfaces.
7. Battery Life: The Hammerhead Laser Level is powered by batteries. To maximize battery life, remember to turn off the laser level when not in use.
8. Storing and Carrying: To protect your Hammerhead Laser Level, store it in a sturdy carrying case and ensure that it is in a secure position to avoid damage. Make sure to remove the batteries before long-term storage.
By following these tips and tricks, you can efficiently and effectively use the Hammerhead Laser Level for your leveling and alignment projects.