When it comes to tiling floors, precision is key. A laser level is a handy tool that can help you achieve perfectly straight and level lines, resulting in a professional-looking tile installation. If you’re a beginner or just want to improve your tiling skills, using a laser level can make the process much easier and more efficient.
A laser level works by projecting a horizontal or vertical laser line onto the surface, providing a reference point for aligning the tiles. This eliminates the need for manual measurements and ensures that your tiles are installed in a straight and even pattern.
Before using a laser level, it’s important to ensure that the floor surface is clean and free of any debris. This will ensure that the laser line is accurate and easy to see. Next, position the laser level on a stable surface and turn it on. Adjust the laser level until the laser line is projected onto the area where you will be tiling.
Once the laser line is in position, you can start laying your tiles. Use the laser line as a guide to ensure that each tile is aligned correctly and that the grout lines are straight. This will help you achieve a professional finish and minimize the risk of crooked or uneven tiles.
Remember to take your time and work methodically when using a laser level for tiling floors. Double-check your measurements and adjust the laser level as needed to ensure the best results. With practice, you’ll become more comfortable using a laser level and will be able to tackle more complex tiling projects with ease.
Choosing the Right Laser Level for Tiling Floor
When it comes to tiling a floor, having a laser level can greatly simplify the process and ensure accurate and even tile placement. However, with so many options available, it can be overwhelming to choose the right laser level for your project. To help you make an informed decision, consider the following factors:
1. Type of Laser Level
There are two main types of laser levels: rotary and line laser levels. Rotary laser levels emit a 360-degree horizontal or vertical laser beam, making them ideal for larger areas. Line laser levels project a straight line, which is suitable for smaller projects. For tiling a floor, a line laser level is usually sufficient.
2. Accuracy
The accuracy of a laser level is an important feature to consider. Look for a laser level with a high degree of accuracy, such as within ±1/16 inch over a 50-foot distance. This level of precision will ensure your tiles are laid perfectly straight.
3. Self-Leveling Capability
Opting for a laser level with self-leveling capability will save you time and effort. Self-leveling laser levels automatically adjust their position to ensure a straight horizontal or vertical line. This feature is especially handy when working on uneven surfaces.
4. Visibility
The visibility of the laser beam is crucial, especially in well-lit areas. Look for a laser level with a highly visible beam, as this will make it easier to see and align your tiles accurately.
5. Durability
Tiling a floor can be a demanding task, so choosing a laser level that can withstand rough handling is important. Look for a model with a rugged construction and preferably an IP rating for dust and water resistance.
6. Additional Features
Consider any additional features that may enhance your tiling experience. For example, some laser levels come with a pulse mode for better visibility in bright sunlight or a remote control for convenience.
By considering these factors, you can confidently choose the right laser level for your tiling project. Remember to always read product reviews and compare options before making a final decision.
Considerations for Laser Level Selection
When it comes to tiling a floor, using a laser level can greatly simplify and improve the accuracy of the job. However, choosing the right laser level for the task at hand is crucial to ensure the best results. Here are some important considerations to keep in mind when selecting a laser level for tiling:
Type of Laser Level: There are various types of laser levels available in the market, including line lasers, dot lasers, and rotary lasers. For tiling a floor, a line laser level is usually the most suitable choice. Line lasers project a straight horizontal or vertical line, which can help ensure that your tiles are laid perfectly level.
Accuracy and Range: The accuracy and range of a laser level are key factors to consider. Look for a laser level with a high level of accuracy, preferably within a few millimeters. Additionally, consider the range of the laser level, especially if you will be working in larger areas. Make sure the laser level has a range that will cover the dimensions of the floor you’ll be tiling.
Self-Leveling: Opting for a self-leveling laser level can save you a significant amount of time and ensure more accurate results. Self-leveling laser levels automatically adjust themselves to ensure that the laser line remains horizontal or vertical, even if the level is slightly misaligned or tilted.
Durability: Since tiling floors can be a physically demanding task, it’s important to choose a laser level that is durable and can withstand rugged conditions. Look for a laser level that is built to withstand dust, moisture, and potential drops or impacts.
Additional Features: Some laser levels come with additional features that can be helpful for tiling, such as a pulse mode for outdoor use or a locking mechanism to keep the laser level stationary. Consider any additional features that may be beneficial for your specific tiling project.
Taking these considerations into account when selecting a laser level for tiling can greatly enhance the quality and efficiency of your floor tiling project.
Tips for Setting Up the Laser Level
Properly setting up your laser level is crucial to ensure accurate and level tiling. Here are some tips to help you get it right:
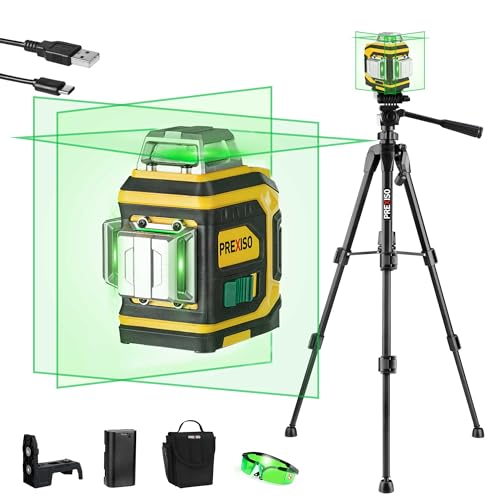
- Choose a sturdy and stable surface to place the laser level on. A tripod stand is typically the best option, as it provides stability and adjustability.
- Make sure the laser level is positioned at a central point in the room. This will ensure that the tiles are laid evenly across the entire floor.
- If your laser level has a built-in leveling feature, turn it on and allow the level to self-level before proceeding with your tiling project.
- Adjust the height of the laser level so that the laser beam is at the desired height for the tiles. This will allow you to accurately mark the walls and floors for tile installation.
- Before starting the tiling process, test the laser level by checking its accuracy. Place a level on top of the tiles and compare the bubble with the laser line. If they match, then the laser level is accurate.
- Keep the laser level in a secure position throughout the tiling process. Any movement or bumps can disrupt the accuracy of the laser beam and result in uneven tiling.
- Be cautious of any obstacles in the room that may block the laser beam, such as furniture or fixtures. Clear the area to ensure a clear and unobstructed line of the laser.
By following these tips, you can effectively set up your laser level and ensure a level and professional-looking tiled floor.