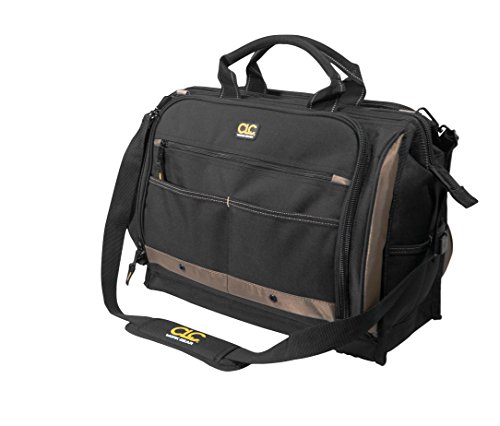
Tool bags are essential for any handyman or DIY enthusiast. They provide a convenient and portable way to carry and organize your tools. However, sometimes tool bags can be too bulky or heavy to carry around, especially if you only need a few tools for a particular job. In this article, we will discuss a step-by-step guide on how to cut a tool bag in half to make it more lightweight and compact.
Step 1: Assess your tool bag
Before starting the cutting process, carefully assess your tool bag to determine if it is suitable for cutting. Consider the material, durability, and overall condition of the bag. It is important to ensure that the bag will still be functional and able to hold your tools securely after cutting.
Step 2: Empty the bag
Before cutting the bag, remove all the tools and contents from it. This will make it easier to handle and reduce the risk of damaging your tools during the cutting process.
Step 3: Mark the cutting line
Using a marker or chalk, carefully mark the line where you want to cut the tool bag. Ensure that the line is straight and even to achieve a clean cut.
Step 4: Cut the tool bag
Using a sharp utility knife or scissors, carefully cut along the marked line. Take your time and make slow, steady cuts to avoid any accidents or mistakes. If you are using a utility knife, make sure to use a cutting mat or a sturdy surface underneath to protect your work area.
Step 5: Seal the edges (optional)
If you want to prevent the cut edges from fraying, you can use a fabric sealant or adhesive to seal the edges. Apply the sealant carefully and allow it to dry according to the manufacturer’s instructions.
Step 6: Reorganize your tools
Now that you have a smaller tool bag, you can reorganize your tools and contents to optimize space. Consider using dividers, pockets, or small containers to keep everything in place and easily accessible.
By following these steps, you can successfully cut a tool bag in half and create a more lightweight and compact solution for carrying your tools. Remember to exercise caution and take your time during the cutting process to ensure a clean and precise cut.
Why would you want to cut a tool bag in half?
A tool bag is an essential item for anyone who works with tools, providing a convenient and portable way to carry and organize equipment. However, there may be situations where cutting a tool bag in half can be beneficial.
One reason to consider cutting a tool bag in half is to create two smaller bags. This can be useful if you have a large tool bag that is becoming too heavy or bulky to carry comfortably. By dividing it into two smaller bags, you can distribute the weight more evenly and make it easier to transport your tools.
Another advantage of cutting a tool bag in half is that you can create specialized bags for different purposes. For example, you could divide your tools based on their size or function, creating separate bags for electrical tools, plumbing tools, or woodworking tools. This can make it quicker and easier to find the tools you need for a specific task.
Additionally, cutting a tool bag in half can help you maximize space and organization. By separating your tools into multiple bags, you can better arrange them to optimize storage. This can prevent tools from getting tangled, damaged, or lost, and make it more efficient to retrieve and put away your tools.
Finally, cutting a tool bag in half can be a useful solution if you have specific storage requirements. For example, if you have limited space in your workshop or vehicle, dividing your tool bag can help you utilize the available area more effectively. You can fit two smaller bags in tight spaces that a single large bag may not accommodate.
In conclusion, cutting a tool bag in half can offer various benefits depending on your needs and preferences. It can make your tool bag more comfortable to carry, enhance organization and storage, and provide flexibility for specific tasks or limited spaces. Before making any modifications, it is essential to consider your requirements and plan accordingly to ensure you achieve the desired outcome.
Step 1: Gather the Necessary Tools
Before you begin cutting your tool bag in half, it’s important to gather all the necessary tools and materials. Having everything you need within reach will help streamline the process and make it easier to complete the task.
Here are the tools and materials you will need:
- A sturdy pair of scissors or a utility knife
- A measuring tape or ruler
- Masking tape or a pencil
- A cutting mat or a flat, sturdy surface
- Optional: a sewing machine or needle and thread for finishing the edges
Make sure your scissors or utility knife is sharp, as this will make the cutting process cleaner and easier. Additionally, a cutting mat or a flat, sturdy surface will provide a stable and safe work area.
If you plan on using the cut edges of your tool bag, it may be beneficial to finish them with a sewing machine or needle and thread. This will prevent the fabric from fraying and increase the durability of your newly cut tool bag halves.
What tools do you need to cut a tool bag?
When it comes to cutting a tool bag in half, having the right tools is essential to ensure a clean and precise cut. Here are some tools that you will need:
1. Utility Knife
A utility knife is a versatile tool that can be used for a variety of cutting tasks. It has a retractable blade that can be easily replaced when it becomes dull. When cutting a tool bag, make sure to use a sharp utility knife to achieve a clean cut without damaging the contents inside.
2. Scissors
Scissors are another tool that can be used to cut a tool bag. They are particularly useful for cutting through lighter materials or when you need more precision. Make sure to use a pair of sharp scissors to ensure a clean cut.
Before cutting a tool bag, it is important to empty the bag and remove any sharp or dangerous tools. Ensure that you are working in a safe and well-lit area to avoid accidents. It is also a good idea to wear protective gloves to protect your hands.
Once you have gathered the necessary tools and taken the necessary safety precautions, you can begin cutting the tool bag in half. Make sure to follow the desired cutting line and take your time to achieve a clean and precise cut. Remember to dispose of the excess material properly.
| Tools Needed: | Use: |
|---|---|
| Utility Knife | Cutting through the tool bag |
| Scissors | Precise cutting or lighter materials |
Step 2: Prepare the Tool Bag
Before cutting your tool bag in half, you need to take some preparation steps to ensure a clean and efficient cut.
1. Empty the Tool Bag: Start by removing all tools and equipment from the tool bag. This will make it easier to handle and cut the bag.
2. Clean the Bag: Check the bag for any dirt or debris and clean it thoroughly. Removing any dirt will prevent it from getting in the way while cutting.
3. Gather your Materials: Prepare the necessary materials for cutting the tool bag in half. You will need a sharp utility knife or scissors, a ruler or measuring tape, and a marker or pencil.
4. Measure and Mark: Use the ruler or measuring tape to measure the desired length for your tool bag. Mark the cutting line with a marker or pencil to ensure a straight and accurate cut.
5. Secure the Bag: Place the tool bag on a stable surface and secure it with clamps or weights to prevent it from moving while cutting.
6. Cut the Bag: Using a sharp utility knife or scissors, carefully cut along the marked cutting line. Apply steady pressure and make sure to follow the line closely for a clean and straight cut.
7. Check the Cut: After cutting, inspect the edges to ensure a clean and even cut. Trim any uneven edges, if necessary, to achieve a neat finish.
8. Dispose of Waste: Properly dispose of the cut-off portion of the tool bag. Make sure to clean up any remaining debris or scraps.
Note: Safety is important when cutting the tool bag. Always exercise caution and follow the manufacturer’s instructions for any tools you use.
How to prepare the tool bag for cutting?
Before cutting a tool bag in half, it is important to prepare the bag properly to ensure a clean and precise cut. Here are some steps to follow:
-
Empty the bag: Remove all tools and other items from the bag to make it easier to work with.
-
Clean the bag: Wipe down the bag to remove any dirt, debris, or excess dust that may interfere with the cutting process.
-
Inspect the bag: Carefully examine the bag for any tears, loose threads, or areas that may require reinforcement before cutting. It is important to address these issues beforehand to prevent further damage.
-
Measure and mark: Determine the desired length for the bag and use a ruler or tape measure to mark the cutting line with a pencil or fabric marker. It is recommended to use a straightedge or masking tape to ensure a straight and even line.
-
Gather the necessary tools: Depending on the material of the bag, you may need scissors, a utility knife, or fabric shears to cut through it. Make sure these tools are sharp and suitable for the specific material.
-
Prepare a cutting surface: Find a flat and stable surface such as a table or cutting mat to place the bag on. This will protect the underlying surface and provide a steady base for cutting.
-
Secure the bag: Use clamps or heavy objects to secure the bag in place, especially if it is made of a slippery or stretchy material. This will prevent the bag from moving during the cutting process.
-
Make the cut: Carefully follow the marked cutting line with your chosen tool, applying steady pressure and using smooth, consistent movements. Take your time and ensure the blade is not dull or damaged to achieve a clean cut.
-
Check the edges: After cutting, inspect the edges of the bag for any fraying or unevenness. If necessary, trim or reinforce the edges to achieve a neater and more durable finish.
-
Clean up: Dispose of any waste material and tools, and tidy up the cutting area to complete the process.
By following these steps, you can properly prepare your tool bag for cutting and ensure a successful outcome.
Step 3: Mark the Cutting Line
Now that you have your tool bag ready to be cut in half, it’s time to mark the cutting line. This step is crucial to ensure that your cut is straight and even.
Start by measuring the desired length of your new tool bag halves. Use a measuring tape or ruler to determine the exact midpoint of the bag’s length.
Once you have identified the midpoint, use a marker or pencil to draw a straight line across the bag at that point. Make sure the line is clear and visible, as it will serve as your guide for cutting.
If your tool bag has any pockets or compartments that you want to preserve, be mindful of their placement when marking the cutting line. You may need to adjust the line slightly to avoid cutting through these features.
Double-check your measurements and the placement of the cutting line before proceeding. It’s better to take a few extra minutes to ensure accuracy rather than rushing through this step and ending up with an uneven cut.
Once you are confident in the placement of the cutting line, you are ready to move on to the next step: cutting your tool bag in half.
Where to mark the cutting line on the tool bag?
Before cutting your tool bag in half, it’s essential to mark the cutting line accurately to ensure a clean cut and preserve the functionality of the bag. Here are some tips on where to mark the cutting line:
- Empty the tool bag: Remove all tools and equipment from the bag to get a clear view of its structure and design.
- Inspect the bag: Examine the bag to identify any seams or stitches that might affect the cutting process. You want to avoid cutting through essential pockets, compartments, or reinforced areas that contribute to the bag’s durability.
- Find a straight line: Look for a straight line on the bag’s surface that will divide it into two equal halves. This can be a seam, a stitching line, or a marked guideline. If there isn’t an obvious straight line, you can use a ruler or a measuring tape to create one.
- Measure and mark: Once you’ve found a suitable line, measure and mark it with a pencil, chalk, or any other appropriate marking tool. Double-check your measurements to ensure accuracy.
- Consider functionality: Take into account the functionality of the tool bag and the layout of its pockets and compartments. Avoid cutting through critical storage areas that are essential for organizing and carrying your tools.
- Make a test cut: Before committing to the actual cutting, it’s a good idea to make a small test cut on an inconspicuous area of the bag to ensure you are satisfied with the results.
By following these guidelines, you’ll be able to mark the cutting line on your tool bag accurately, ensuring a successful and functional outcome.
Step 4: Use the Appropriate Cutting Tool
When cutting a tool bag in half, it is crucial to use the appropriate cutting tool to ensure clean and precise cuts. Using the wrong tool can result in jagged edges or damage to the bag.
Here are some commonly used cutting tools for cutting a tool bag:
- Utility Knife: A utility knife with a sharp blade is a versatile cutting tool that can easily slice through different materials, including a tool bag. Make sure to use a new blade for cleaner cuts.
- Scissors: If the tool bag is made of thin or soft material, a pair of sharp scissors can be used to cut it in half. Ensure that the scissors are clean and have a strong grip for better control.
- Rotary Cutter: A rotary cutter is a tool commonly used in sewing and crafting. It has a circular blade that rotates, making it ideal for cutting straight lines on a tool bag. Hold the bag securely and use a ruler or straight edge as a guide for precise cuts.
Whichever cutting tool you choose, it is essential to prioritize safety:
- Work in a well-lit area: Having adequate lighting ensures better visibility and reduces the risk of accidents.
- Wear protective gloves: Protect your hands by wearing gloves that provide a good grip and prevent any potential injuries.
- Use a cutting mat or surface: Place a cutting mat or a thick piece of cardboard underneath the tool bag to protect your work surface and improve cutting accuracy.
By using the appropriate cutting tool and following safety precautions, you can achieve clean and precise cuts while cutting your tool bag in half.
FAQ
Why would I want to cut a tool bag in half?
There are several reasons why someone might want to cut a tool bag in half. One reason could be that the tool bag is too large and cumbersome to carry around, so cutting it in half would make it more compact and easier to transport. Another reason could be that the tool bag is worn out or damaged, and by cutting it in half, you can salvage the usable parts and discard the rest. Lastly, some people might want to cut a tool bag in half to create two separate smaller tool bags for different purposes or to share with someone else.
What tools do I need to cut a tool bag in half?
To cut a tool bag in half, you will need a few tools. First, you will need a sharp pair of scissors or a utility knife to cut through the fabric of the bag. Make sure the scissors or knife is clean and sharp to ensure a clean cut. Additionally, you may need a measuring tape or ruler to accurately mark the halfway point on the tool bag before cutting it. Finally, having a sturdy work surface such as a table or cutting mat will make the process easier and safer.