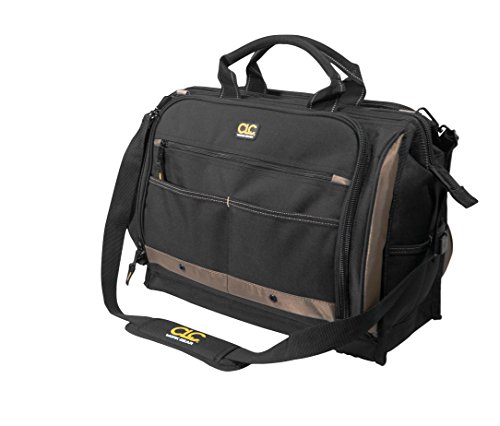
Having a well-organized and convenient way to carry your garden tools can make gardening a much more enjoyable and efficient experience. One great solution to this problem is to create your own garden tool bag. Not only will you have a dedicated space to keep all your gardening essentials in one place, but you can also customize it to suit your needs and personal style.
To make a garden tool bag, you will need a few basic materials and some sewing skills. Start by choosing a durable and water-resistant fabric for your bag, such as canvas or nylon. Measure and cut out the desired size and shape for your bag, allowing for extra space to accommodate your tools.
Next, sew the sides and bottom of the bag together, leaving the top open. You can reinforce the seams with double stitching to ensure the bag is strong and able to hold the weight of your tools. Consider adding pockets or compartments inside the bag to keep smaller items organized. You can use additional pieces of fabric and sew them onto the inside of the bag to create pockets of various sizes.

Finally, attach a strong and comfortable strap to the bag. This will allow you to carry the bag easily while also distributing the weight of the tools evenly. Choose a strap made of a sturdy material, such as nylon webbing, and attach it securely to the sides of the bag with reinforced stitching.
Once your garden tool bag is complete, you can start filling it with your favorite gardening tools. Having all your tools easily accessible and neatly organized will make your gardening tasks more efficient and enjoyable. So grab your sewing kit and start creating your own personalized garden tool bag today!
Choosing The Right Fabric
When it comes to selecting the fabric for your garden tool bag, it is important to consider durability, water resistance, and ease of cleaning. Here are some factors to keep in mind when making your decision:
- Durability: Look for fabrics that are strong and able to withstand regular use. Heavy-duty canvas or nylon are good options, as they can handle the weight and sharp edges of gardening tools without tearing easily.
- Water Resistance: Gardening often involves exposure to water, whether it’s from watering plants or working in wet soil. Choosing a fabric that is water-resistant or has a waterproof coating will help protect the tools inside your bag from moisture.
- Ease of Cleaning: Garden tools can be dirty, muddy, or covered in plant debris. Opt for a fabric that can be easily cleaned or wiped down to maintain a fresh and tidy appearance. Machine washable fabrics or those that can be spot-cleaned are ideal.
Additionally, consider the weight of the fabric. While heavy-duty materials may provide added durability, they can also add unnecessary weight to your bag. Strike a balance between strength and weight to ensure your tool bag is comfortable to carry around the garden.
Ultimately, the fabric you choose should meet your specific needs and preferences. Take the time to evaluate different options and select a fabric that will keep your gardening tools protected and organized for years to come.
Gathering The Necessary Tools
Before you start making your own garden tool bag, it’s important to gather all the necessary tools and materials. Having everything ready will make the process smoother and more efficient.
Tools and Materials:
| 1. Fabric: | Choose a sturdy and durable fabric for your tool bag. Canvas or heavy-duty polyester are popular options. |
| 2. Measuring Tape: | Use a measuring tape to determine the dimensions of your tool bag. This will help you cut the fabric accurately. |
| 3. Scissors: | Sharp scissors are essential for cutting the fabric and any other materials you may need, such as straps or pockets. |
| 4. Sewing Machine: | If you have access to a sewing machine, it will make the process faster and more efficient. However, you can also hand sew your tool bag if you don’t have a sewing machine. |
| 5. Thread: | Choose a strong thread that matches the color of your fabric. This will ensure sturdy seams and a professional finish. |
| 6. Needles: | You will need sewing needles for hand sewing or machine needles if you are using a sewing machine. |
| 7. Pins or Clips: | Use pins or clips to hold the fabric pieces together while sewing. They will help keep everything in place to ensure even seams. |
| 8. Ruler: | A ruler will come in handy for measuring and marking the fabric before cutting. |
| 9. Iron: | Having an iron will help press the seams and give your tool bag a more polished look. |
Once you have all these tools and materials ready, you can proceed to the next step of making your own garden tool bag.
Measuring and Cutting the Fabric
Before you start making your garden tool bag, you’ll need to measure and cut the fabric. This step is important to ensure that your tool bag is the right size and shape to hold all your gardening tools.
Here’s a step-by-step guide to measuring and cutting the fabric for your garden tool bag:
Step 1: Gather the necessary materials:
- A measuring tape
- Scissors
- Fabric of your choice
Step 2: Determine the dimensions of your garden tool bag:
Consider how many tools you want your bag to hold and their sizes. Measure the length, width, and depth of your largest tool to determine the dimensions of your bag. Add a few extra inches to the measurements for seam allowances.
Step 3: Mark and cut the fabric:
Using your measurements, mark the dimensions on the fabric with a pencil or fabric marker. Use a ruler or straight edge to ensure straight lines. Carefully cut along the marked lines with scissors. Be precise and take your time to achieve clean cuts and accurate dimensions.
Once your fabric is cut, you’re ready to move on to the next step of making your garden tool bag. Remember to double-check your measurements before cutting to ensure a proper fit for your tools.
Sewing the Bag Together
Once you have cut out all the pieces for your garden tool bag, it’s time to sew them together. Follow these steps to assemble your bag:
- Place one of the side panels on top of the bottom panel, with right sides facing each other. Pin them together along one of the long edges.
- Using a sewing machine or needle and thread, sew along the pinned edge with a 1/2 inch seam allowance. Backstitch at the beginning and end to secure the stitches.
- Repeat steps 1 and 2 to attach the other side panel to the opposite long edge of the bottom panel.
- Next, attach the front panel to one of the side panels in the same way, pinning and sewing along the long edge.
- Do the same to attach the back panel to the remaining side panel.
- Now, fold over the top edge of the bag by 1 inch and press it with an iron to create a clean finish.
- Pin the folded edge in place and sew it down with a 1/4 inch seam allowance. This will create a casing for the drawstring.
- Finally, turn the bag right side out and it’s ready to be used as a handy garden tool carrier!
Remember to trim any loose threads and press the seams open to give your bag a professional look. Enjoy your new garden tool bag!
Adding Pockets for Organization
One important feature of a garden tool bag is the addition of pockets. These pockets provide a convenient and organized way to store and access your various gardening tools. Here are a few tips on how to add pockets to your garden tool bag:

1. Determine the Size and Number of Pockets
Before you start adding pockets, consider the size and number of pockets you need. Think about the types of tools you usually use and how you want to separate them. This will help you determine the size and number of pockets to add to your bag.
2. Choose a Durable Fabric
When adding pockets, it’s important to choose a fabric that is durable and strong enough to hold your tools. Canvas or heavy-duty nylon are good options. Cut the fabric according to the size of the pockets you want to add.
3. Sew the Pockets
Using a sewing machine or by hand, sew the pockets onto the inside of your bag. Make sure to reinforce the edges of the pockets to ensure durability. You can create different-sized pockets to accommodate different tools, such as small pockets for hand tools and larger pockets for larger tools.
4. Add Velcro or Snaps
To keep your tools secure, consider adding Velcro or snaps to close the pockets. This will prevent your tools from falling out when you’re carrying the bag or transporting it. Make sure to position the closures properly for easy access.
5. Label the Pockets
For even more organization, consider labeling the pockets. This can be done by attaching fabric labels or using a fabric marker to write directly on the pockets. Labeling will make it easier to find the right tool quickly.
By adding pockets to your garden tool bag, you’ll be able to keep your tools organized and easily accessible. This will save you time and frustration as you tend to your garden. Follow these steps and enjoy a well-organized tool bag for all your gardening needs.
Personalizing and Finishing Touches
Once you’ve assembled all your necessary tools in your garden tool bag, it’s time to add some personal touches to make it truly your own. Personalizing your bag not only adds a unique touch, but also makes it easier to identify your bag among others.
Here are a few ideas for personalizing and adding finishing touches to your garden tool bag:
1. Embroider your name or initials: Use a needle and thread or a sewing machine to stitch your name or initials onto the bag. This not only adds a personal touch but also makes it easier to identify your bag.
2. Add decorative patches or pins: Find decorative patches or pins that reflect your gardening style or interests and sew or pin them onto your bag. This can be anything from floral patterns to cute gardening-themed designs.
3. Use fabric paint or markers: Get creative with fabric paint or markers and add unique designs or patterns to your bag. This is a great way to showcase your artistic skills and make your bag stand out.
4. Attach keychains or charms: Add small keychains or charms to the zippers or handles of your bag. This not only adds a decorative touch but also makes it easier to open and close the bag.
Remember, the goal is to make your garden tool bag reflect your personality and style. Don’t be afraid to get creative and have fun with personalizing your bag. Happy gardening!
FAQ

Can I customize the garden tool bag with pockets for specific tools?
Yes, you can customize the garden tool bag with pockets for specific tools. Measure the dimensions of each tool and create pockets according to these measurements. You can also add extra features, such as Velcro or snap closures, to secure the tools in place.