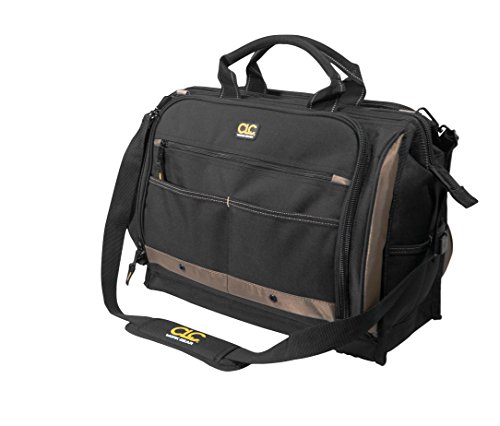

Tool bags are an essential item for many professionals who need to carry their tools with them. However, over time, the base of the tool bag can become worn out and start to tear. This not only compromises the functionality of the bag but can also lead to damage to the tools inside.
One effective solution to this problem is to put a rubber coating on the base of the tool bag. This not only provides added durability but also helps protect the bag and its contents from moisture and other elements. In this article, we will guide you through the process of applying a rubber coating to your tool bag base, ensuring that it stays in top condition for years to come.
Step 1: Clean the Tool Bag Base
Before applying the rubber coating, it is important to thoroughly clean the base of the tool bag. Use a brush or a cloth to remove any dirt, debris, or grease. This will ensure that the coating adheres properly and provides maximum protection.
Step 2: Prepare the Rubber Coating
Next, prepare the rubber coating according to the manufacturer’s instructions. This may involve mixing different components or diluting the coating with a solvent. It is important to follow the instructions carefully to ensure that the coating is applied correctly.
Step 3: Apply the Rubber Coating
Using a paintbrush or a roller, apply an even layer of the rubber coating to the base of the tool bag. Make sure to cover all areas, including the corners and edges. Take your time and apply the coating in thin, smooth strokes to ensure an even and seamless finish.
Caution: Make sure to work in a well-ventilated area and wear protective gloves and a mask, as some rubber coatings can emit strong fumes or be harmful if in contact with skin.
Step 4: Allow the Coating to Dry
After applying the rubber coating, allow it to dry completely. This may take several hours or even overnight, depending on the specific product used. Avoid touching or moving the tool bag during this time to prevent any damage to the coating.
Step 5: Test the Coating
Once the coating is dry, test its effectiveness by placing the tool bag on different surfaces and applying pressure. The rubber coating should provide a firm grip and prevent the bag from slipping or sliding. If any areas seem to be lacking in coverage, apply an additional coat and repeat the drying process.
By following these steps, you can easily put a rubber coating on the base of your tool bag. Not only will this extend the life of the bag, but it will also protect your valuable tools and ensure that they are always in safe hands.
Step-by-Step Guide on How to Put Rubber Coating on Tool Bag Base
If you want to protect the base of your tool bag and extend its lifespan, putting a rubber coating on it is a great idea. The rubber coating will protect the base from wear and tear, water damage, and other potential hazards. Here is a step-by-step guide on how to put rubber coating on the tool bag base.
- Clean the Base: Start by cleaning the base of your tool bag thoroughly. Use a cleaning solution and a brush to remove any dirt, grease, or debris. Make sure the base is completely dry before moving on to the next step.
- Prepare the Rubber Coating: Shake the rubber coating canister well to ensure proper mixing. If using a liquid rubber coating, follow the instructions on the packaging to prepare the coating. If using a rubber coating spray, ensure the nozzle is clean and ready for use.
- Apply the Rubber Coating: Start applying the rubber coating to the base of the tool bag. If using a liquid coating, you can use a brush or a roller to evenly spread the coating. If using a spray, hold the canister about 6-8 inches away from the base and apply a thin, even coat. Allow the first coat to dry completely before applying additional coats, if necessary.
- Inspect for any Missed Spots: Once the rubber coating is dry, inspect the base of the tool bag for any missed spots or thin areas. If necessary, apply an additional coat to ensure complete coverage and protection.
- Let it Dry Completely: Allow the rubber coating to dry for the recommended time mentioned on the packaging. This will ensure that the coating sets properly and provides the desired level of protection.
- Test the Coating: After the rubber coating has dried completely, test its effectiveness by placing the tool bag on various surfaces, including rough or wet areas. Ensure that the rubber coating provides the desired traction and protection.
By following these steps, you can effectively put a rubber coating on the base of your tool bag. This will enhance its durability, protect it from damage, and extend its overall lifespan.
Prepare Your Tool Bag Base
Before applying rubber coating to your tool bag base, it is important to prepare the surface properly. This will ensure that the coating adheres well and lasts for a long time.
Clean the Base
Start by cleaning the base of your tool bag. Remove any dirt, dust, or debris using a brush or a damp cloth. Make sure to clean every corner and crevice of the base.
Remove Any Rust
If there are any signs of rust on the base, use sandpaper or a wire brush to remove it. Scrub the affected area until the rust is completely removed and the surface is smooth. Wipe away any remaining residue with a cloth.
Filling Holes and Cracks
If there are any holes or cracks in the base, fill them with an appropriate filler. Use a putty knife to apply the filler and smooth it out. Allow the filler to dry completely before proceeding.
Sand the Surface
To create a rough surface for the rubber coating to adhere to, sand the base using fine-grit sandpaper. This will help the coating bond better with the surface of the tool bag base.
Masking
If there are any areas that you don’t want to be coated with rubber, such as handles or straps, use masking tape to cover them. This will protect those areas from the rubber coating.
Clean the Base Again
After sanding and masking, clean the base once again to remove any dust or debris. A damp cloth or brush can be used for this purpose.
Once you have properly prepared the tool bag base, you are ready to apply the rubber coating. Follow the manufacturer’s instructions for the best results.
Clean the Surface Thoroughly
Before applying the rubber coating on the tool bag base, it is important to clean the surface thoroughly to ensure proper adhesion and durability. Follow these steps to clean the surface:
- Remove all items from the tool bag and set them aside.
- Wipe the surface with a clean, damp cloth to remove any dirt, dust, or debris.
- If there are any stubborn stains or sticky residue, use a mild detergent or cleaner specifically designed for the material of the tool bag base.
- Gently scrub the stained areas with a soft brush or sponge, working in a circular motion.
- Rinse the surface with clean water to remove any residue from the cleaning agent.
- Dry the surface thoroughly with a clean, absorbent towel or allow it to air dry completely.
- Inspect the surface to ensure that it is clean and free of any contaminants that could interfere with the adhesion of the rubber coating.
By cleaning the surface thoroughly before applying the rubber coating, you will ensure a strong bond between the coating and the tool bag base, leading to a more durable and long-lasting result.
Apply Primer to the Tool Bag Base
Before applying the rubber coating to the tool bag base, it is important to first apply a primer. The primer acts as a bonding agent, ensuring that the rubber coating adheres properly to the surface of the base.
Gather Materials
Before starting the priming process, gather all the necessary materials. Here’s what you’ll need:
| Primer | – Choose a primer specifically designed for use with rubber coatings. Make sure it is compatible with the type of rubber coating you will be using. |
| Paintbrush | – Select a paintbrush that is suitable for the size of the tool bag base. A brush with synthetic bristles is recommended as it will provide smooth and even coverage. |
| Masking Tape | – Use masking tape to protect any areas of the tool bag base that you do not want to be primed. |
| Clean Cloth | – Prepare a clean cloth for wiping away any excess primer. |
Priming Process
Follow these steps to apply the primer to the tool bag base:
- Clean the Tool Bag Base – Ensure that the surface of the base is clean and free from any dirt, dust, or debris. You can use a damp cloth to wipe away any loose particles.
- Apply Masking Tape – Use masking tape to cover any parts of the tool bag base that you want to keep free from primer. This will ensure clean and precise application.
- Shake the Primer – Shake the primer can vigorously for a few seconds to mix the contents properly.
- Apply the Primer – Dip the paintbrush into the primer and begin applying it to the tool bag base. Start with thin and even coats, working your way across the entire surface. Avoid applying too much primer at once to prevent drips or uneven coverage.
- Allow the Primer to Dry – Read the manufacturer’s instructions to determine the drying time for the primer. Typically, it takes about 30 minutes to an hour for the primer to dry completely. Make sure the tool bag base is placed in a well-ventilated area so that the drying process is not inhibited.
- Inspect for Missed Spots – Once the primer is dry, inspect the tool bag base for any missed spots or areas that need additional priming. Touch up those areas with the paintbrush and allow them to dry completely.
Now that the tool bag base has been properly primed, it is ready for the rubber coating application. Follow the instructions in the next section to learn how to apply the rubber coating to achieve a durable and protective finish for your tool bag base.
Mix and Apply the Rubber Coating
Once you have prepared the tool bag base by cleaning and sanding it, you are ready to mix and apply the rubber coating. Follow these steps to ensure a successful application:
- Gather all the necessary materials and tools, including the rubber coating solution, a clean container for mixing, a stir stick, and a paintbrush or roller.
- Read the instructions provided by the rubber coating manufacturer carefully to understand the proper mixing ratio and any additional steps required.
- Pour the desired amount of rubber coating solution into the clean container, making sure to measure accurately according to the manufacturer’s instructions.
- Thoroughly mix the rubber coating solution using the stir stick, ensuring that all components are well combined. Stir in a circular motion for several minutes until the mixture is homogeneous.
- While stirring, make sure to scrape the sides and bottom of the container to incorporate any unblended product into the mixture.
- Once the rubber coating solution is properly mixed, you can begin applying it to the tool bag base using a paintbrush or roller. Start from one end and work your way to the other, ensuring smooth and even coverage.
- If needed, apply multiple coats of the rubber coating, allowing each coat to dry fully before applying the next one. This will help achieve a thicker and more durable finish.
- After you have finished applying the rubber coating, allow it to dry completely according to the manufacturer’s instructions. This may take a few hours or longer, depending on the product used.
- Once the rubber coating is dry, inspect the tool bag base for any areas that might require touch-ups. Use a paintbrush or roller to apply additional coating as needed, and allow it to dry completely.
- Clean your tools and containers immediately after use, following the manufacturer’s instructions for proper cleaning and disposal of the rubber coating material.
By following these steps, you will be able to effectively mix and apply the rubber coating to your tool bag base, resulting in a protective and durable finish.
Allow the Rubber Coating to Dry
After applying the rubber coating to the base of your tool bag, it is important to allow it sufficient time to dry. This will ensure that the coating adheres properly and provides the desired protective and anti-slip properties.
Check the label or instructions on the rubber coating product you are using for the recommended drying time. Generally, it takes around 24 hours for the rubber coating to fully cure and dry. However, this drying time can vary depending on factors such as temperature and humidity levels.
During the drying process, it is essential to keep the tool bag in a well-ventilated area. This will help expedite the drying process and prevent any unpleasant odors from lingering. Avoid placing the tool bag in direct sunlight or near a heat source, as this can cause the coating to dry unevenly or too quickly.
To ensure that the rubber coating is completely dry, you can perform a simple touch test. Gently touch a small, inconspicuous area of the coated base to see if it feels dry to the touch. If there is any stickiness or tackiness, allow more time for it to dry.
Additional Tips:
- Patience is key – rushing the drying process may lead to subpar results.
- If you’re in a hurry and need to use the tool bag, you can use a fan or a heat gun to gently accelerate the drying process. However, exercise caution and maintain a safe distance to avoid damage to the rubber coating.
- Avoid stacking or placing heavy items on the tool bag until the rubber coating is fully dry to prevent indentations or imprints.
By allowing the rubber coating to dry thoroughly, you will ensure that your tool bag’s base is well-protected and provides the desired anti-slip functionality. Once dry, your tool bag will be ready for use in a wide range of environments and conditions.
Test and Inspect the Coated Tool Bag Base
Once you have applied the rubber coating to the base of your tool bag, it is important to test and inspect the finish to ensure it is applied correctly and evenly. Follow these steps to properly test and inspect the coated tool bag base:
Step 1: Visual Inspection
Start by visually inspecting the coated area. Look for any visible imperfections such as uneven coverage, drips, or areas where the coating appears to be thin. Make sure that the rubber coating is evenly applied and covers the entire base of the tool bag. Pay close attention to any corners or edges to ensure they are properly coated.
Step 2: Touch Inspection
Using your fingers, gently touch the coated surface. The rubber coating should feel smooth and even to the touch. If you encounter any rough or bumpy areas, this may indicate an uneven application of the coating. Take note of any areas that do not feel as expected.
Step 3: Flexibility Test
To test the flexibility of the rubber coating, gently flex the coated base of the tool bag. The coating should flex and move with the bag without cracking or peeling. If you notice any cracking or peeling during the flexibility test, this may be a sign of an inadequate application of the coating.
Step 4: Water Resistance Test
To test the water resistance of the rubber coating, take a small amount of water and pour it onto the coated surface. Observe how the water beads and runs off the coating. If the water forms large puddles or does not run off the surface, this may indicate that the coating is not properly bonded or that there are areas of low coverage.
By following these steps, you can ensure that the rubber coating on the base of your tool bag has been applied correctly and is ready to protect your tools from wear, tear, and the elements.
FAQ
What materials do I need to put rubber coating on a tool bag base?
To put rubber coating on a tool bag base, you will need the following materials: a rubber coating material, a spray bottle, a paintbrush, a small roller, masking tape, and a drop cloth to protect your work area.
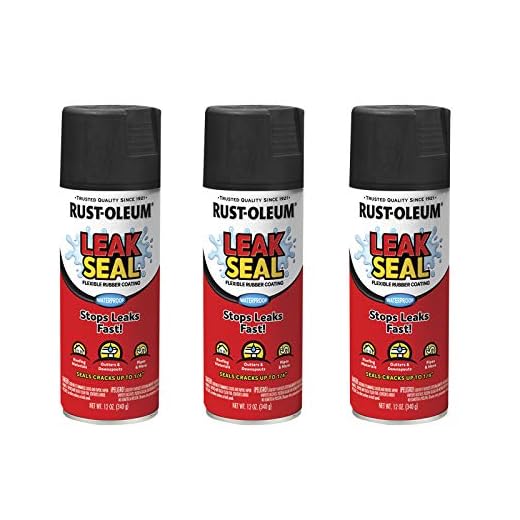
Can I use any type of rubber coating for my tool bag base?
No, it is recommended to use a rubber coating specifically designed for application on fabric or tool bags. This type of rubber coating is more flexible and adheres better to the fabric surface, providing better durability and protection.
How do I prepare the tool bag base before applying the rubber coating?
Before applying the rubber coating, you need to clean the tool bag base thoroughly. This can be done by wiping it with a damp cloth to remove any dirt or debris. It is also advisable to lightly sand the surface to improve the adhesion of the rubber coating.
What is the best method to apply the rubber coating on the tool bag base?
The best method to apply the rubber coating on the tool bag base is to start by masking off any areas that you don’t want to be coated, such as handles or zippers. Then, you can either spray the rubber coating directly onto the fabric or use a paintbrush or roller to apply it in a thin and even layer. Make sure to follow the manufacturer’s instructions for drying and curing time.